 Evan Shortiss
How I fixed my AMD Driver Timeout Issues and retained 8/10 Bits per Color
Summary/TLDR
My driver timeouts are related to my 144 Hz monitor and AMD GPU driver not playing nice, as far as I can tell. This YouTube video has an even quicker fix.
Note: I think this fix is just a trivial config change, but follow this guide at your own risk. If something goes wrong use Safe-Mode and the CRU reset script to fix it, etc.
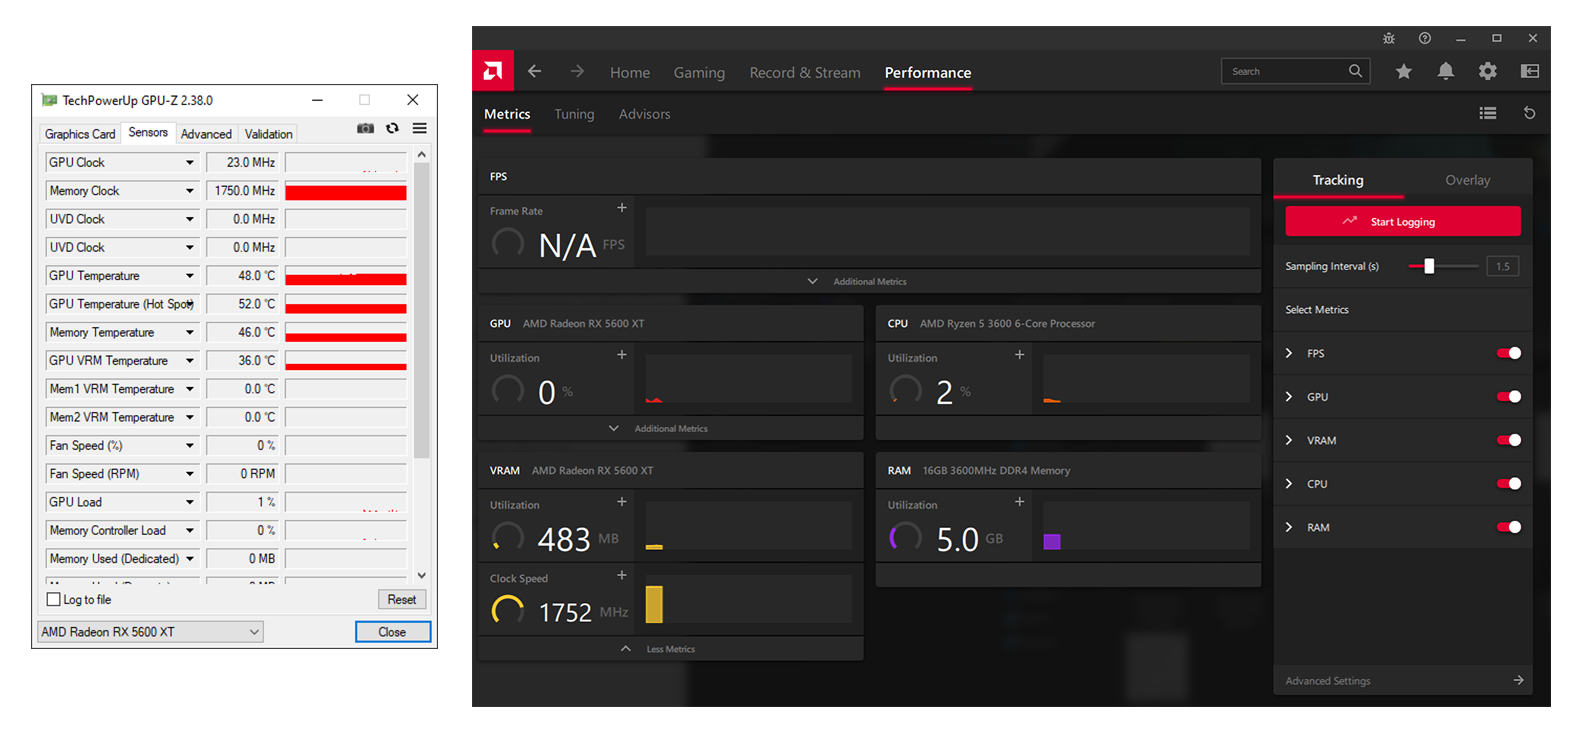
First, confirm your driver timeout has a similar cause to mine. You can verify this by checking your VRAM frequency. If the VRAM frequency is constantly maxed out, then you might have the same or similar issue. This frequency should be able to drop to a few hundred MHz when the PC is idle, but mine was locked at 1750MHz which is the default max VRAM speed for my 5600 XT GPU. Remember to close all other programs when checking this value using GPU-Z or the Radeon Software Metrics, as shown.
There are two straightforward solutions to this problem. The easiest option is to change your refresh rate to 120Hz in the Advanced display settings of Windows, but what if you’ve payed for 24Hz more that your consciousness can barely perceive? 😉
| Refresh Rate | Frametime |
|---|---|
| 144Hz | 6.944ms |
| 120Hz | 8.333ms |
| 60Hz | 16.666ms |
If you really want 144/165Hz then you need to correct your high refresh rate to use correct/standard VESA timings with CRU (Custom Resolution Utility) like so:
- Download CRU and unzip it.
- Start the CRU program by double-clicking the blue icon.
- Double-click your 144/165Hz resolution from the Detailed resolutions list. This should be the same as the resolution you’ve set in your Windows Advanced Display settings.
-
Change the Timing setting from Manual to Automatic (PC). Don’t change anything else.
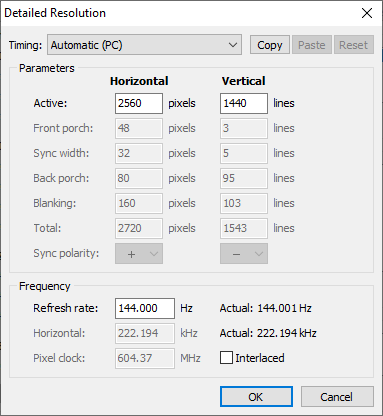
- Click OK to save the new timing values.
- Close CRU by clicking OK.
- Run the restart64 script included with CRU.
- Wait for your monitor to refresh.
Your VRAM frequency should now be idling at a lower value than it was prior to adjusting the timing using CRU. You can see that my 5600 XT VRAM idles at 200MHz after applying this fix.
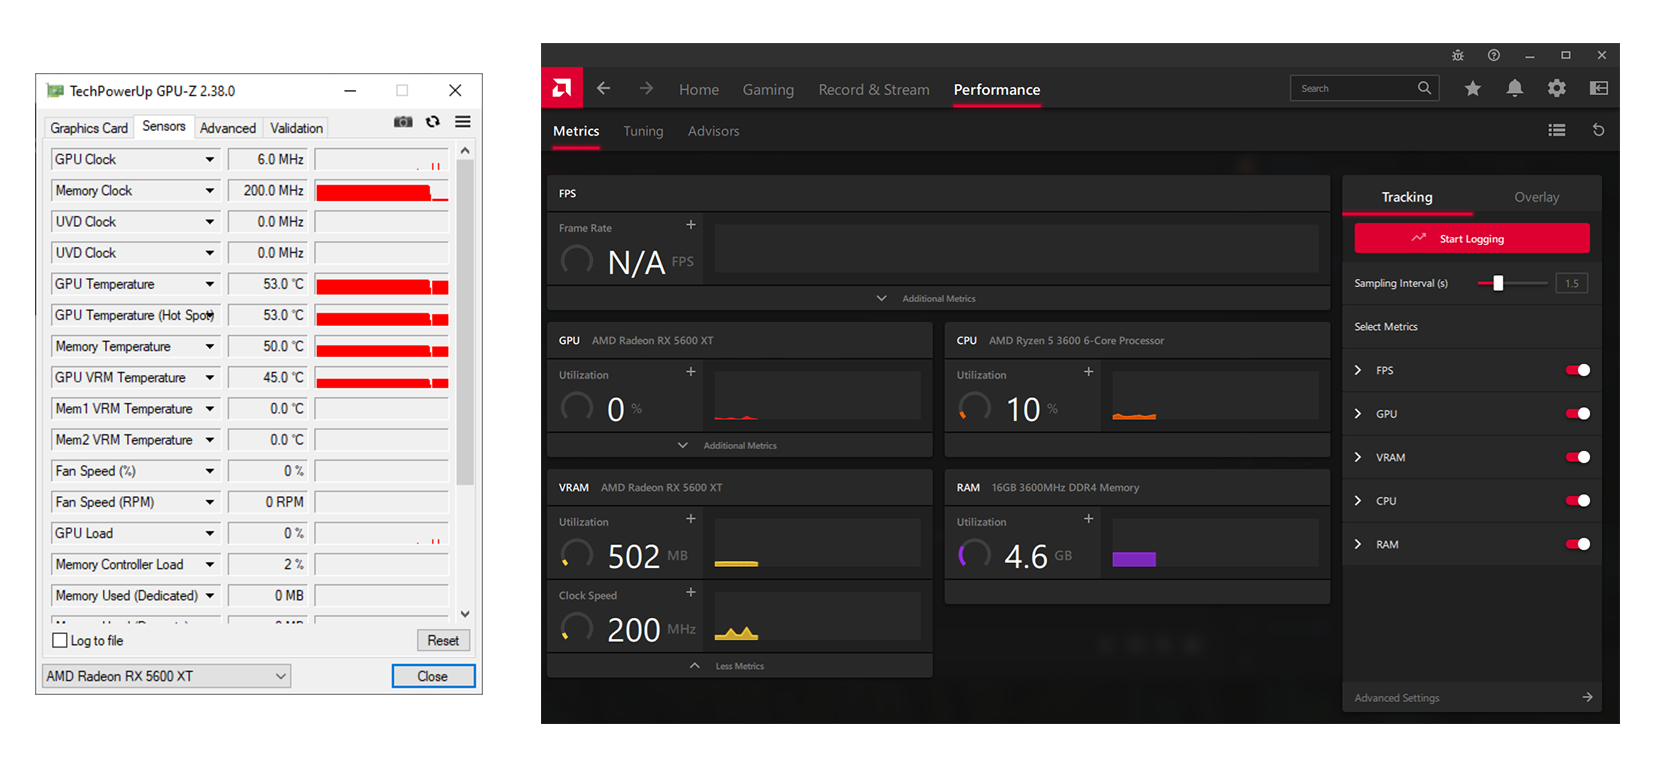
This completely resolves the crashes on my PC. I don’t entirely understand why, but I won’t question it. I can even overclock my VRAM and it will happily run constantly at over 1800 Mhz when gaming, so it’s not the memory frequency.
Using the automatic CRU timings at 144Hz supports 8-bit colour on my monitor. The highest refresh rate I can obtain with 10-bit colour via CRU is 138Hz. I also found that I could leave all timing settings in CRU at the defaults and simply increase the Vertical Blank from the default value. Increasing it from the default of 56 to 98 works for me, but the exact values will probably vary across monitors.
That’s all folks! Hopefully fixing your monitor timings and vertical blanking resolves your AMD driver timeouts like it did for me.
No need to read beyond here unless you’re bored and want some background information!
The Issue
Does the following image make your blood boil? It sure as shit had an affect on me this past year. The idea that your GPU might be toast sucks, but it’s a complete nightmare in the current PC hardware market. Thankfully, for some of us, it’s just a software issue related to our GPU and monitor not playing nice!
For some people this dialog isn’t displayed, but they get a warning in their Windows logs that states “driver amdkmdag stopped responding and has successfully recovered”.

There are many potential causes for this issue. Poor RAM compatibility, unstable RAM timings, unstable overclock, and a weak PSU seem to be common causes. In my case it appears to be a specific AMD Driver issue due to my GPU and 144Hz monitor combination.
I’m the owner of an MSI Radeon RX 5600 XT GAMING X. It’s a fantastic GPU for the price, considering it gives an RTX 2060 Super a run for it’s money, assuming you can find one at MSRP these days. Its cooler is an absolute unit, so it has a nice feature that allows it to disable the fans when not gaming. Unfortunately the AMD drivers combined with my monitor have a bit of an issue when gaming at 1440p 144Hz in Windows; the driver crashes occasionally. And yes, based on my limited testing, Fedora Linux 34 does not suffer from this issue when gaming at 1440p 144Hz.
This GPU had a bit of rough a launch, so I cut it some slack when this issue started occurring. After multiple driver updates I started to lose hope though. The awful state of the GPU market made matters even worse. Returning it would result in credit/cash towards a new massively overpriced GPU. Worse again, I bought it from the UK so I wasn’t sure how the Brexit shenanigans might affect the return process. Another matter of concern is that this appears to be a software issue when using certain monitors and refresh rates, so the return would probably have been rejected!
After trying almost literally every fix posted online, I eventually
found that I could fix the problem by lowering my refresh rate to 120Hz. I
wasn’t totally satisfied with this so I kept digging, as you’ll see in this
post.
Is this the definition first world problem? Sure is. But on the other hand I paid for the whole monitor and GPU, so I’m gonna use the whole monitor and GPU!
The Clue
When AMD released the 21.7.1 drivers I decided to see if the 144Hz crashing issue was fixed. Spoiler alert: it’s not fixed, at least not for all of us. During my latest test I noticed that my VRAM was constantly locked at 1750Mz when I set my refresh rate to 144Hz. This is fine when gaming, but why would it be locked so high when the PC is idle? As soon as I changed my refresh rate back to 120Hz the VRAM was able to fluctuate between 200Mhz and 1750Mhz, depending on workload. Why is it fine pinned to 1750Mhz gaming at 120Hz, but not fine when pinned at 1750Mhz and gaming at 144Hz? I still don’t fully understand, but I knew that I had found a lead. Another interesting aspect to this bug is that my VRAM can overclock to more than 1800Mhz just fine, it’s only when 144Hz is being used that I experience the random driver timeouts.
Using the VRAM clock speed clue leads us to a fantastic solution by Hard Reset on YouTube. Their video demonstrates that creating a Custom Resolution solution solves the issue. I created a 1440p custom resolution with a 142Hz refresh rate, and my crashing problems were solved. So, is this it? Case closed? Not entirely!
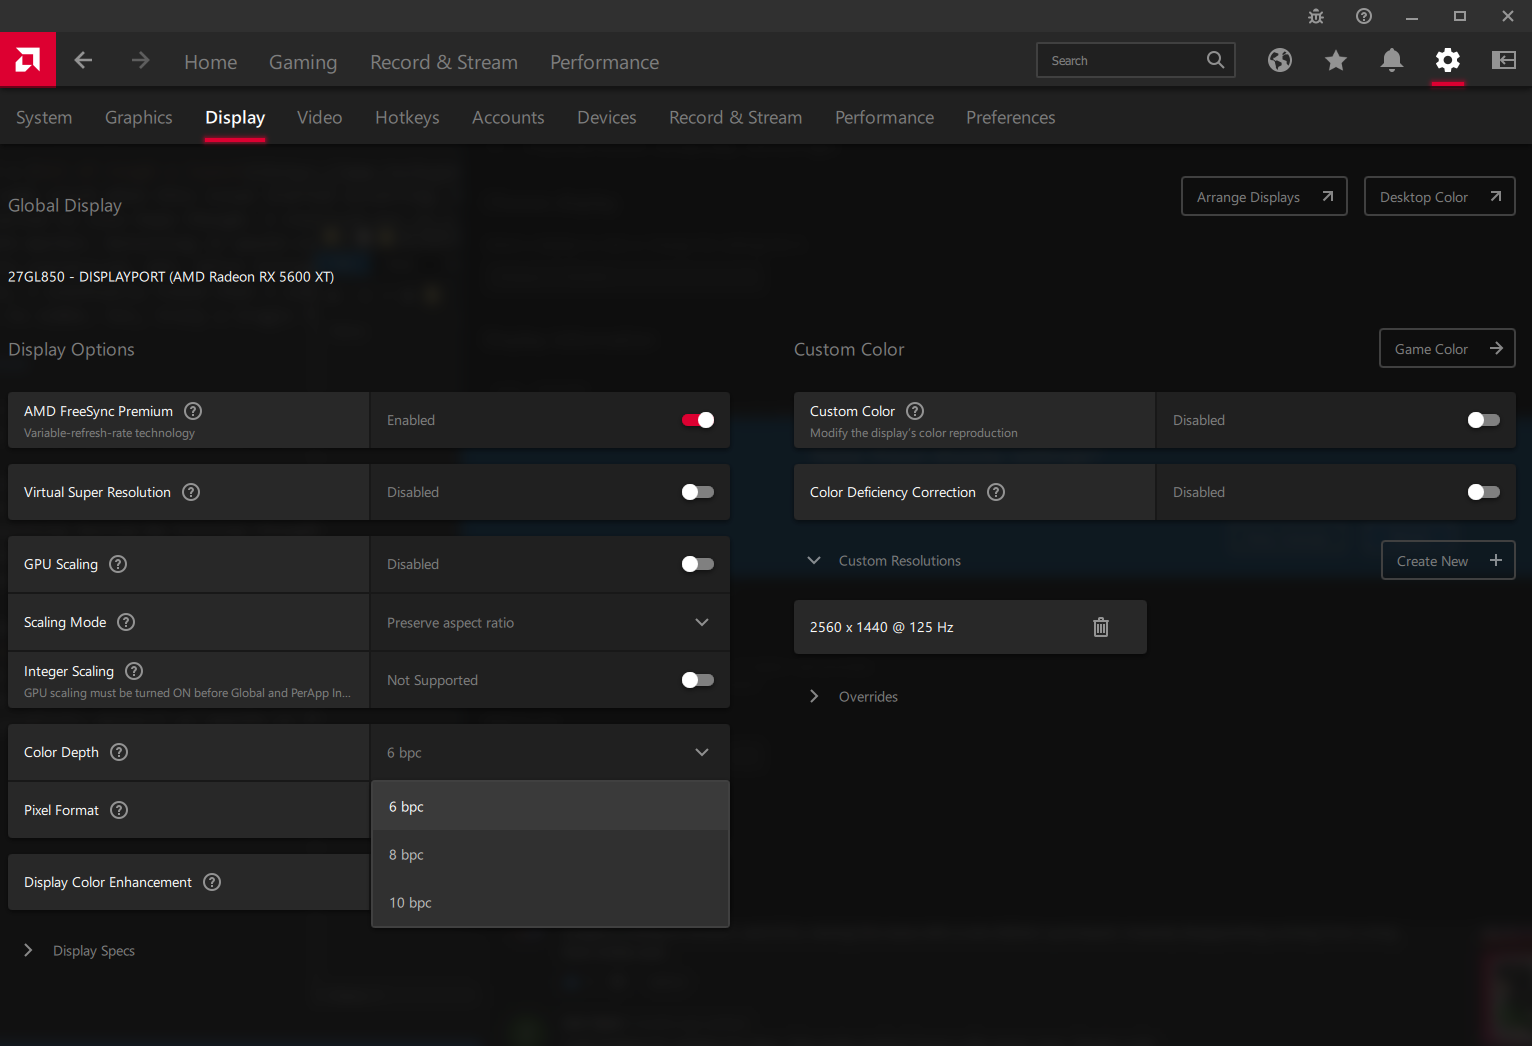
Image quality seemed different when using my new custom resolution. It wasn’t very noticeable, but what has been seen cannot be unseen. Every time I opened a new tab in my web browser I could see a grain on the blank page if I looked closely. I think this was because the custom resolution was limiting colour depth. Radeon Software listed 8 and 10 bit colour options, but selecting either would fail and revert back to 6 bpc after using the technique from that YouTube video.
The My Solution
I’m not a video expert, but I assume the custom resolution configuration was maxing out the available bandwidth on my DisplayPort. Now, I know for a fact that I can run at 1440p 144Hz with 10 bit colour via DisplayPort on my hardware since the default resolutions support this, albeit with an occasional driver crash when gaming. Knowing this, I spent a few minutes tweaking the custom resolution settings in Radeon Software to try get it to expand the colour depth while retaining a high-refresh rate. After 5 minutes I accepted defeat 😢
This is when I turned to CRU (Custom Resolution Utility). It was mentioned in one of the threads I found online when researching this issue, so I figured it was worth a try.
Here’s how I used CRU to create a high-refresh rate that supported the full colour depth of my monitor:
Edit: This solution is for 10 bpc. Use the one from the top of the article if 144Hz is more important to you than having 10 bpc.
- Start the CRU program.
- Take note of the Pixel Clock listed beside the default entry for 144Hz (or whatever resolution/refresh rate combination is causing trouble for you).
- Add a new entry under the Detailed Resolutions.
- Double click this new entry to open the Edit dialog.
- Select Automatic (PC) from the Timing dropdown.
- Set the Refresh Rate to a value that results in a Pixel Clock that’s equal to, or less than, the default value.
- Click the OK button to save the custom resolution.
At this point you will have two resolutions listed like so. The Pixel Clock of the new resolution does not have to match the original perfectly, just be sure it’s equal or lower.
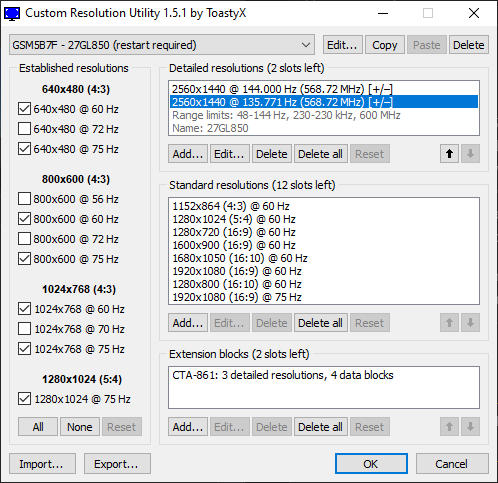
I managed to get them to align at 568.72Mhz while keeping a 136Hz refresh rate somehow by setting the timing back to Manual and editing the Pixel Clock, but can’t get it to happen when I try again when testing it for this blog! I’m too lazy to spend more time trying to squeeze the refresh rate higher, and the difference between 144Hz and 136Hz is less than half a millisecond so who cares. Wait, couldn’t you make a similar argument for 120Hz vs 136Hz and that I shouldn’t have wasted my time on this first world problem? 🤔
| Refresh Rate | Frametime |
|---|---|
| 144Hz | 6.944ms |
| 136Hz | 7.353ms |
| 120Hz | 8.333ms |
| 100Hz | 10.000ms |
| 60Hz | 16.666ms |
No, this effort is for “science”! Anyways, click the “OK” button to close CRU. Run the restart64 executable included with your CRU download. Your screen will go blank for a moment, then come back to life. Now, head over to the Windows display settings.
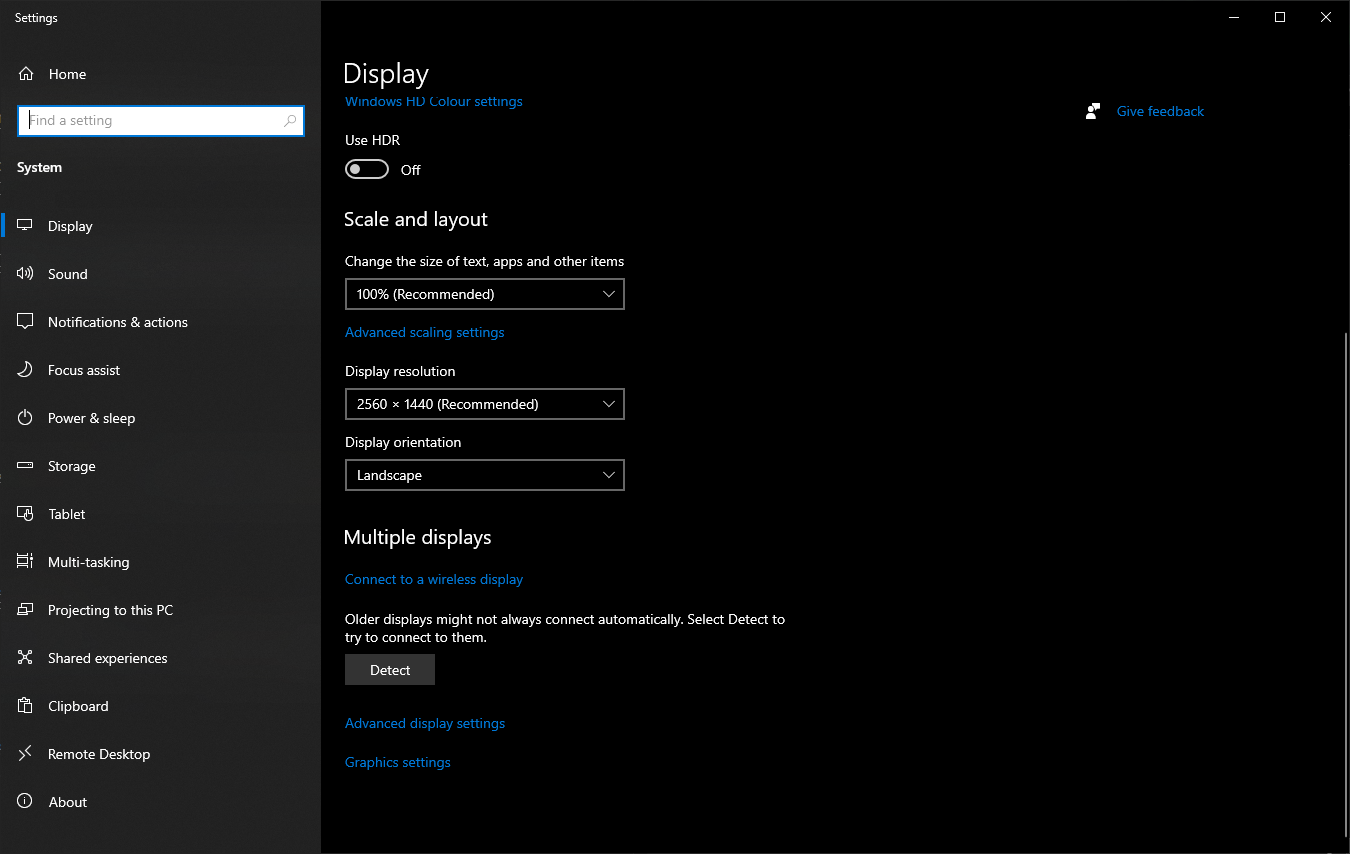
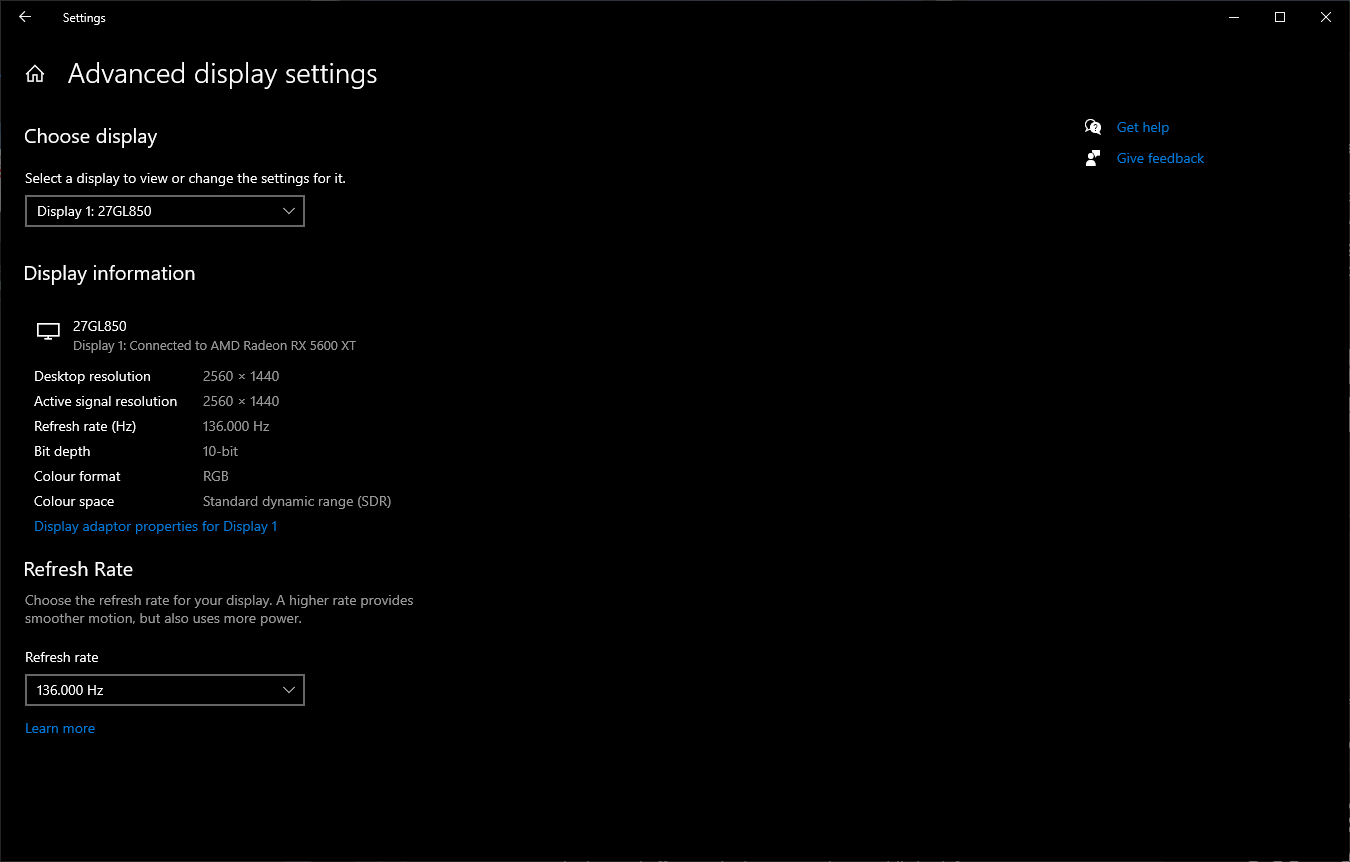
Verify that the selected resolution matches that one you created in CRU, then sroll down and select Advanced display settings.
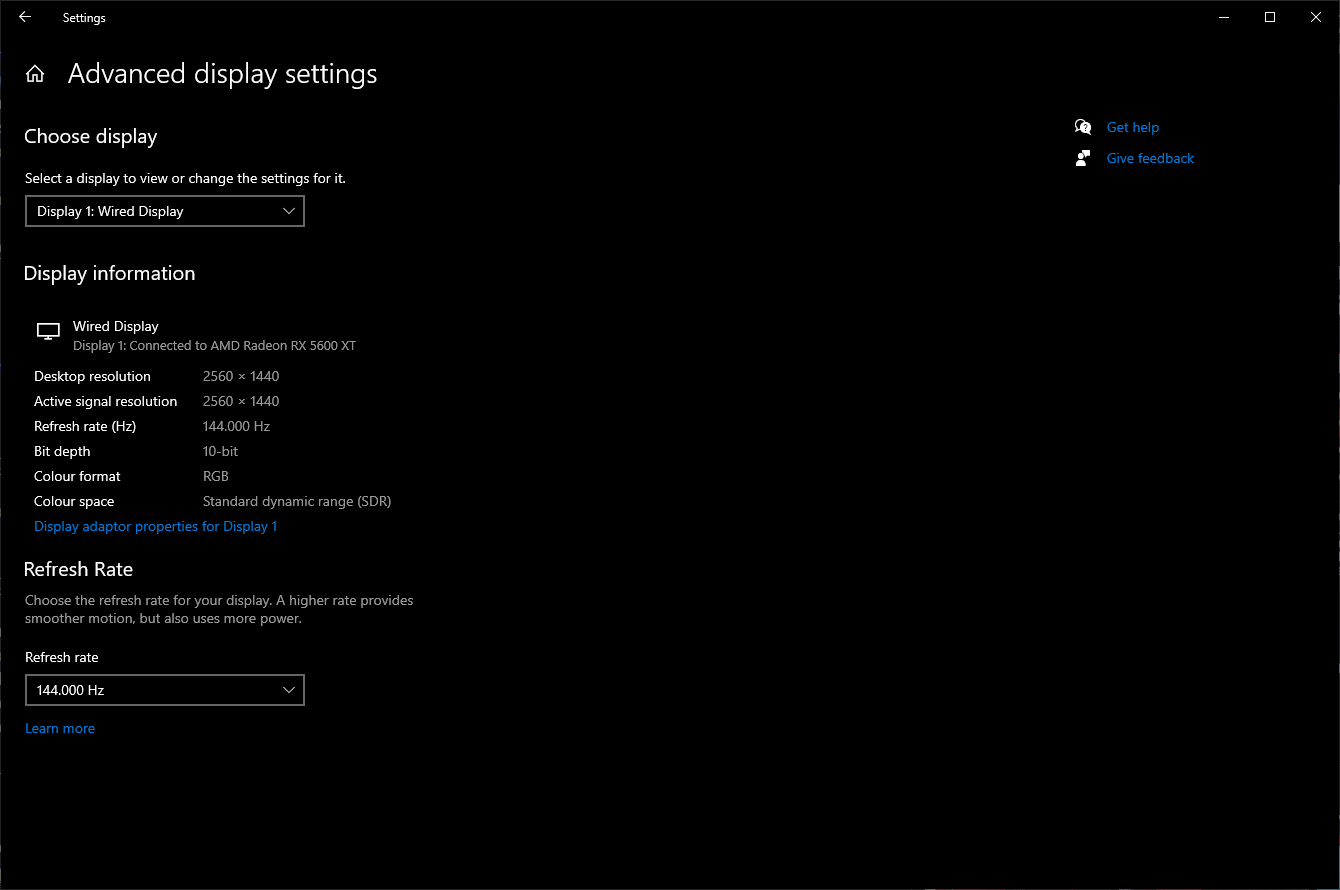
Take note of the listed Bit depth, e.g 10-bit in my case. Select your custom refresh rate. The screen will go blank briefly, and should return to normal after a second. If everything seems fine click the Keep changes button. If the screen remains blank don’t panic! It just means your custom refresh and resolution isn’t supported, but Windows will revert the change after 30 seconds.
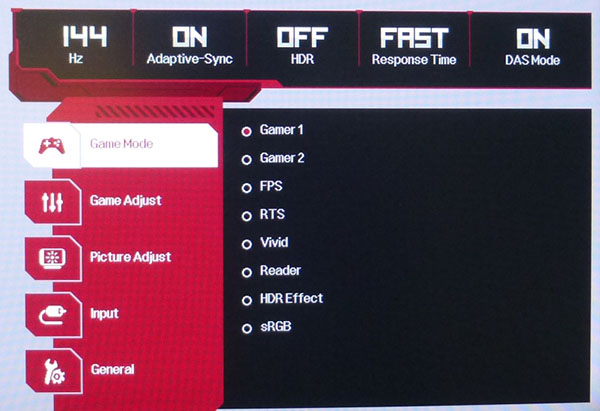
If you were able to select Keep changes, verify that the listed Bit depth matches what it was previously. You should also verify that your monitor is displaying the refresh rate correctly. Many monitors include an overlay that displays the active refresh rate. For example, my monitor has it built into the settings overlay like this. This verification is important, since I found that Windows might accept the custom resolution and refresh rate, but in reality your monitor will only output half of the refresh rate. For example, I had a 140Hz refresh rate configured, but my monitor was only displaying at 70Hz which was pretty noticeably slower than 140Hz, and also easily confirmed via the monitor settings!
You can see that my custom refresh rate of 136Hz retains 10 bit depth. It might be possible to push the refresh rate higher and maintain the 10 bits, but I’ve been unable to find a setting that does so with my monitor and GPU. A few tutorials state that increasing the blanking on the default resolution profile does the trick too, so it might be worth trying.