 Evan Shortiss
Hosting CodeReady Containers on DigitalOcean
Note: The official documentation for CodeReady Containers now includes a section similar to this post. You can find the official documentation at this link.
This is a slightly customised version of Jason Dobies’ post on the Official OpenShift blog. That blog was inspired by Trevor McKay’s GitHub Gist found here. That means I’m being incredibly derivative with this one, but I had fun and I hope you find it interesting!
Like Jason, I sometimes want admin access to a full, but lightweight OpenShift development environment. Running CodeReady Containers on my Macbook works well, but it’s not fun when Firefox, Chrome, Visual Studio Code are also in competition for my 16 gigs of memory. I’d also rather my Macbook’s fans didn’t spin at 100% speed all the time.
I have a gaming PC (look, I’d be fooling no one if I said it’s primary purpose is productivity) that could easily run CodeReady Containers, but it only has a single 1TB drive with Windows 10 installed. Partitioning my drive, or running CodeReady Containers on Windows didn’t sound like exciting prospects, and waiting for an SSD delivery would require patience, so I figured I’d try something else.
This post outlines how I setup a DigitalOcean Droplet to run OpenShift 4 via CodeReady Containers, and how I configured my Macbook’s DNS to communicate with it.
DigitalOcean Droplet Setup
I’m going to assume you have a DigitalOcean account with a credit card attached to it. If you don’t, go ahead and set that up before reading any further. They’re not going to let you run a Droplet with 8 vCPU and 16GB of RAM for free!
Get started by creating a new project on DigitalOcean. Name it something boring, like “CRC OpenShift 4”, and give it a similarly sensible description.
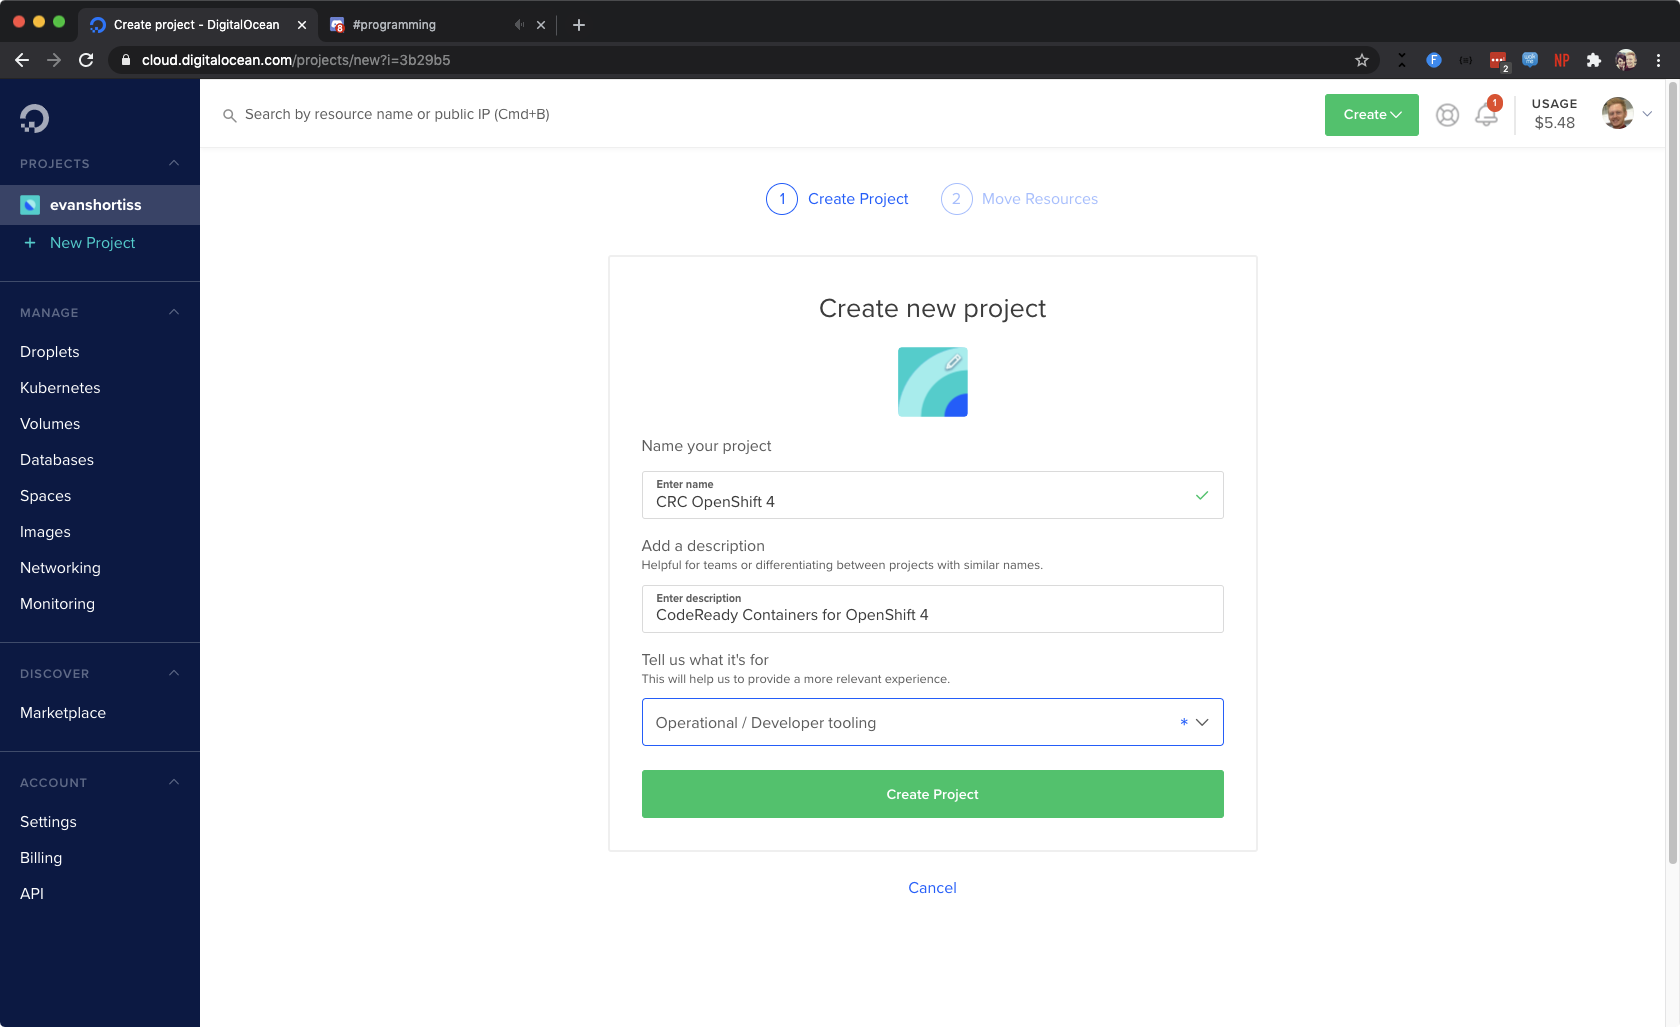
Creating a project for CodeReady Containers on DigitalOcean.
Next, create a Fedroa 32 Droplet in that project you just created. You’ll want something beefy since the CodeReady Containers documentation states that it requires:
- 4 vCPUs
- 8GB RAM (I’ve found it uses closer to 9GB)
- 35 GB of disk space
A Basic Droplet type with 8 vCPUs and 16GB RAM does the trick. This costs approximately 12 USD cents an hour, or 80 USD/month. Even though this is a throwaway single node OpenShift cluster, make sure you configure an SSH Key for authentication, because professionals have standards (warning: cartoon violence)!
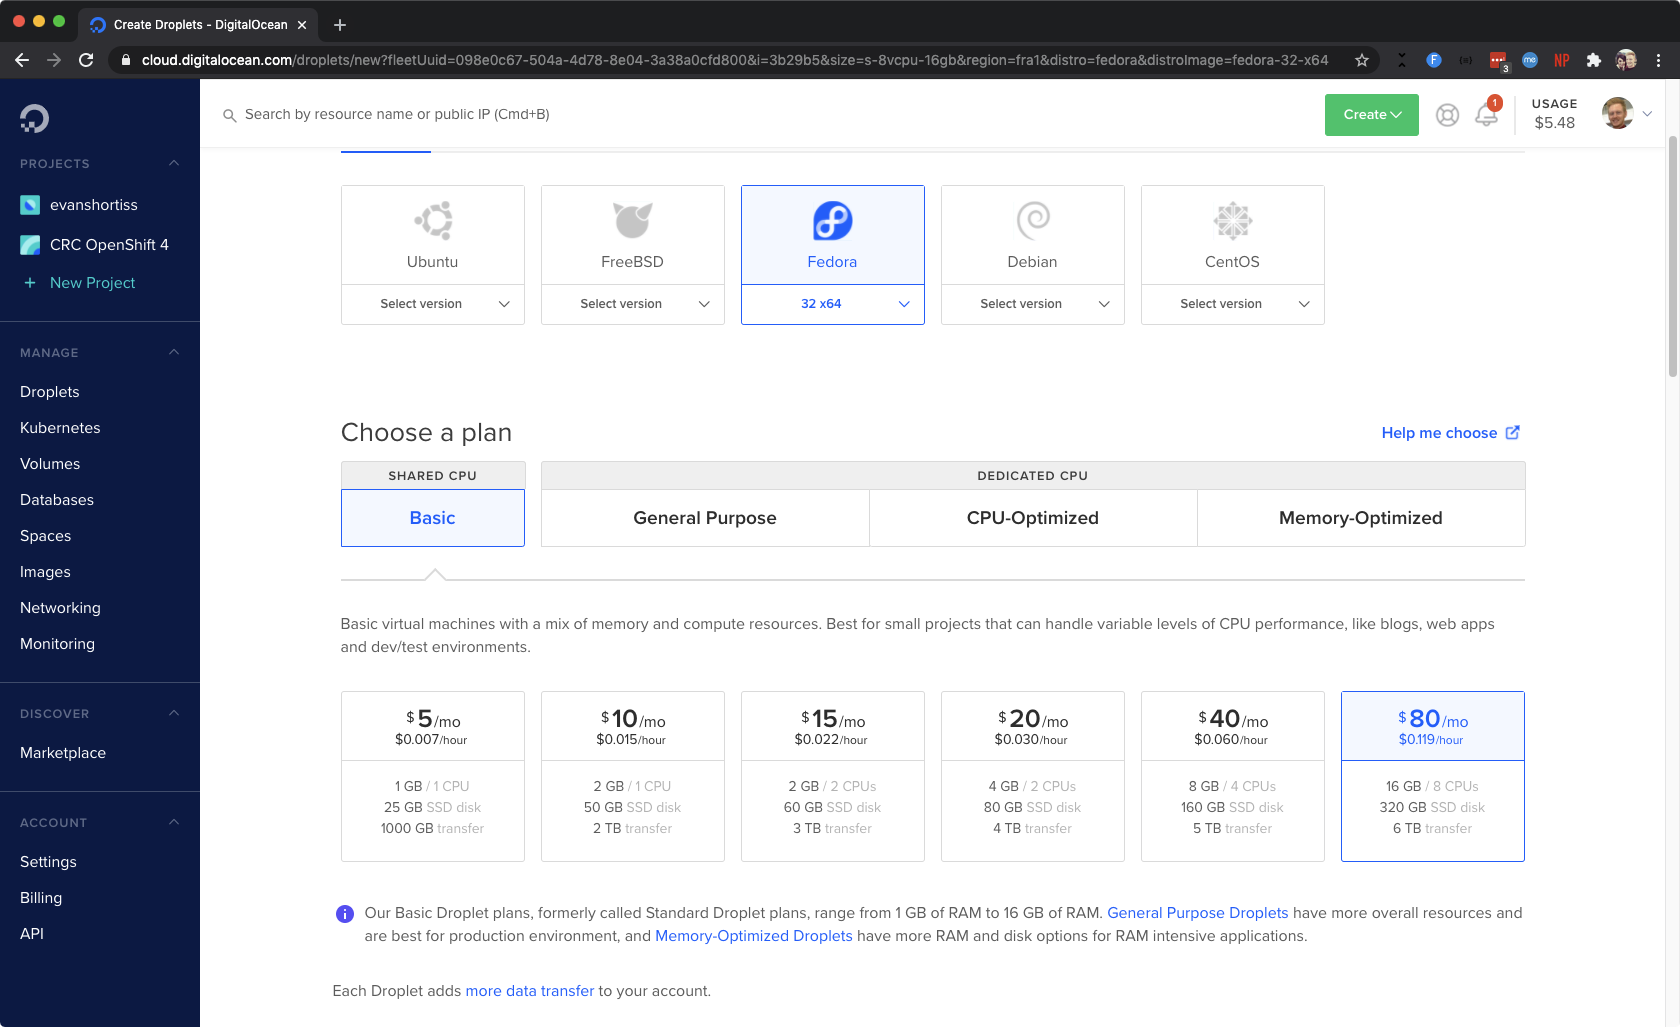
The Droplet I chose has 8vCPUs and 16GB RAM. Nice!
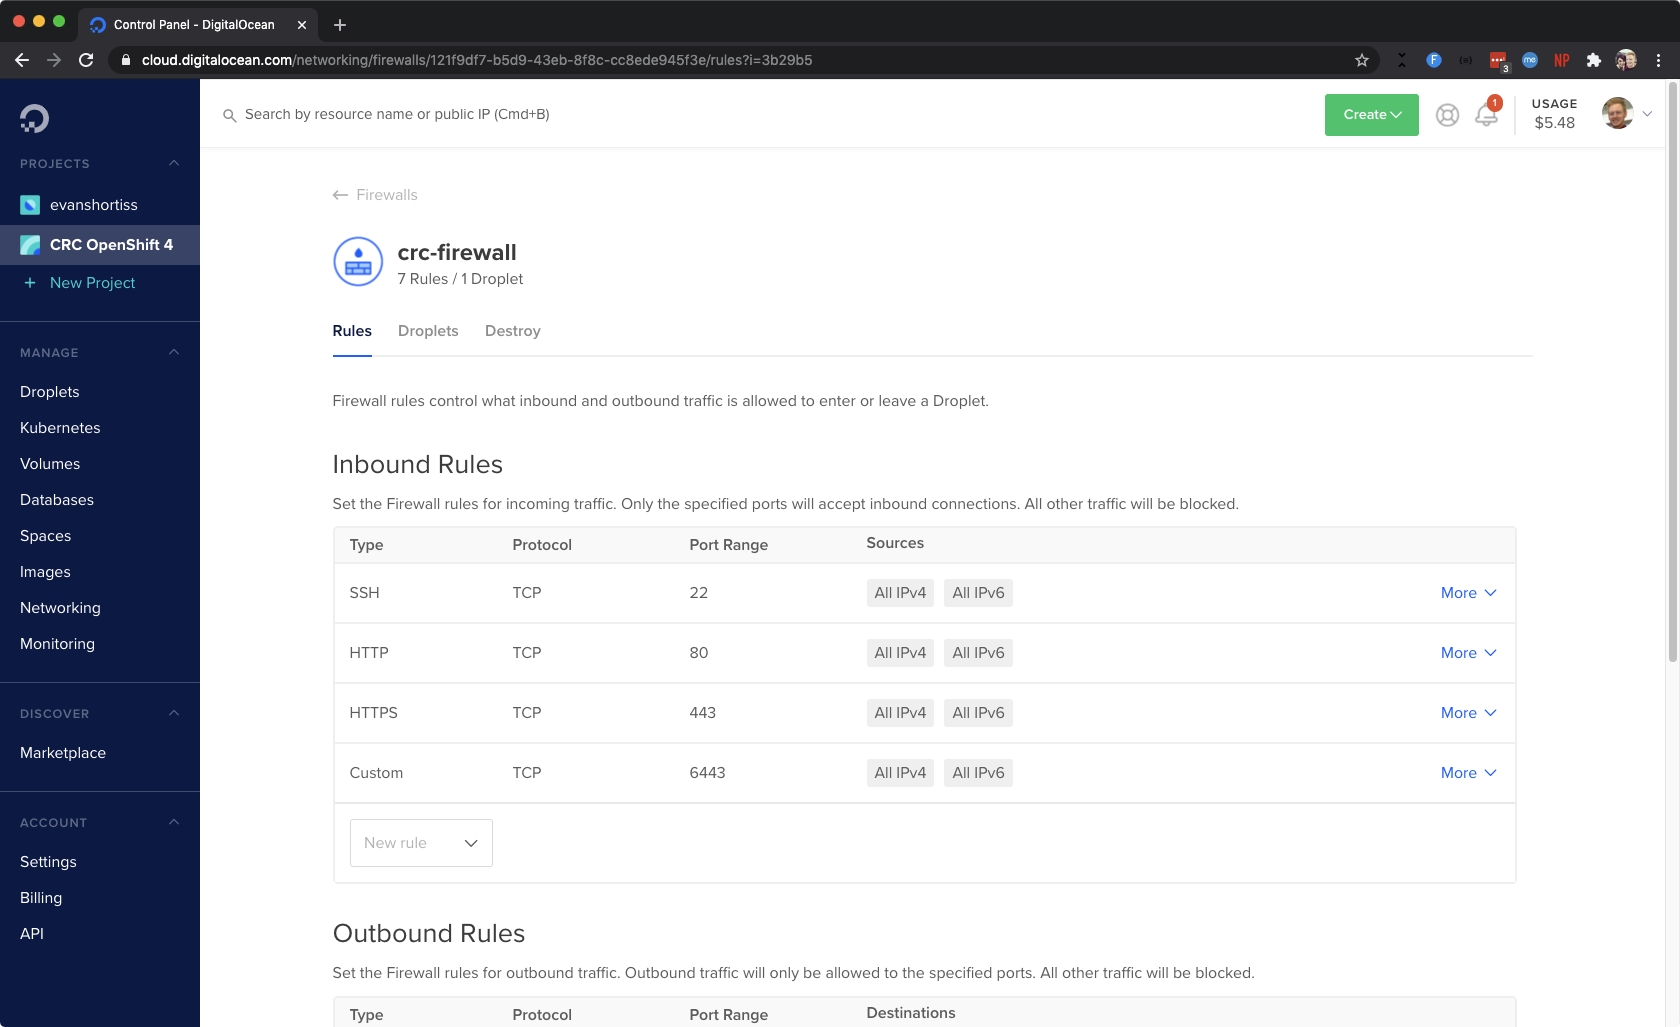
While the Droplet is being created, head to the Networking section and click Create Firewall in the Firewalls section. Add the following rules:
- SSH
- HTTP
- HTTPS
- TCP 6443 (use the Custom option in the New Rule dropdown)
Your rules should look similar to the screenshot below. Don’t forget to actually apply the rules to your new Fedora 32 Droplet!
Software Versions and Other Notes
The bash commands throughout this guide reference a $DROPLET_IP variable. As you may have guessed, this is the IPv4 address that’s listed alongside your shiny new Fedora 32 Droplet in the DigitalOcean UI. Anywhere you see $DROPLET_IP, replace it with your Droplet’s IPv4 address.
Also, take note of this list. If you encounter issues recreating my setup, it might due to a version mismatch* with these:
- Fedora 32
- CodeReady Containers version: 1.16.0+bf72d3a
- HA-Proxy version 2.1.7 2020/06/09
- NetworkManager 1.22.10-1.fc32
- firewalld 0.8.3
- libvirtd 6.1.0
* and hopefully not an error in my instructions!
User Setup
SSH into your Droplet once it finishes provisioning. Read this DigitalOcean How-To for SSH if you’re having trouble.
CodeReady Containers should not be run as the root user, so the first thing to do is create another user, e.g crc-user.
ssh root@$DROPLET_IP
useradd crc-user
passwd crc-user
sudo usermod -aG wheel crc-user
Now that the user is added, you can copy add your SSH key to the authorised keys for the new user. Run this from your development/client machine:
ssh-copy-id crc-user@$DROPLET_IP
There’s more you can do to secure your Droplet, but that’s outside the scope of this guide. Step 2 in this guide for Fedora is a start!
Install Dependencies and Confgure firewalld
# Note that you SSH as crc-user this time!
ssh crc-user@$DROPLET_IP

sudo dnf -y install NetworkManager haproxy firewalld policycoreutils-python-utils
sudo systemctl start libvirtd
sudo systemctl start firewalld
sudo firewall-cmd --add-port=80/tcp --permanent
sudo firewall-cmd --add-port=6443/tcp --permanent
sudo firewall-cmd --add-port=443/tcp --permanent
sudo systemctl restart firewalld
sudo semanage port -a -t http_port_t -p tcp 6443
Before moving on, verify that a valid nameserver entry is set in /etc/resolv.conf. The primary nameserver needs to be set to 127.0.0.1 so OpenShift Routes can be resolved. I used 1.1.1.1 as my secondary nameserver. The updated /etc/resolv.conf will look like this:
# Generated by NetworkManager
nameserver 127.0.0.1
nameserver 1.1.1.1
Download and Run CodeReady Containers
I’ve included a URL in the first step here for completeness, but if it fails you can check cloud.redhat.com/openshift/install/crc/installer-provisioned to find a working URL.
# Download, unpack, and move CRC the binary onto the PATH
curl https://mirror.openshift.com/pub/openshift-v4/clients/crc/latest/crc-linux-amd64.tar.xz > crc-linux-amd64.tar.xz
tar -xf crc-linux-amd64.tar.xz
sudo mv crc-linux-1.16.0-amd64/crc /usr/local/bin/

# Verify the binary is on the PATH. It should print version information.
crc version

# If the version command worked, run this setup command
crc setup
The crc setup command takes a minute to run, so now is a good time to get a “pull secret” prepared for the next step.
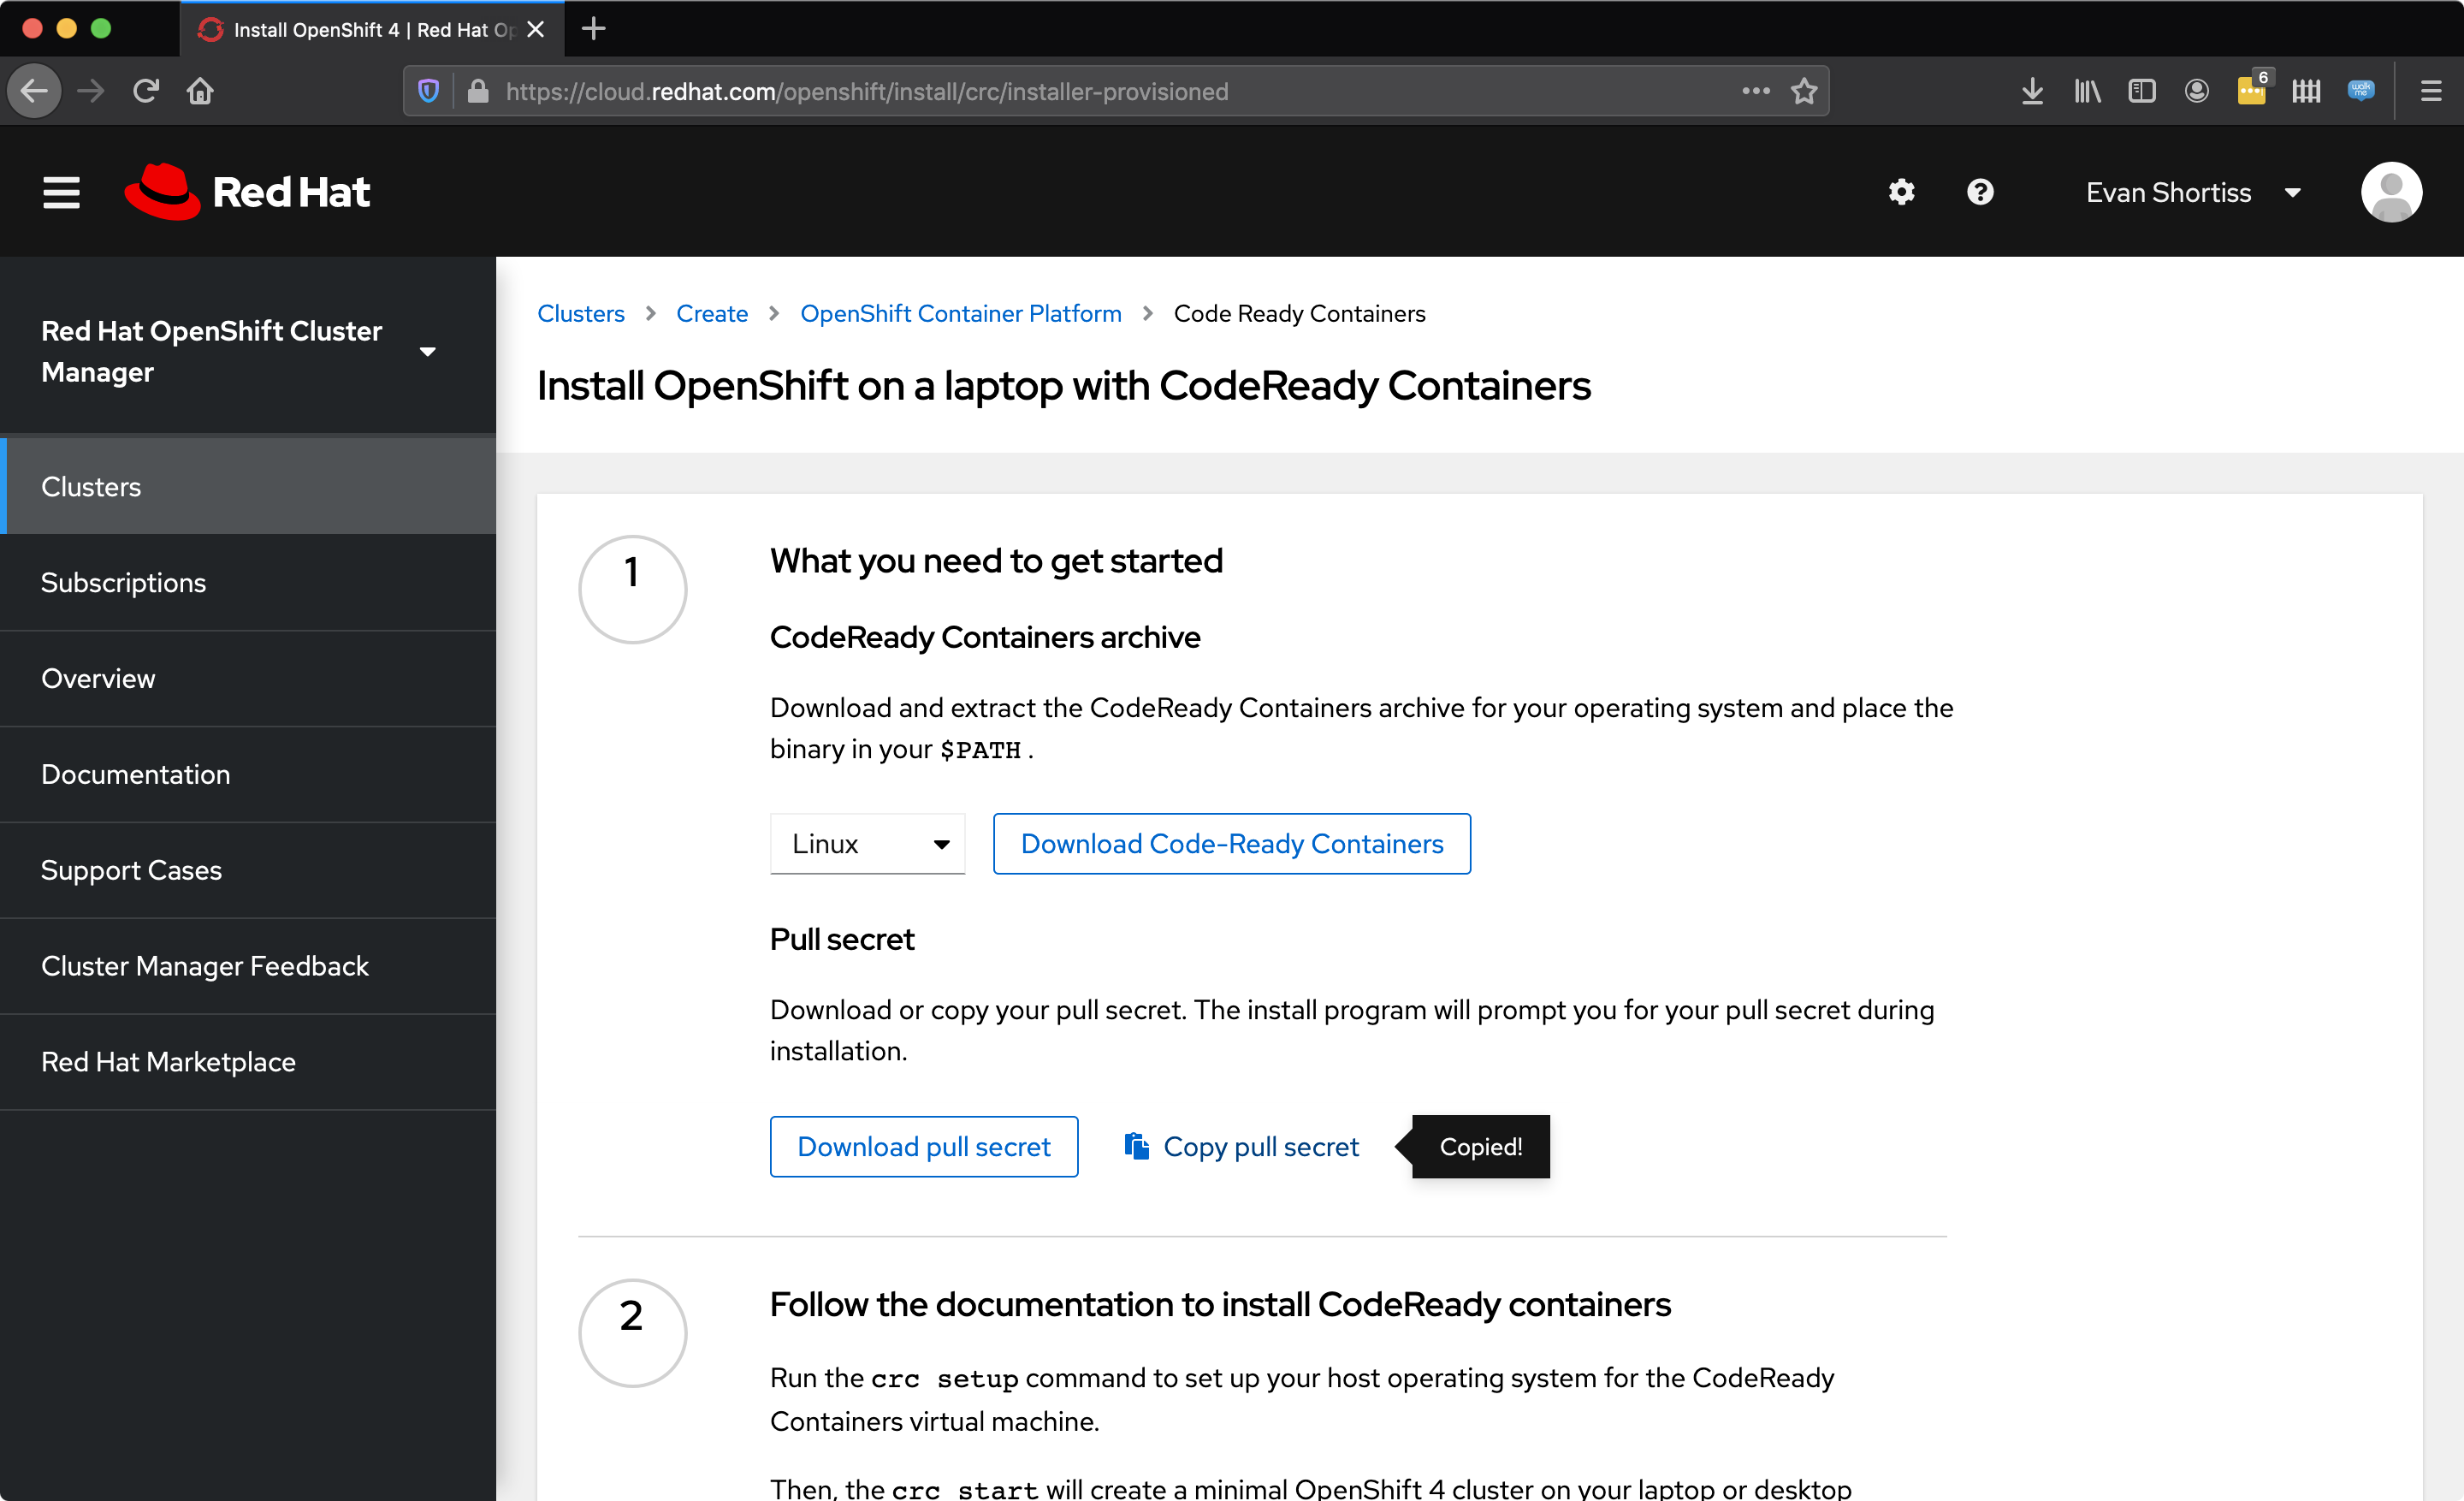
Obtain the Pull Secret under the cluster creation UI. You can also find the CodeReady Containers download URL here by right-clicking the “Download Code-Ready Containers” button and choosing “Copy Link Location”.
Your pull secret is found on cloud.redhat.com:
- Login to cloud.redhat.com/openshift.
- Select Clusters from the side menu.
- Click the Create button on the clusters listing page.
- Choose Red Hat OpenShift Container Platform as the cluster type.
- Choose the Run on Laptop option.
- Click the Copy Pull Secret button.
- Return to your SSH session.
- Paste your pull secret into a file, e.g
vi ~/crc-pull-secret.jsonand paste the contents. crc start -p ~/crc-pull-secret.json
CodeReady Containers will take a minute or two to start, so this is a good time to mindlessly browse Reddit or Twitter.
Configure HAProxy
HAProxy will route HTTP and HTTPS traffic to CodeReady Containers:
- Backup the default HAProxy configuration:
sudo cp /etc/haproxy/haproxy.cfg /etc/haproxy/haproxy.cfg.original - Obtain the CodeReady Containers VM IP using the
crc ipcommand. - Paste the following configuration into
/etc/haproxy/haproxy.cfg, being sure to replace theCRC_IPstrings with the IP obtained usingcrc ip:
defaults
    mode http
    log global
    option httplog
    option  http-server-close
    option  dontlognull
    option  redispatch
    option  contstats
    retries 3
    backlog 10000
    timeout client          25s
    timeout connect          5s
    timeout server          25s
    timeout tunnel        3600s
    timeout http-keep-alive  1s
    timeout http-request    15s
    timeout queue           30s
    timeout tarpit          60s
    default-server inter 3s rise 2 fall 3
    option forwardfor

frontend apps
    bind 0.0.0.0:80
    bind 0.0.0.0:443
    option tcplog
    mode tcp
    default_backend apps

backend apps
    mode tcp
    balance roundrobin
    option tcp-check
    server webserver1 192.168.130.11 check port 80

frontend api
    bind 0.0.0.0:6443
    option tcplog
    mode tcp
    default_backend api

backend api
    mode tcp
    balance roundrobin
    option tcp-check
    server webserver1 192.168.130.11:6443 check port 6443
Start HAProxy using the sudo systemctl start haproxy command.
If HAProxy fails to start, use haproxy -f /etc/haproxy/haproxy.cfg -db to view logs and diagnose the issue.
Note that the CodeReady Container VM IP can change on reboots/restarts. If the IP changes you’ll need to update the haproxy.cfg with the new IP and run sudo systemctl restart haproxy!
Configure DNS on your Development Machine
As Jason said in his post, there’s no right or wrong way to do this, but you’ll need to tell your development machine how to resolve the CodeReady Container URLs, i.e to resolve URLs with the testing suffix to your $DROPLET_IP.
This is pretty easy to configure for the static OpenShift routes via /etc/hosts on Linux and macOS. Add the following line to your /etc/hosts file, and don’t forget to replace $DROPLET_IP with the correct value:
# CodeReady Containers (running on DigitalOcean)
$DROPLET_IP api.crc.testing oauth-openshift.apps-crc.testing console-openshift-console.apps-crc.testing default-route-openshift-image-registry.apps-crc.testing
DNS resolution for deployed application Routes is a little less straightforward. This is because they are wildcard routes, i.e *.apps-crc.testing. I had hoped my PiHole would help with this, but it doesn’t seem to support setting a redirect for wildcards. I used dnsmsaq instead.
These commands will configure dnsmasq to resolve your CodeReady Containers installation on DigitalOcean on macOS:
brew install dnsmasq

# Commands based on: https://asciithoughts.com/posts/2014/02/23/setting-up-a-wildcard-dns-domain-on-mac-os-x/
echo "address=/.testing/$DROPLET_IP" > /usr/local/etc/dnsmasq.conf

# Copy the daemon config plist
sudo cp -fv /usr/local/opt/dnsmasq/*.plist /Library/LaunchDaemons
sudo chown root /Library/LaunchDaemons/homebrew.mxcl.dnsmasq.plist

# Approve the request to "accept incoming" connections if asked
sudo launchctl load /Library/LaunchDaemons/homebrew.mxcl.dnsmasq.plist

# Redirect DNS queries for "testing" to localhost
sudo mkdir -p /etc/resolver
sudo sh -c 'echo "nameserver 127.0.0.1" > /etc/resolver/testing'
Finally, in the Network settings for your device make 127.0.0.1 your first nameserver, then follow it up with another, e.g 1.1.1.1 and/or 8.8.8.8.

macOS Network settings to resolve the testing domain via dnsmasq, and 1.1.1.1 for everything else.
Revel in Your Success
Once you have DNS configured, navigate to console-openshift-console.apps-crc.testing in your web browser. You’ll receive some very exciting SSL warnings. Yes, these are exciting because it means you’ve been successful!
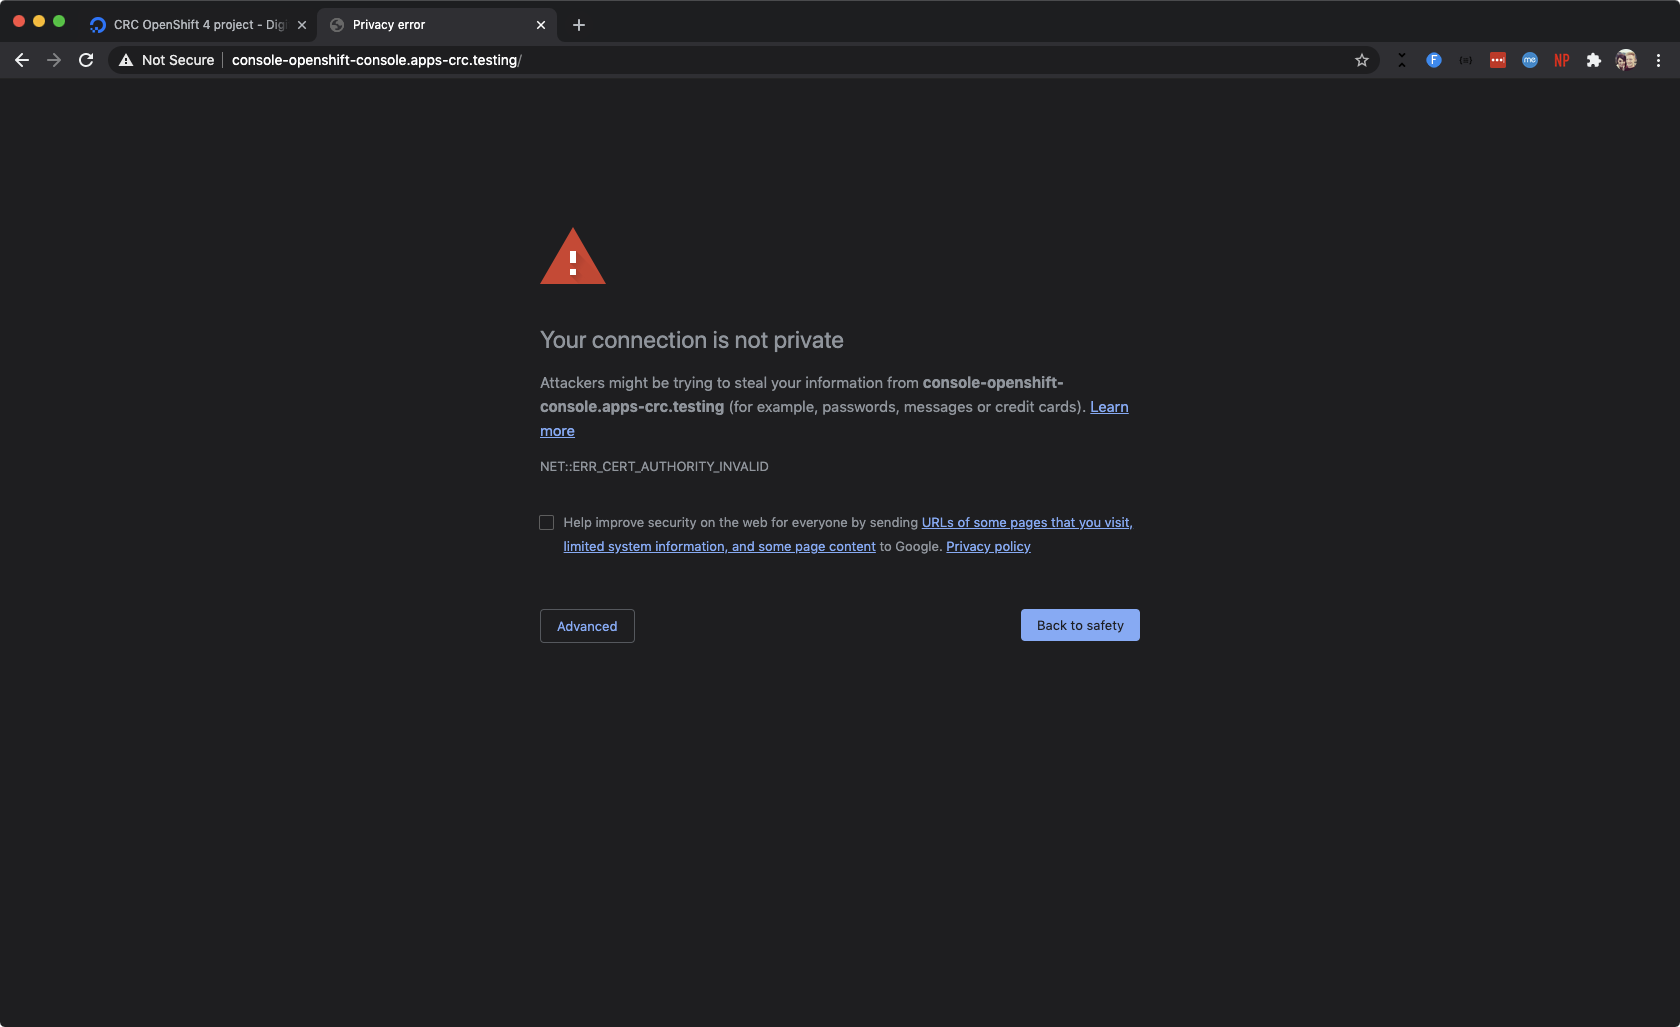
The most exciting self-signed SSL certificate error you’ll see this week.
Add an exception for the self-signed SSL certificates, and voila! You’ll be brought to the OpenShift login page. You can login using credentials found by running crc console --credentials on your Droplet - hell yeah!
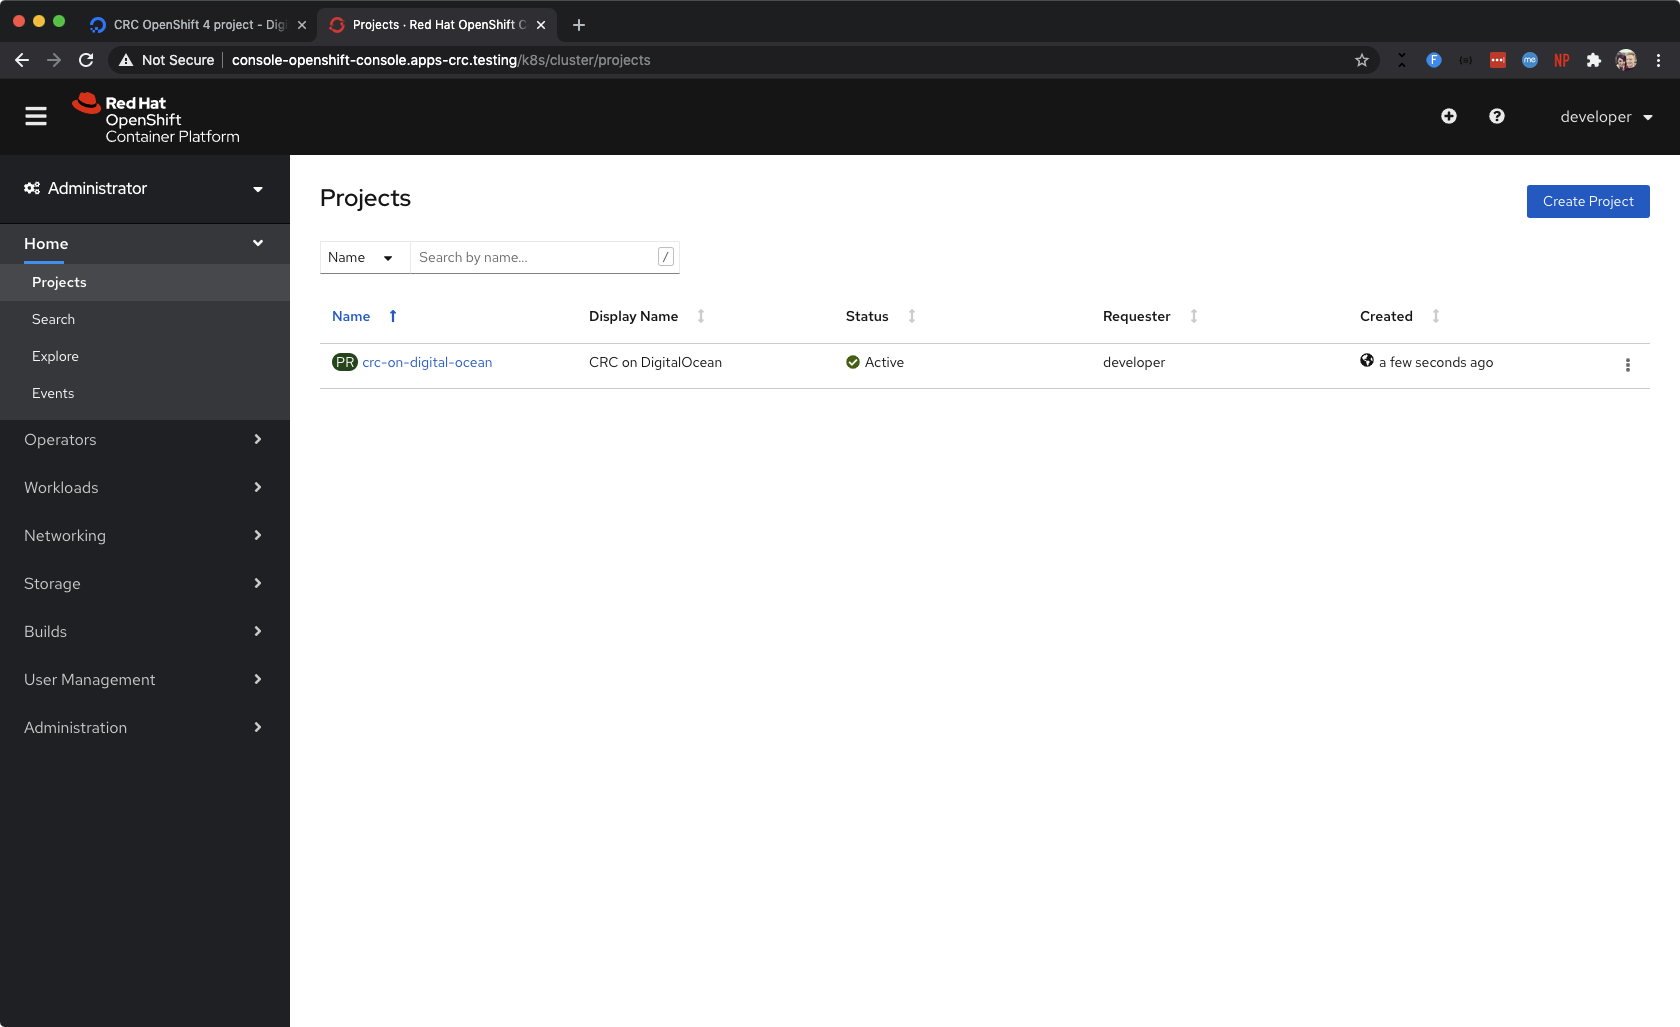
The OpenShift Projects list. You can see I created a Project to test the basic cluster functionality.
Create an OpenShift Project, and deploy a template. I went with the Node.js application because I’m a bit of a JavaScript fanboi. You can see my Node.js application running in the Developer Topology view in the screenshot below.
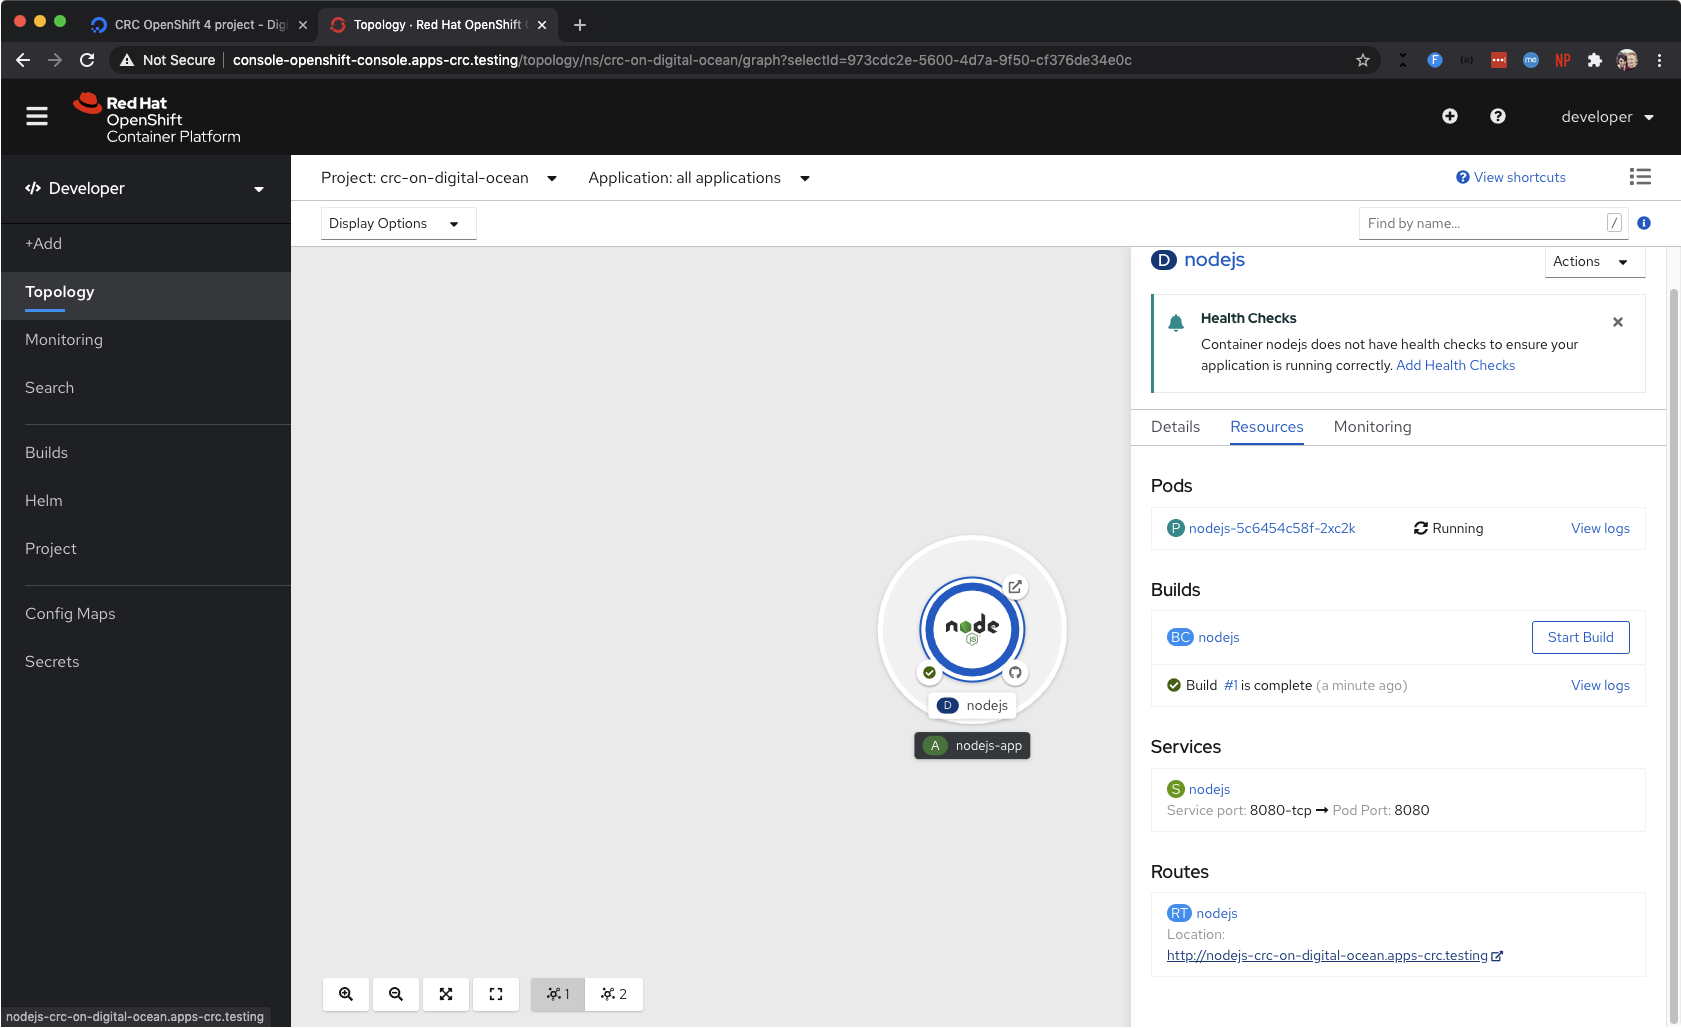
A Node.js application running in my Project.
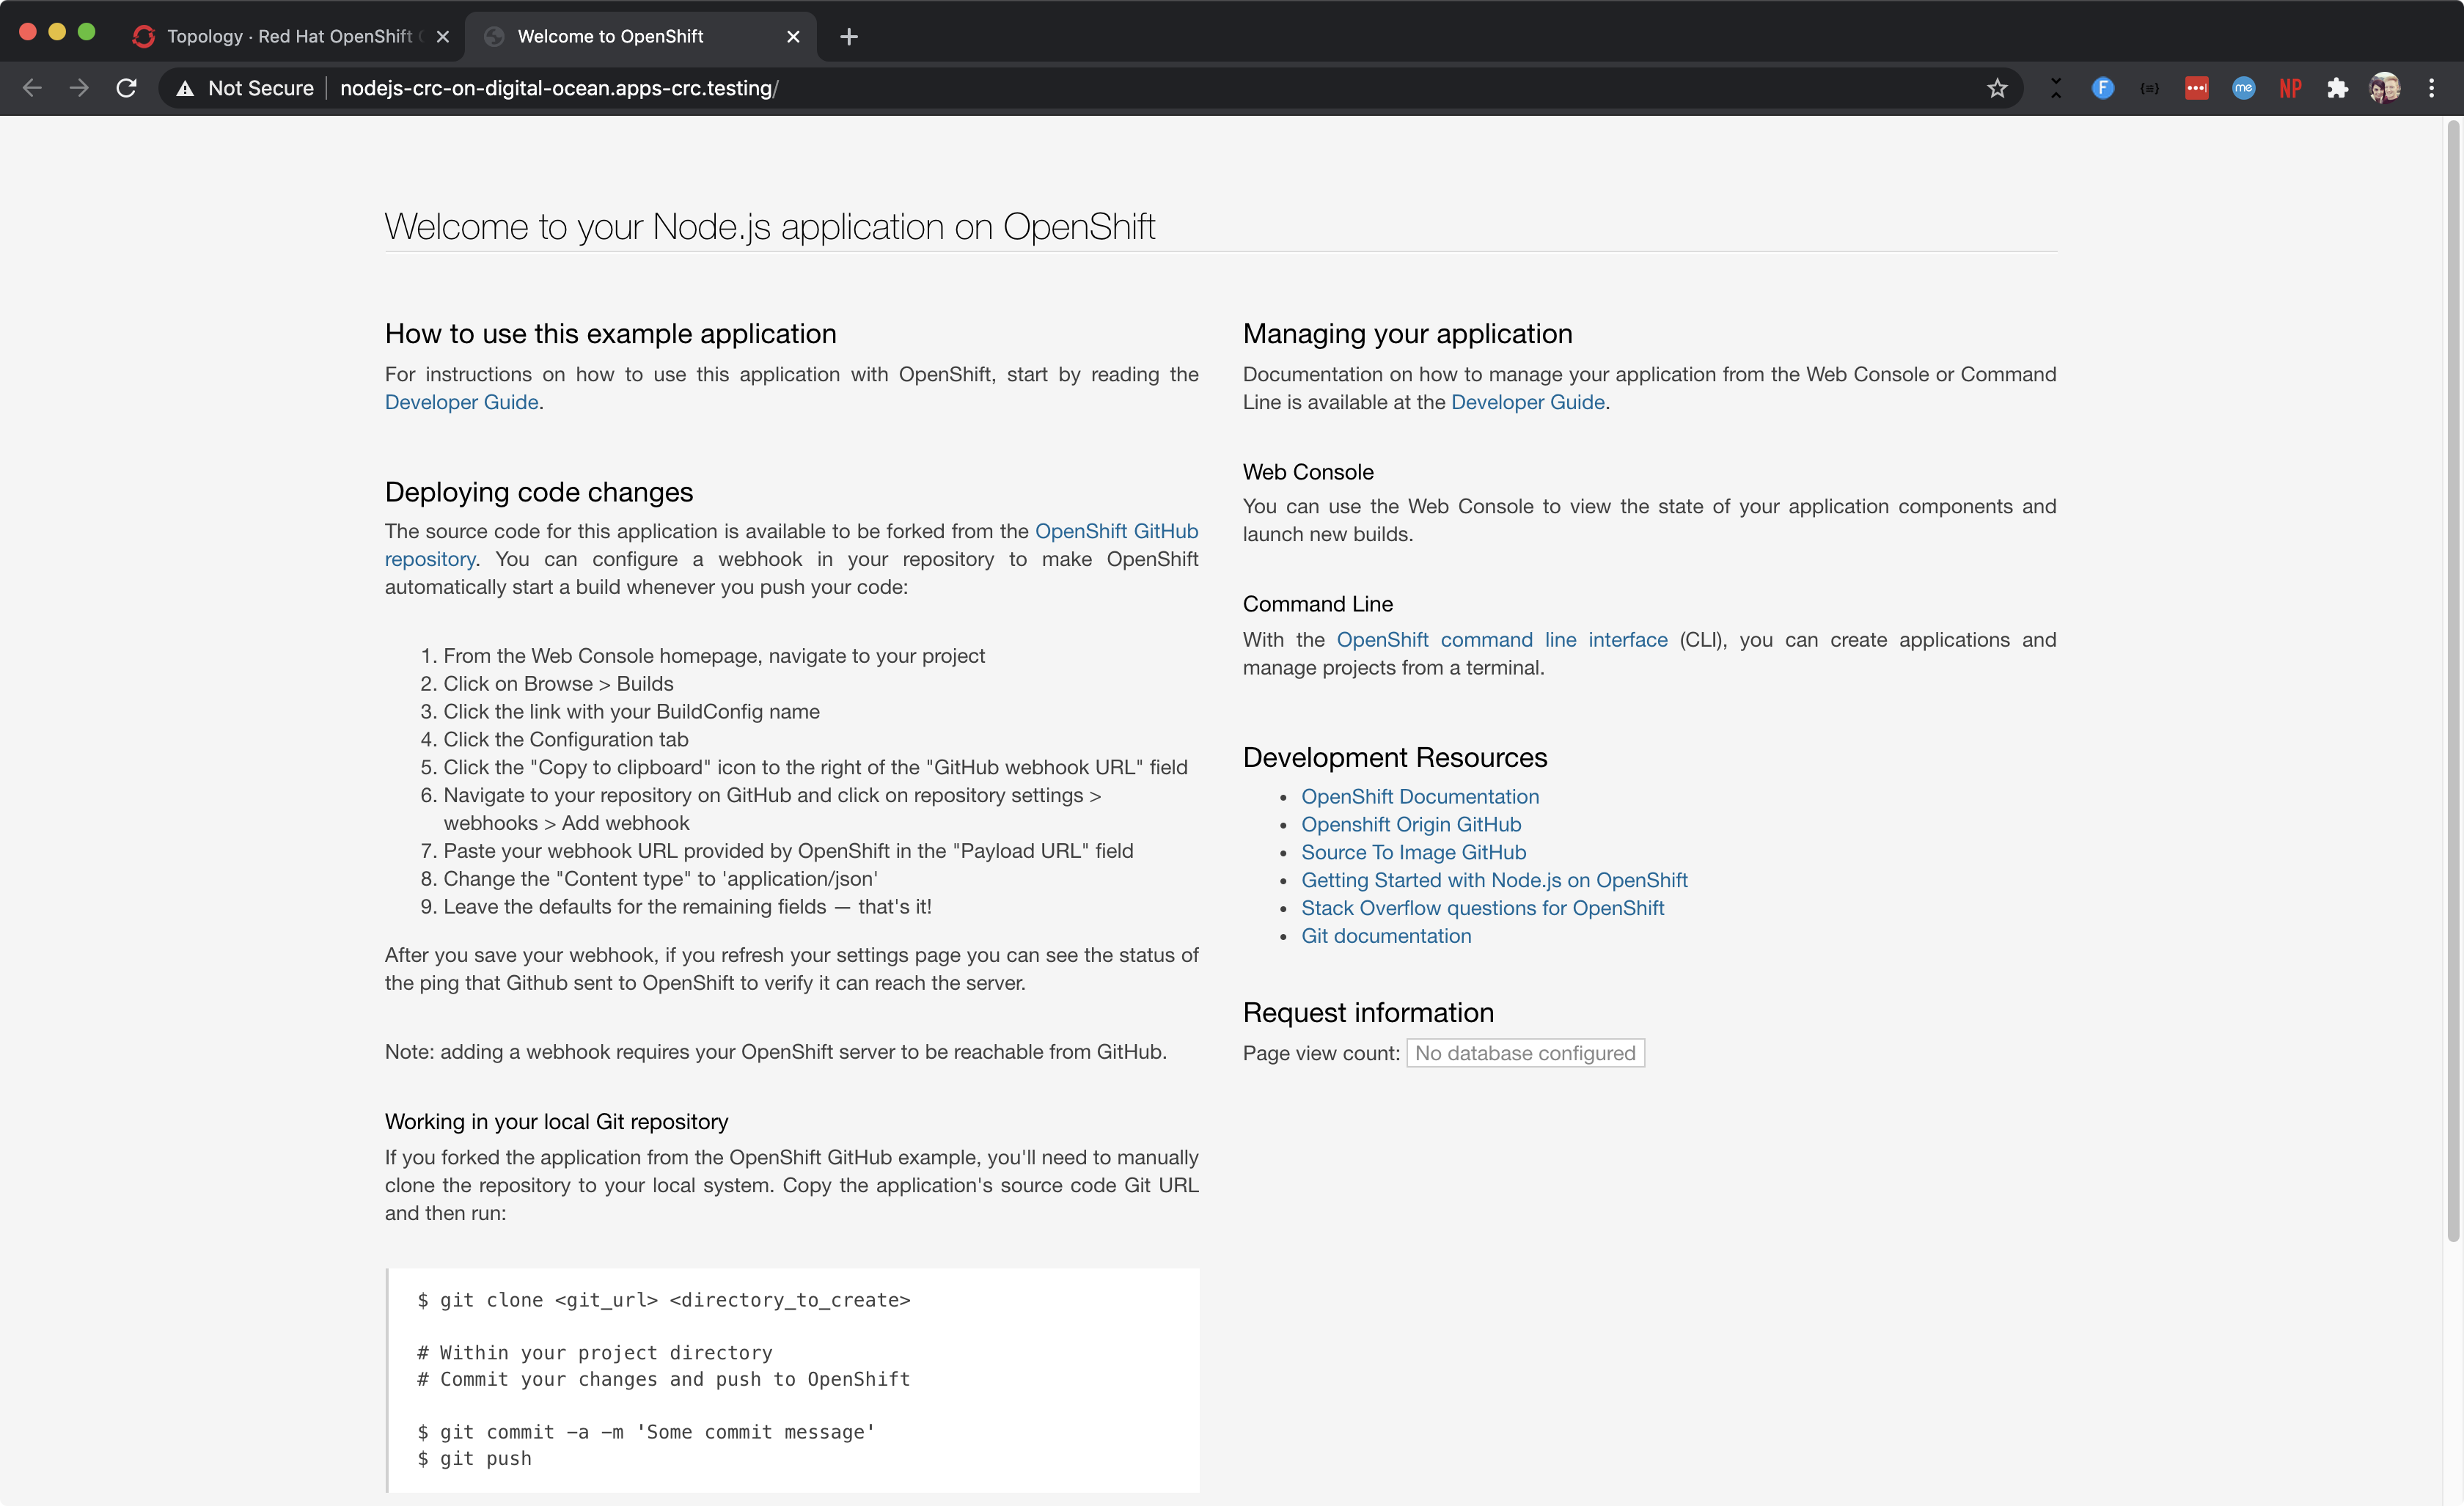
Clicking the application node presents a details pane on the right. Open the URL under Routes and briefly marvel at the wonders of cloud technology.
Configure OpenShift User Logins
Last but not least, you’ll want to change the default login details. Those are the ones that can be obtained via crc console --credentials. The developer user it provides has a default password that should be changed.
Here’s how you can update it:
ssh crc-user@$DROPLET_IP

# This will make the OpenShift CLI (oc) available
eval $(crc oc-env)

# Installs htpasswd, among other things
sudo dnf install httpd-tools

# Get the kubeadmin credentials
crc console --credentials

# Login as kubeadmin (you can omit the -p flag so it prompts you for the password)
oc login -u kubeadmin -p $KUBEADMIN_PASSWORD https://api.crc.testing:6443

# Save the current htpasswd file that OpenShift is using to a local user.htpasswd file
oc get secrets/htpass-secret -n openshift-config -o jsonpath="{.data.htpasswd}" | base64 -d > users.htpasswd

# Update the password for the "developer" user. You can also use htpasswd
# to add more users if you want
export DEVELOPER_PASSWORD="newsafepassword"
htpasswd -c -B -b users.htpasswd developer $DEVELOPER_PASSWORD

# Output the htpasswd in base64 format
cat users.htpasswd | base64
Visit console-openshift-console.apps-crc.testing/k8s/ns/openshift-config/secrets/htpass-secret/yaml and replace the existing htpasswd value in the YAML with the new one, then click Save. You can also do this via oc patch or oc edit commands.
Verify that the new password is working by logging in as the developer user:
oc login -u developer
That’s a Wrap
Don’t forget to shutdown the Droplet when you’re not using it!