 Evan Shortiss
CodeReady Workspaces Preview URL Setup
Recently I’ve had the opportunity to work with Red Hat’s CodeReady Workspaces running in an OpenShift environment. In plain english that means I used a browser-based IDE that was served from a Kubernetes cluster. CodeReady Workspaces is Red Hat’s productised version of Eclipse Che, and OpenShift is Red Hat’s Kubernetes platform for the enterprise.
Since the product is running on OpenShift this means your development environment is containerised. This means you develop and test in an environment that can replicate production and don’t need to setup everything locally. Neat stuff!
What I want to cover in this post is a really quick TLDRTD (too long, didn’t read the documentation) method to setup Preview URLs for your code in your workspace. Preview URLs enable you to interact with your project running inside the CodeReady workspace. For example you can send requests to an endpoint such as https://dev-container-id.codeready.my-cluster.com.
To create the steps below I forked the nodeshift-starters/nodejs-rest-http to my GitHub account and imported it into CodeReady Workspaces, but the same steps apply to virtually any tech stack since all you need to do is bind their development server to a port.
How To
To get started create a workspace. Below you can see I’m about to import my fork of the nodeshift-starters/nodejs-rest-http repository.

Once you create the workspace wait a minute or two for it to initialise. Once the workspace is ready to be used navigate to it’s settings from the Workspaces list as shown.

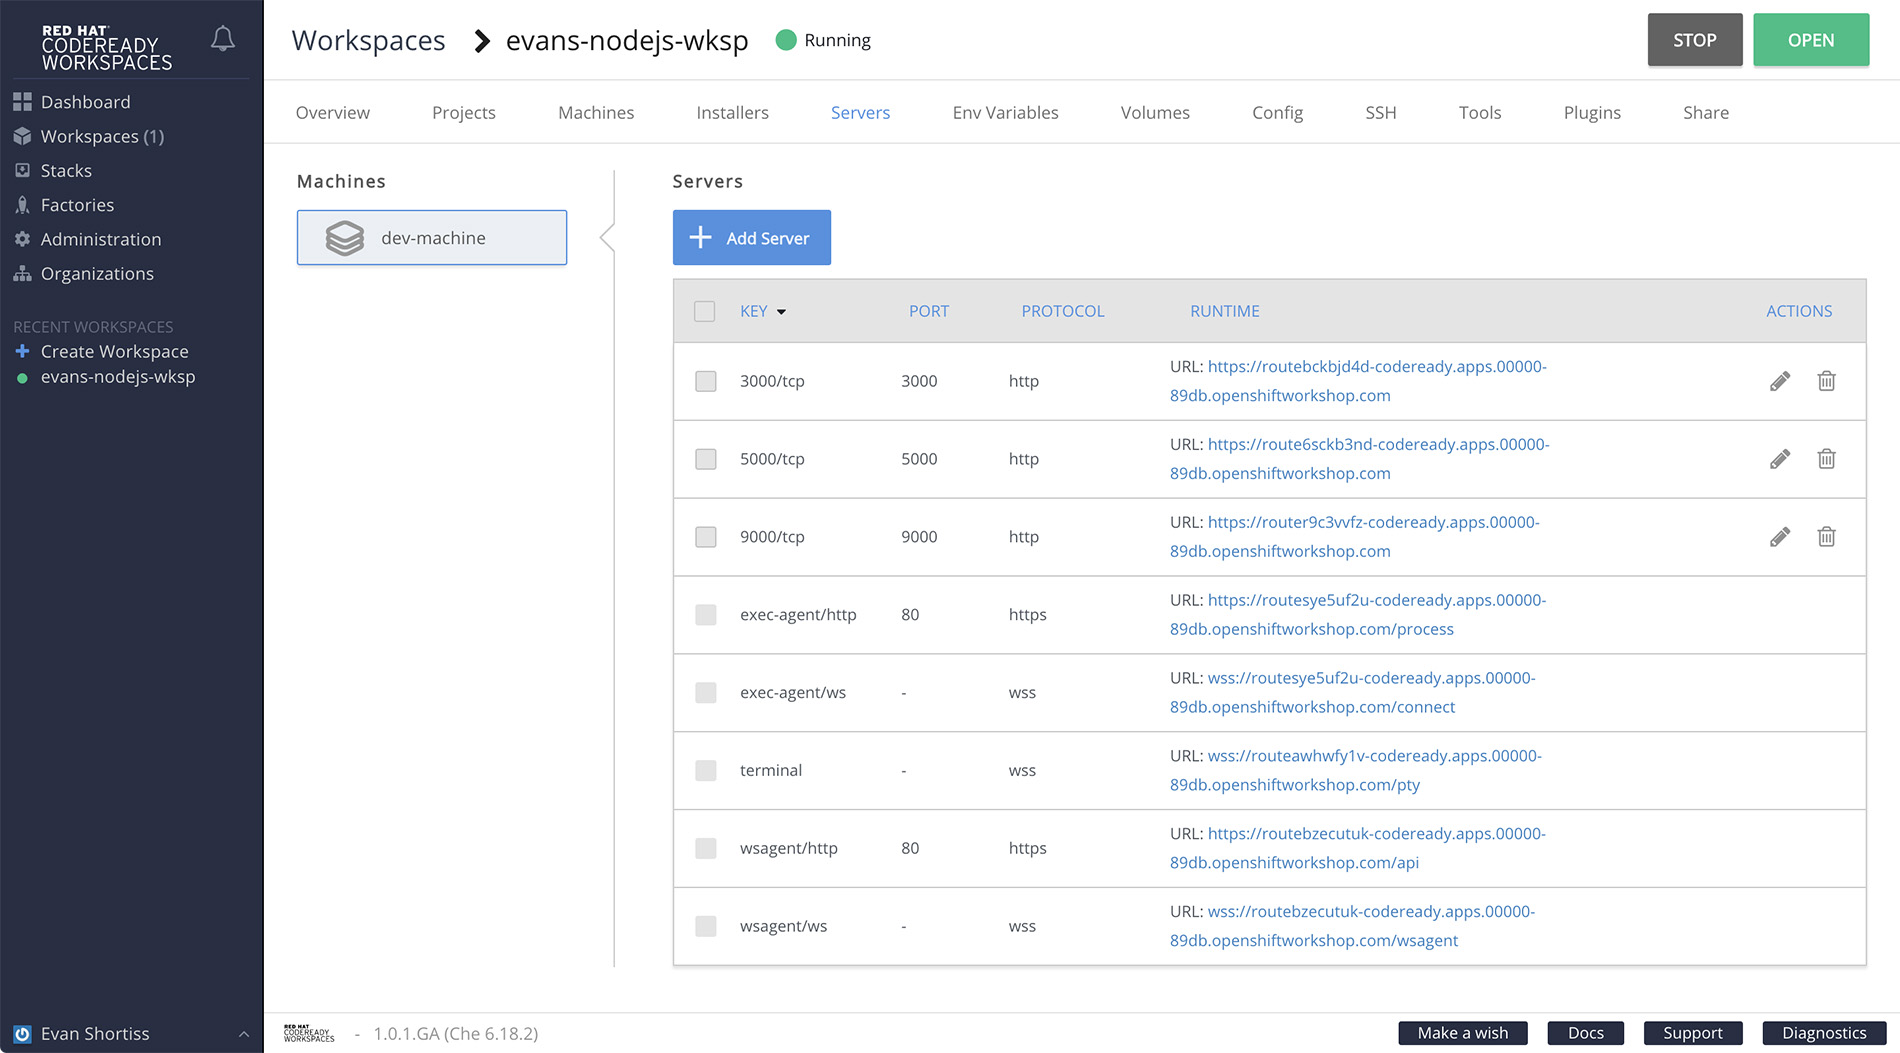
Select the Servers tab and note one of the displayed HTTPS URLS. I’ll be using the one that proxies to port 3000 in my workspace - it’s the first in the list shown below.
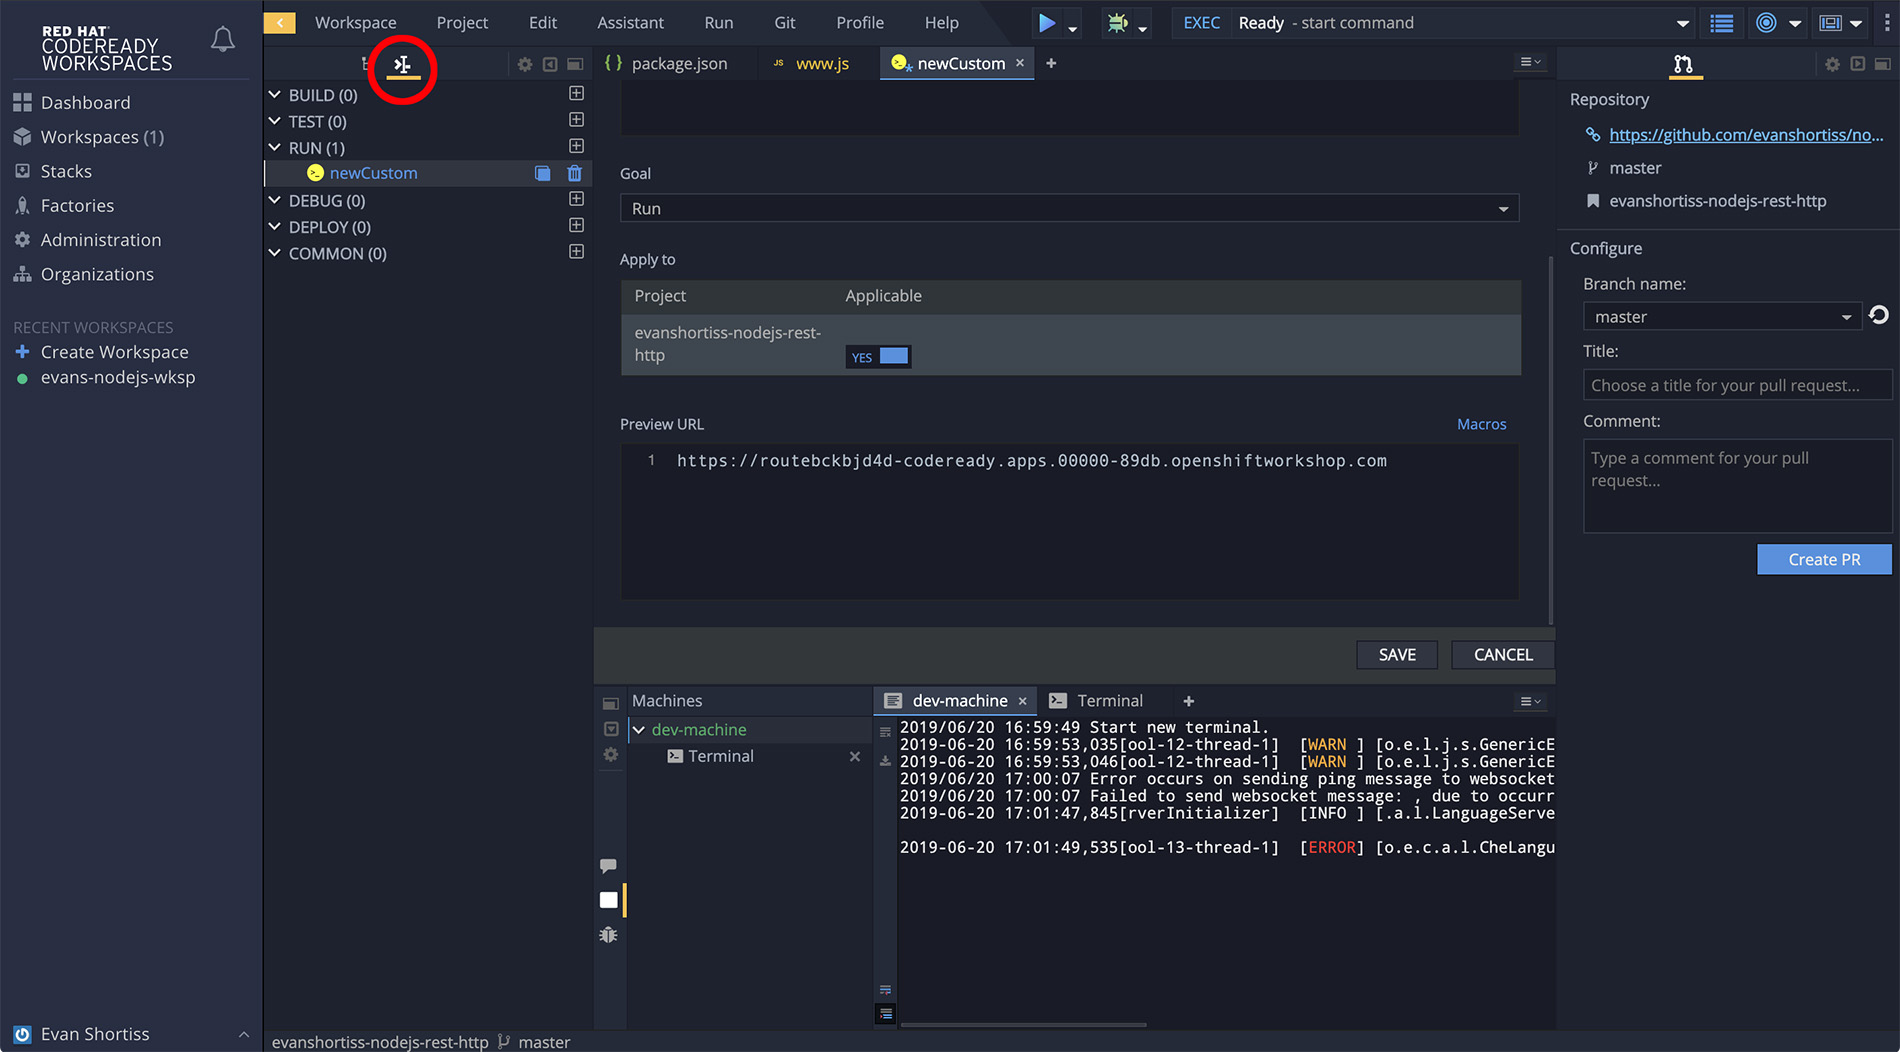
Open your workspace now and navigate to the Commands list using the icon highlighted in the image below. From here create a new command under the RUN section and name it “serve” or something similarly appropriate. You can now enter the HTTPS URL you found previously on the Servers tab in the Preview URL textbox on the right, as shown below.
The last thing you need to configure is the actual command required to start
your server. Enter the necessary command(s) in the Command Line textbox and
click Save. Note that the commands I entered here are specific to a Node.js
application, for other runtimes you’ll need their equivalent commands, e.g
mvn package && java -jar targets/my-app-0.1.0-snapshot.jar or similar for
Java.
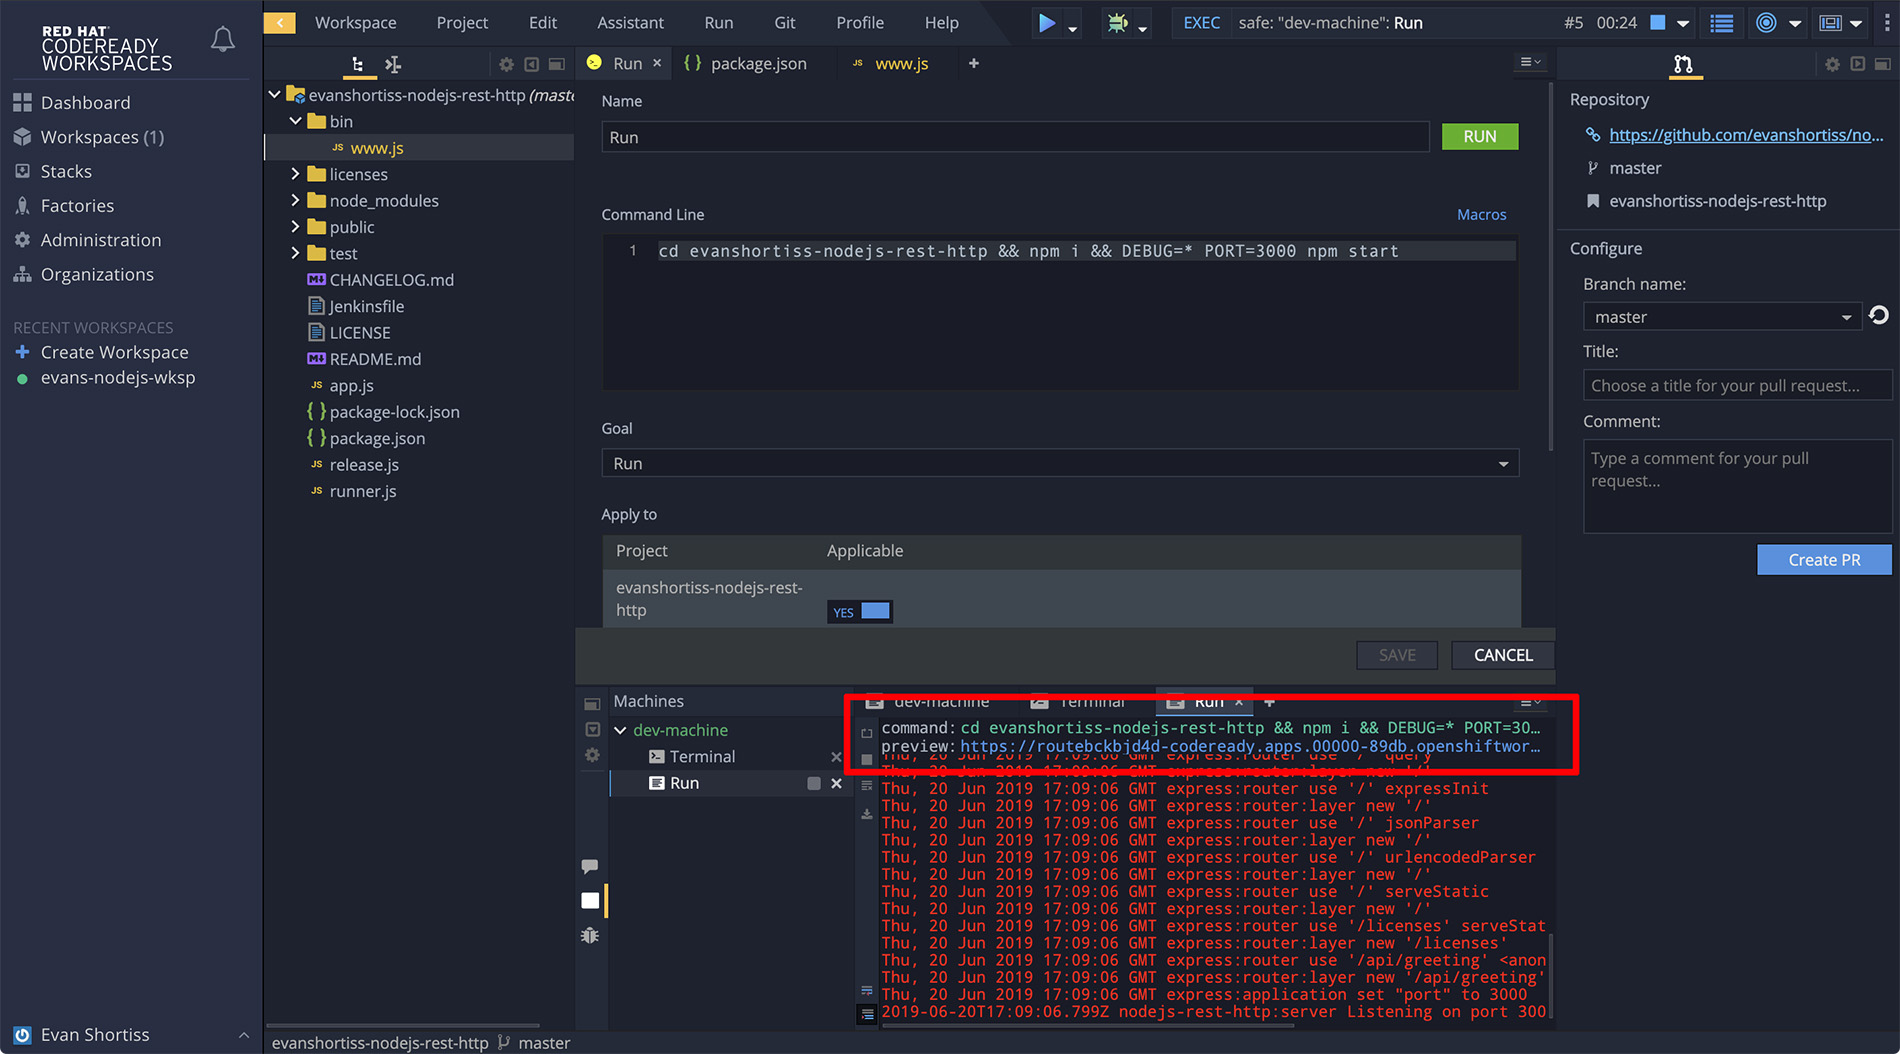
You can now use the Play icon between the Help and Debug menu entries to start your server and make it available via the HTTPS Preview URL you configured. You can see that the URL is printed by CodeReady Workspaces if configured, as shown in the image below.
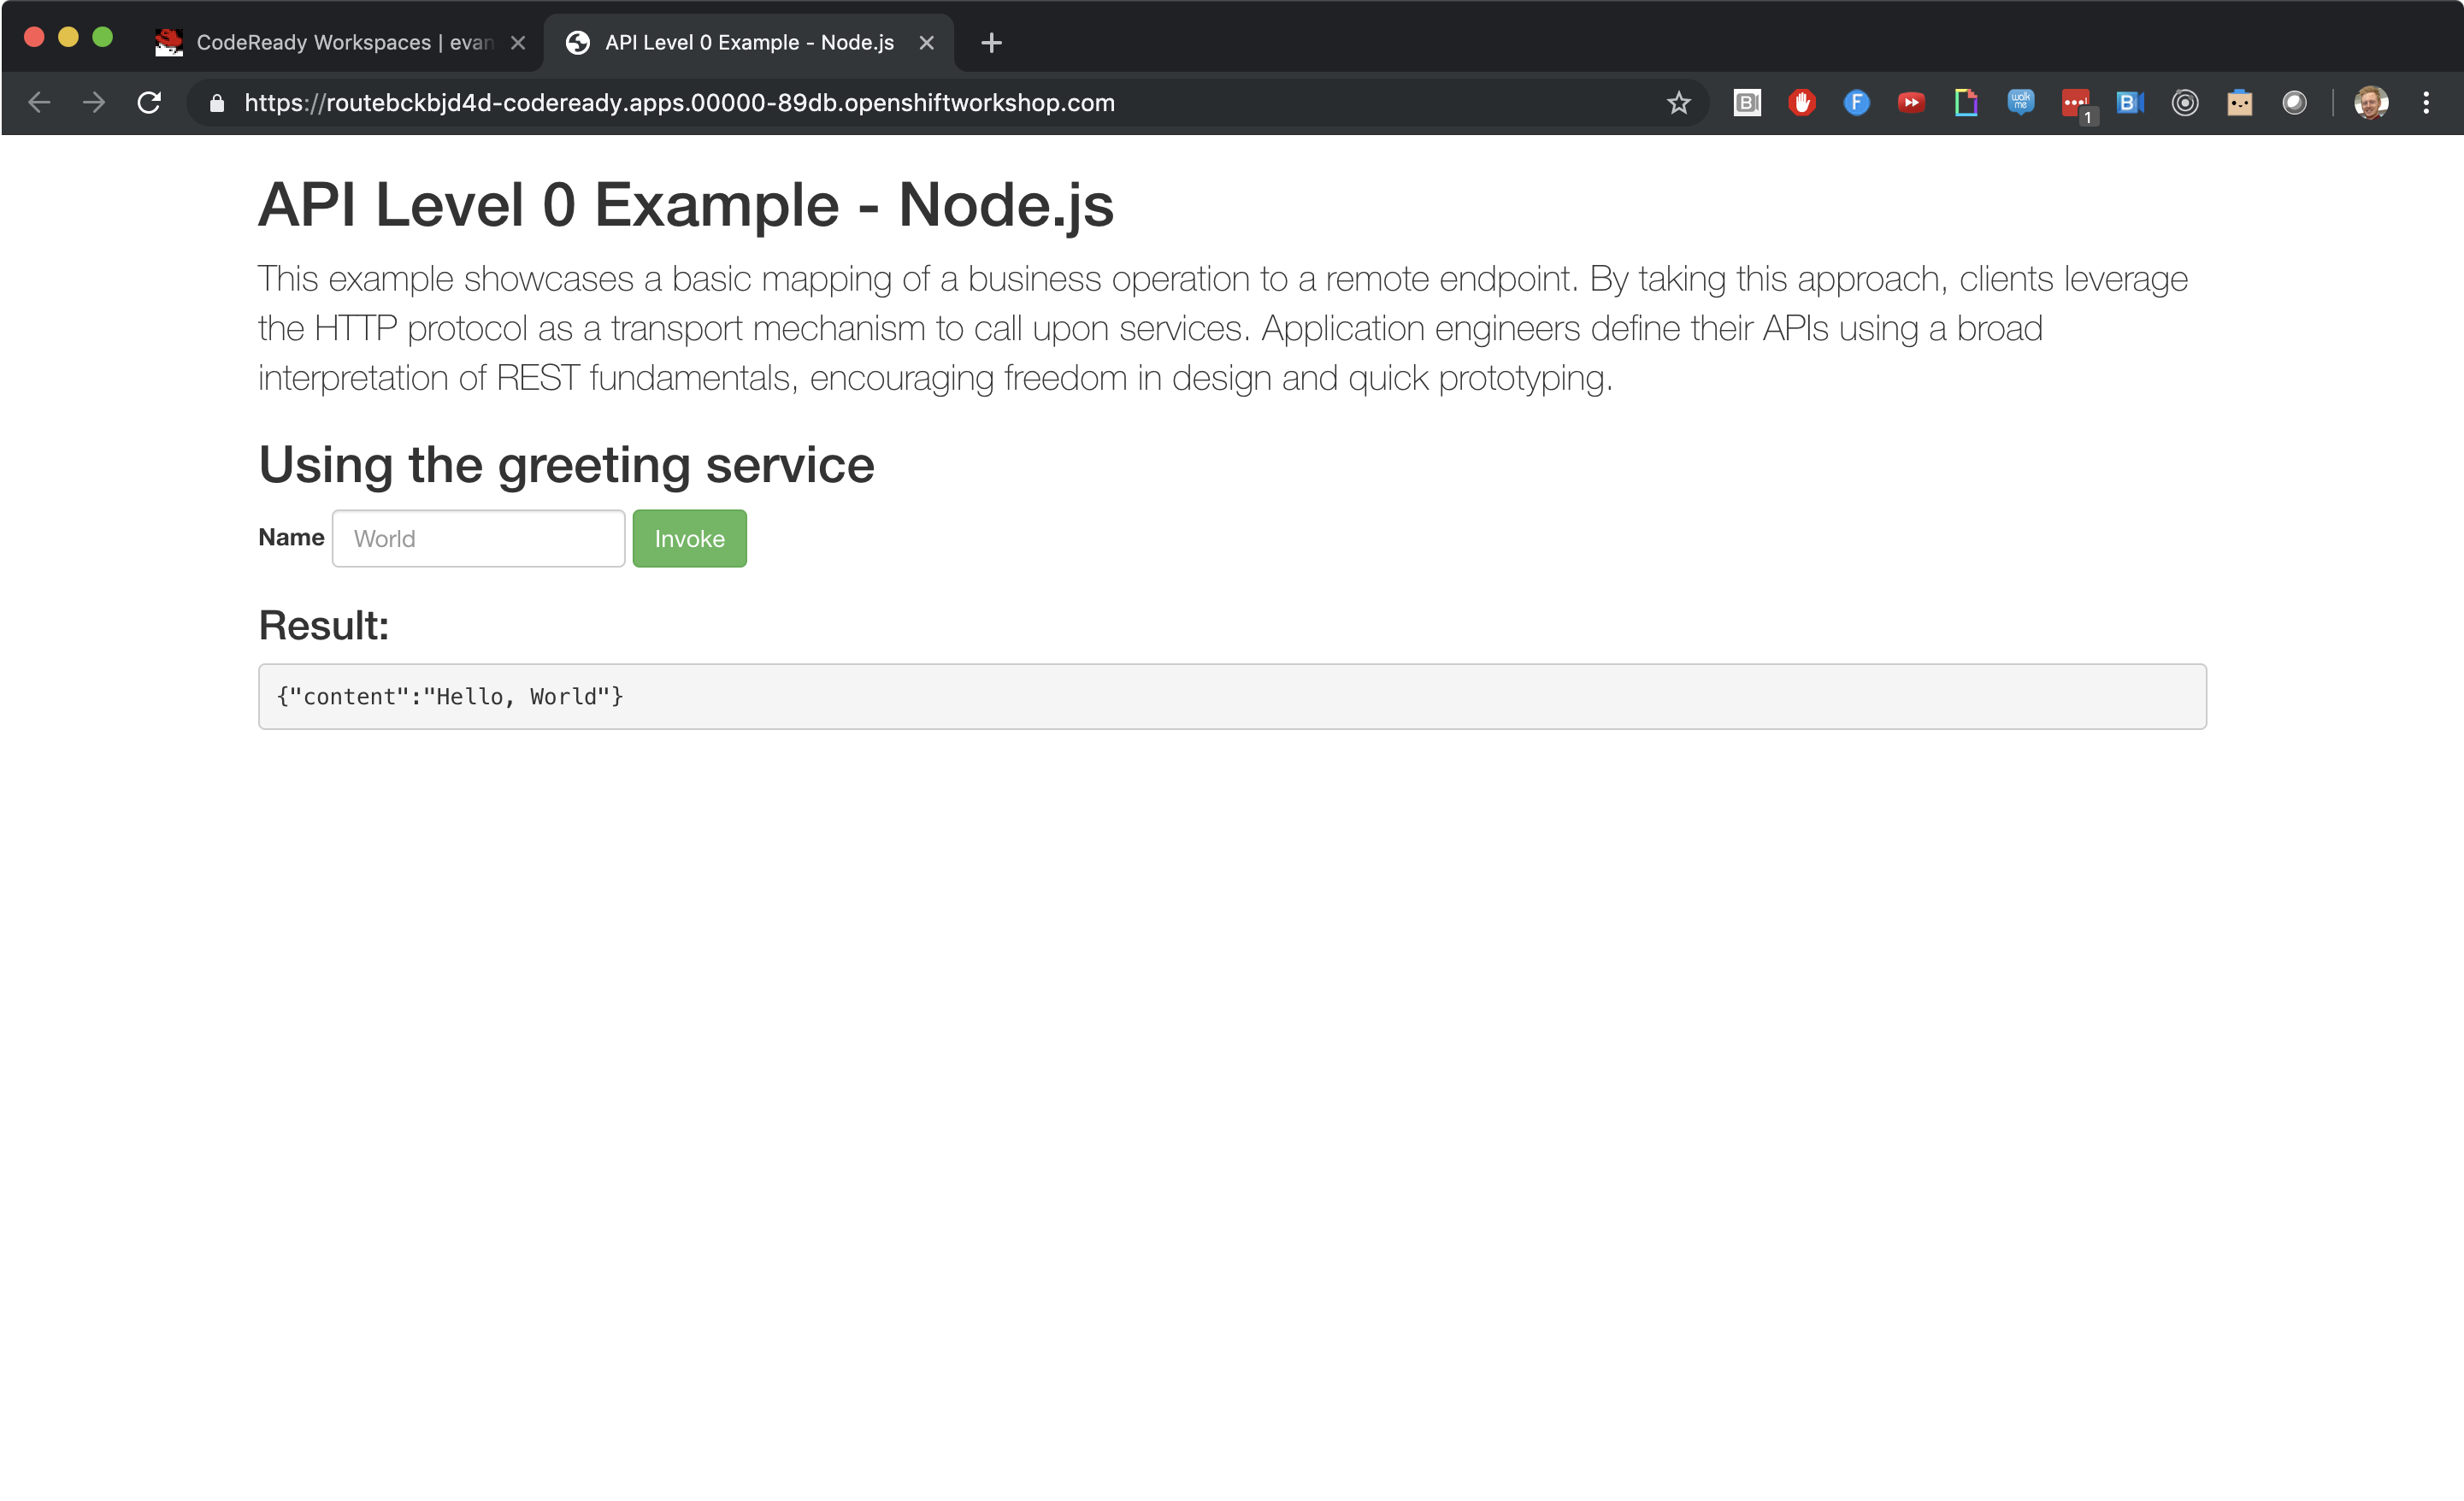
Visit the printed Preview URL and you’ll be able to view your application! You can see mine below.
This feature also works great for hybrid/progressive web applications too. For
example, try loading the aerogear/ionic-showcase
into your CodeReady Workspaces using a URL with the following format
https://$CODE_READY_HOST/f?url=https://github.com/aerogear/ionic-showcase.
Since this repository contains a .factory.json file it will setup the
workspace with some pre-existing RUN commands and Preview URL ports.