 Evan Shortiss
CodeReady Containers Everywhere and Anywhere with Tailscale
This post serves as a quick summary of a setup I’m using to access my OpenShift cluster, based on CodeReady Containers (CRC). The TLDR is that I’m using Tailscale to create a mesh network so I can access my devices anywhere, and it’s awesome! Read on to learn more about the setup.
Why CodeReady Containers?
Working at Red Hat means that I frequently need access to an OpenShift (enterprise Kubernetes) cluster. Using OpenShift via CodeReady Containers (CRC) is a great option for me, since I don’t always need a production grade cluster with multiple nodes for high-availability.
CRC isn’t perfect though; it requires 9 GB of memory and 4 CPU cores to run. My MacBook Pro can handle this, but I found that I have a better experience running CodeReady Containers by booting Fedora on my gaming PC and deploying CRC there. This way I can assign more memory to CRC, and my MacBook doesn’t burn my thighs! 🔥
Of course, running CRC on my PC means I have to deal with some mildly painful networking and DNS issues. It also means I can’t access my OpenShift cluster when I’m away from home. However, a fellow Red Hatter mentioned Tailscale to me recently, so I figured I’d try using it as a solution to these networking and DNS challenges.
Networking
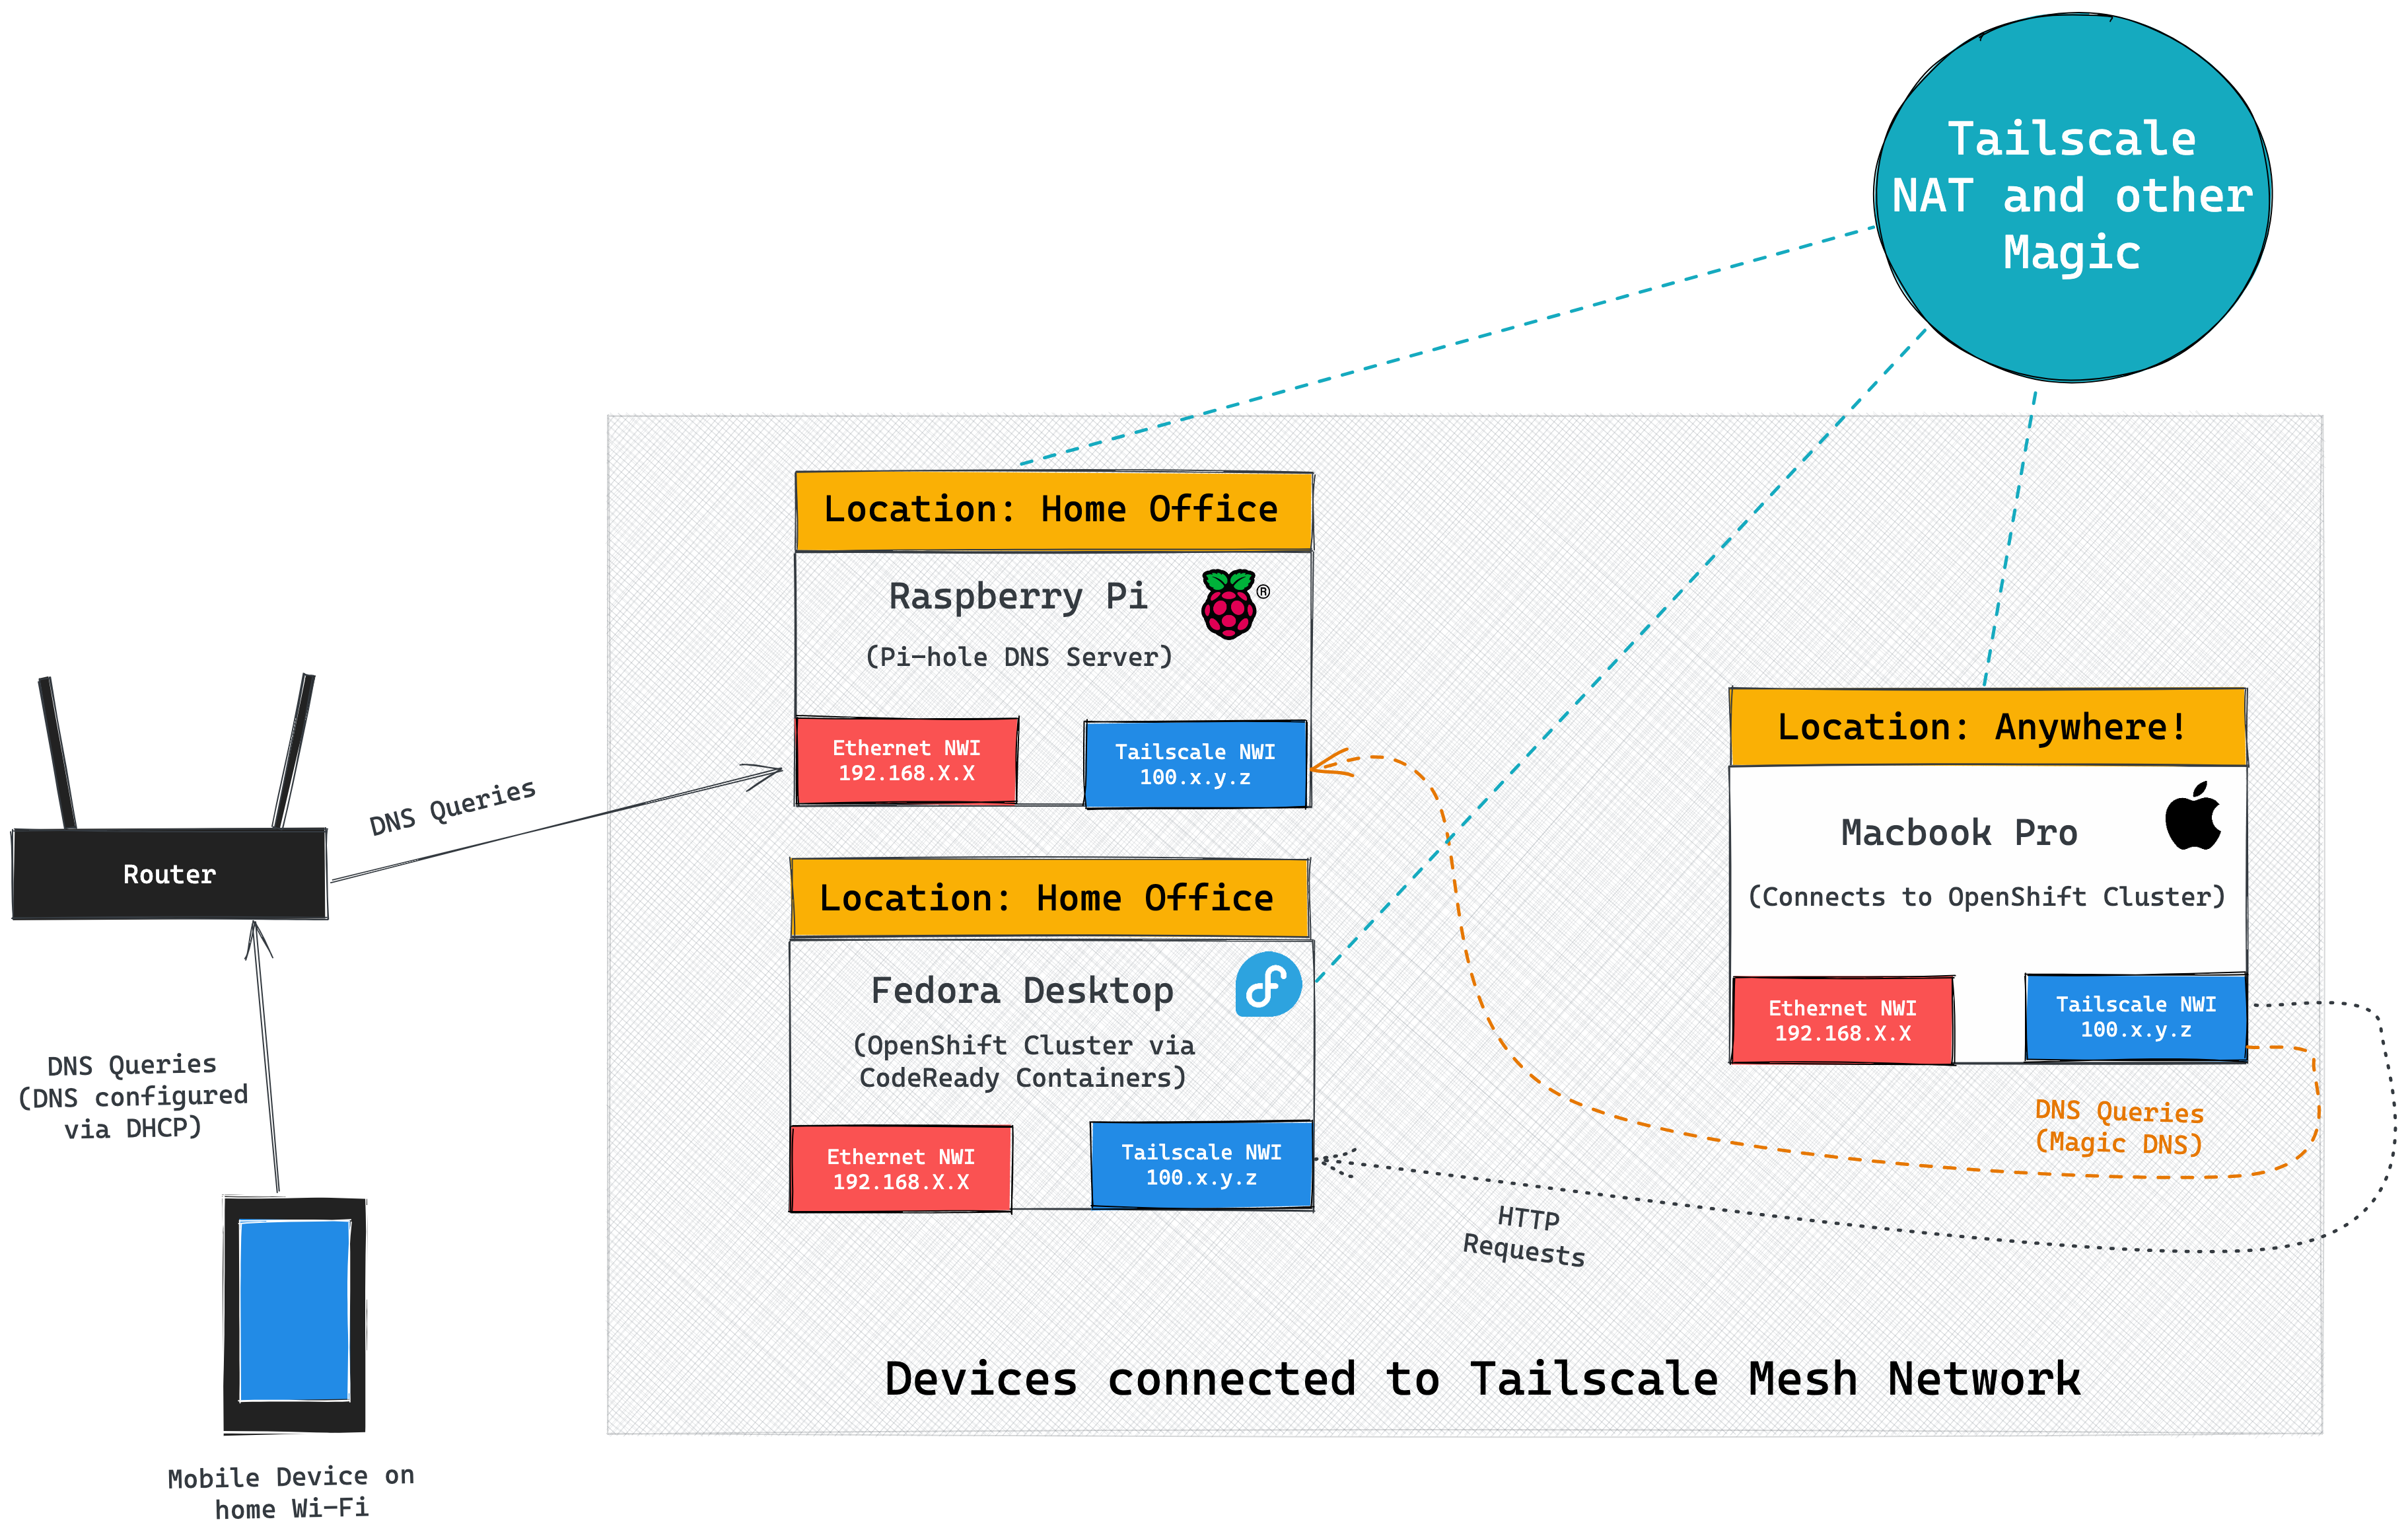
Turns out Tailscale is a perfect solution to managing a small mesh network. Tailscale provides a zero config option for connecting all of my devices via a VPN. Basically, Tailscale enables a peer-to-peer mesh of encrypted connections between registered your devices using the WireGuard protocol. This means that my MacBook can communicate with my Fedora machine in my office, even when I’m out and about.
Here’s how to get started:
- Sign-up for Tailscale (it’s free!)
- Setup the Tailscale client on your machines (that’s macOS and Fedora in my case)
- Start CRC on the Fedora PC and expose it via HAProxy (all explained in sections 3.2 and 5.4 of the CRC docs)
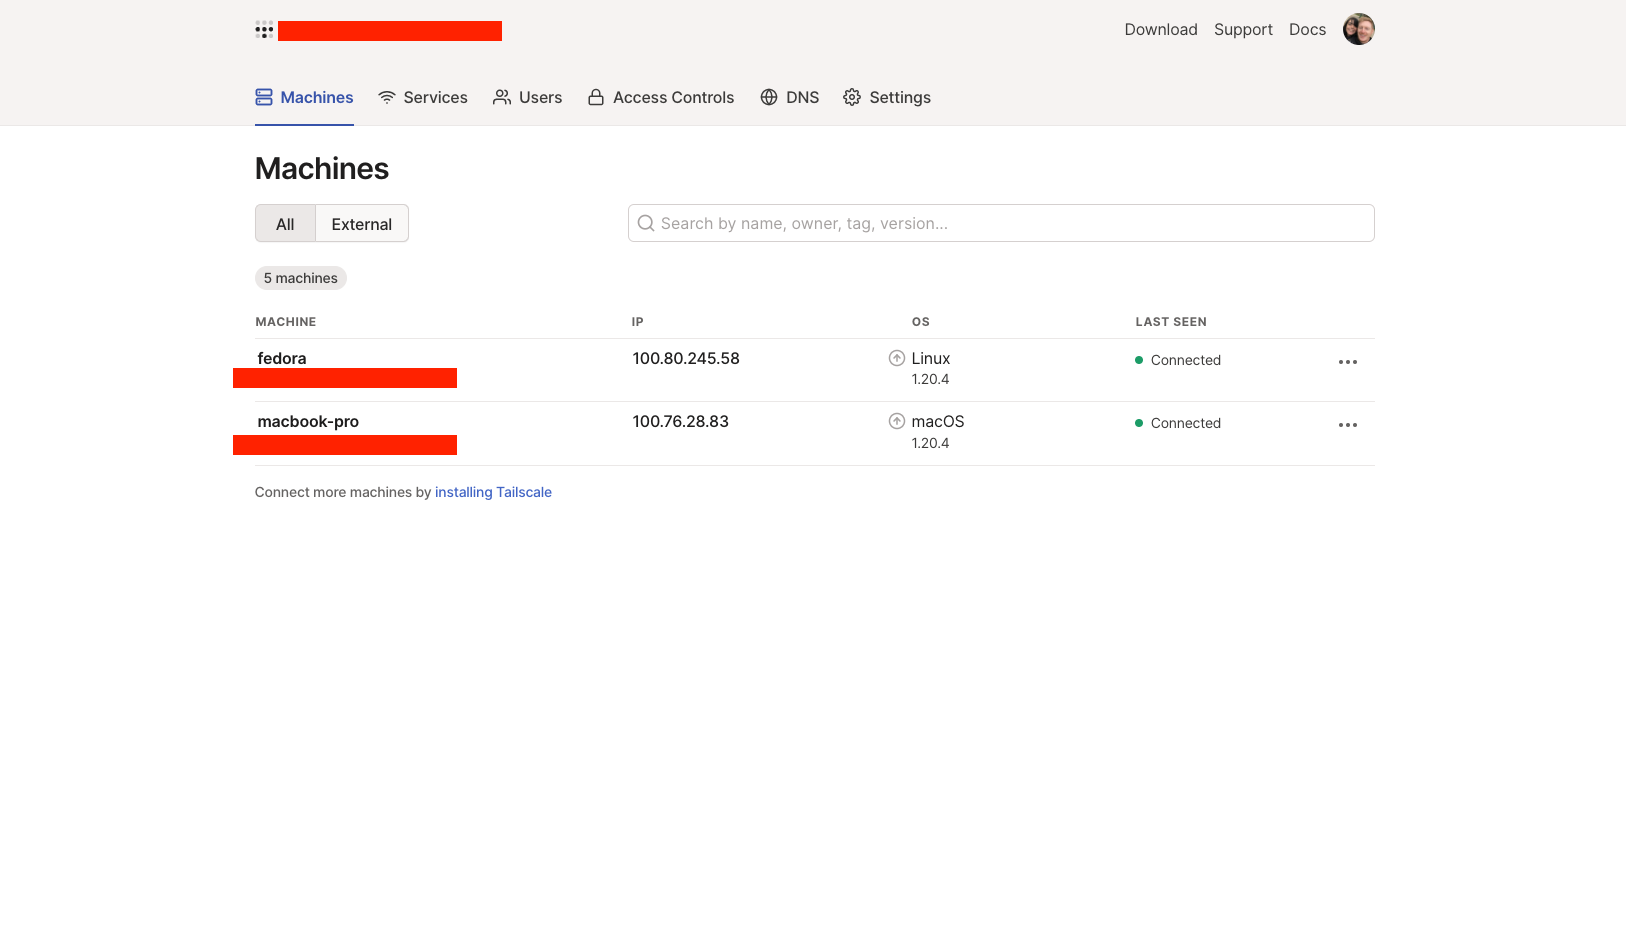
In the image below you can see both of my machines listed in the Machines
section of the Tailscale UI, so I knew they were configured correctly. I further
verified connectivity by SSH’ing from my MacBook Pro to the Fedora machine
using the Tailscale interface IP address, i.e ssh evan@100.80.245.58 (enable SSH on Fedora if you want to do this!).
DNS
The CRC documentation describes how to configure dnsmasq on your development machine to resolve the CRC addresses if you’re deploying CRC on a remote system like I am, but in my case I’m taking a different approach. Technically this approach uses dnsmasq too, but it’ll work for all devices connected to my Tailscale network thanks to Pi-hole!
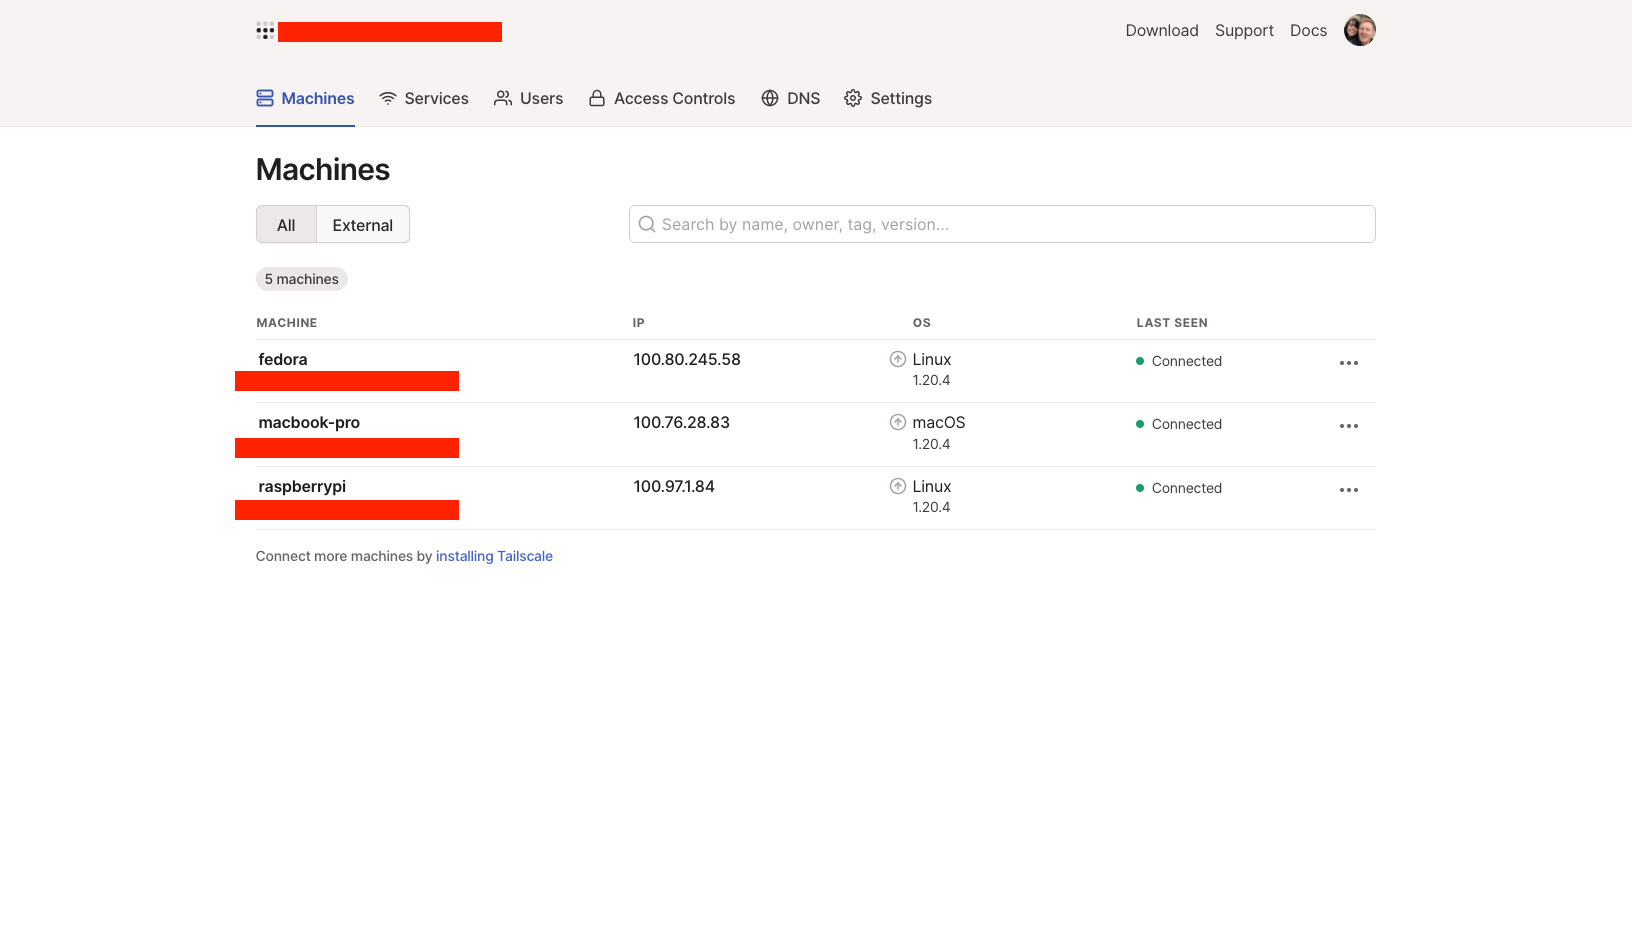
I run Pi-hole on my Raspberry Pi for DNS on my home network, since it provides a network-wide ad/tracker blocking. Pi-hole also supports configuring custom DNS and CNAME rules for your network. I went ahead and setup Tailscale on my Raspberry Pi to extend the Pi-hole capabilities to devices on my Tailscale network. You can see my Raspberry Pi in the Machines list in my Tailscale dashboard.
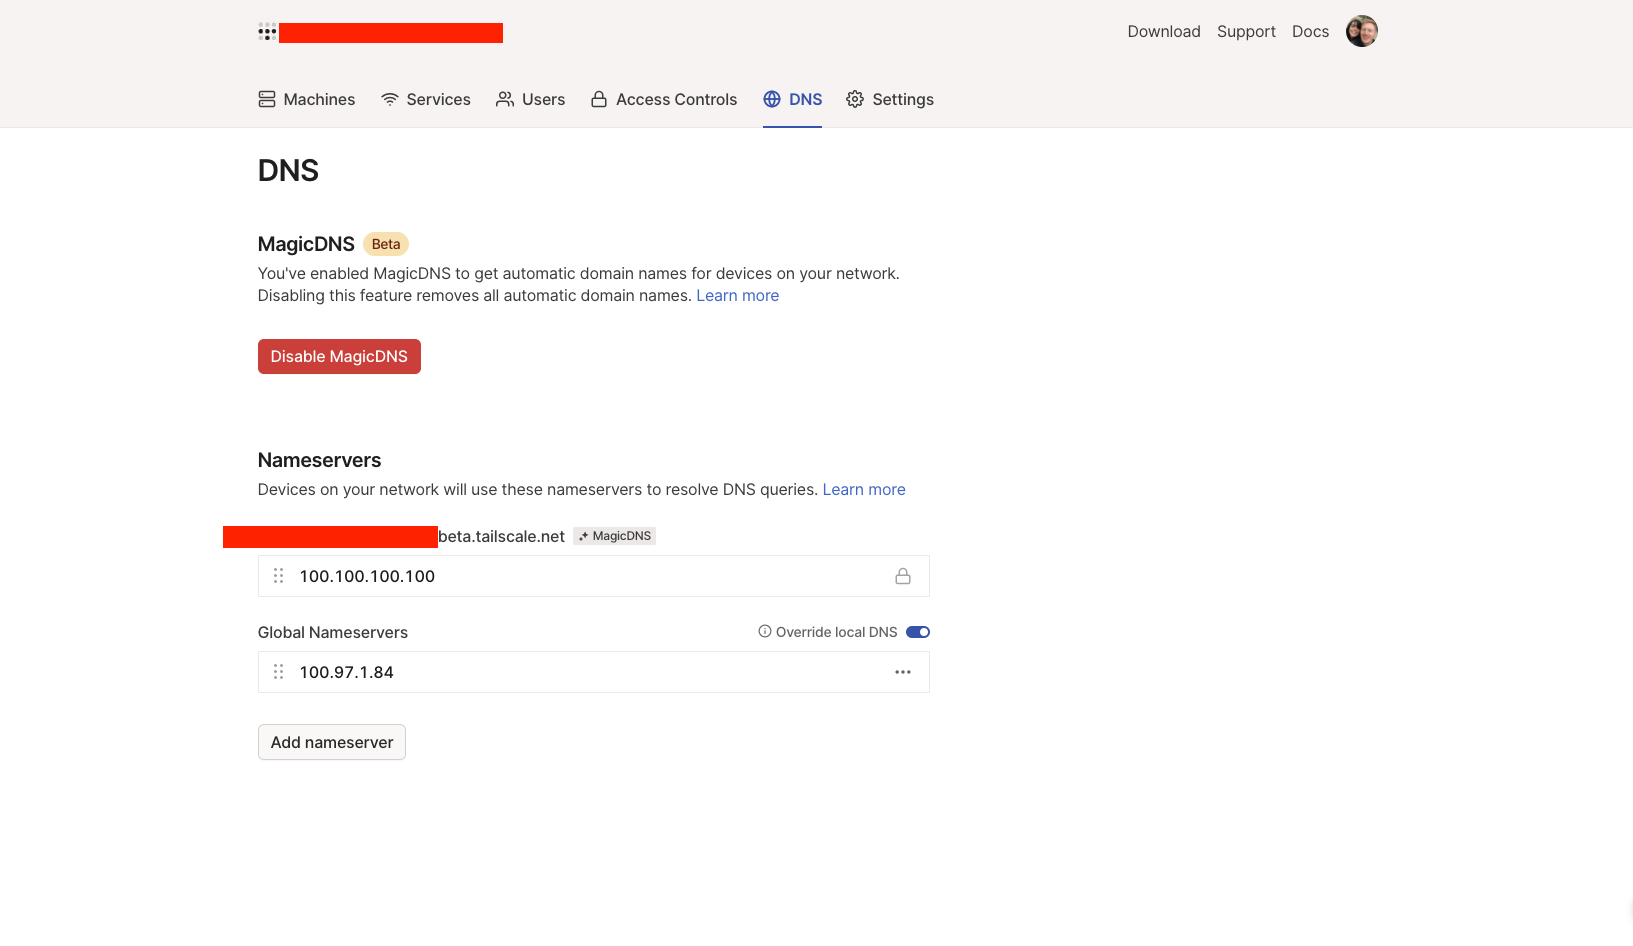
Tailscale provides a MagicDNS feature that automatically configures DNS entries for devices in my Tailscale network, so you can connect to devices using their hostname instead of their Tailscale IP address. Another neat feature that Tailscale supports is setting a global nameserver. I enabled MagicDNS and set my Raspberry Pi as the global nameserver.
The last step, was to update my Pi-hole deployment to accept a custom dnsmasq
config to handle address resolution for the CRC cluster. To do this I created a
folder named etc-dnsmasq.d on my Raspberry Pi and created a file named
02-pihole-custom.conf within that folder. I then added the following lines to
the file:
address=/apps-crc.testing/100.80.245.58
address=/api.crc.testing/100.80.245.58
After this I recreated my Pi-hole container (I run Pi-hole using Docker on my Raspberry Pi)
and made sure to pass the custom etc-dnsmasq.d folder as a volume to
docker run using -v "/home/pi/etc-dnsmasq.d/:/etc/dnsmasq.d/".
NOTE: It is possible to manually define the routes in the Pi-hole admin Local DNS Records UI, but this is tedious since you need to add wildcard routes individually, i.e Pi-hole does not support entering *.apps-crc.testing. If you prefer to use this option you need to at the very least define api.crc.testing, console-openshift-console.apps-crc.testing, and oauth-openshift.apps-crc.testing to use the OpenShift cluster. Any OpenShift Routes you create for your applications will need to be added to the Pi-hole too, e.g my-java-app.apps-crc.testing. Personally, I prefer the dnsmasq config option, since it’s one and done!
Verification
At this point, everything was in place. I was able to navigate to https://console-openshift-console.apps-crc.testing/
in the web browser on my MacBook Pro, accept the self-signed TLS certificate
warnings, and access my OpenShift cluster powered by CodeReady Containers!
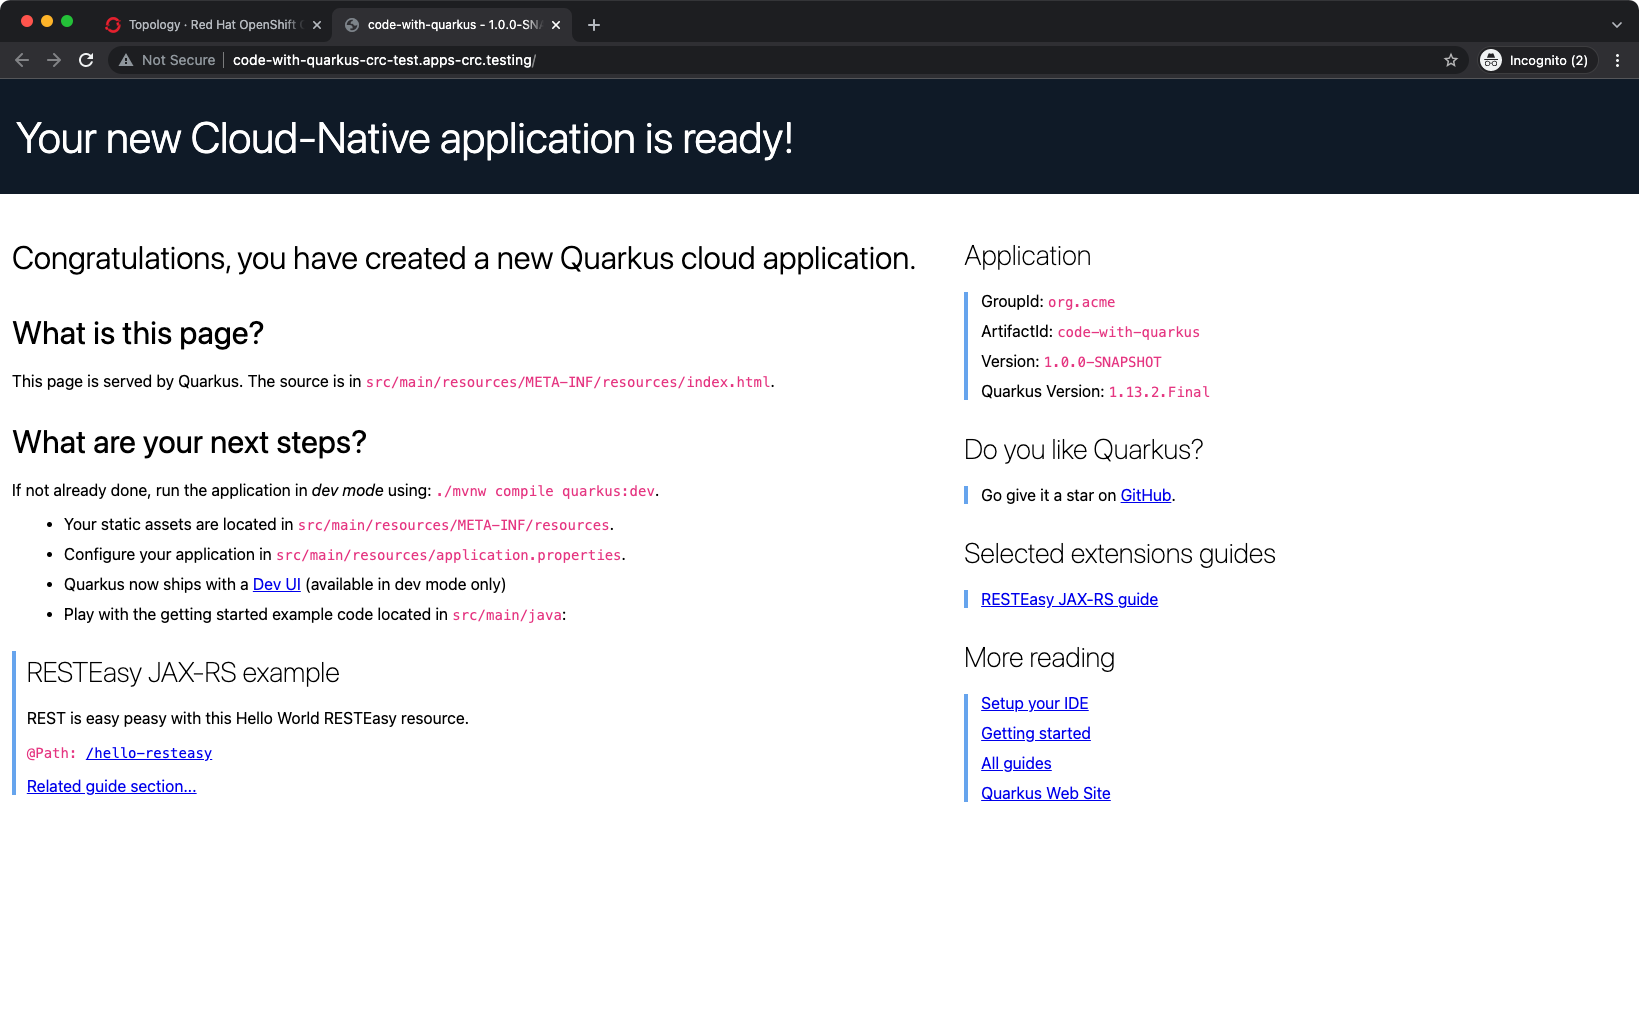
I created a Project and deployed a sample Quarkus application. This created a HTTP
Route that I was able to access and use to verify that wildcard domains such as
*.apps-crc.testing/ were resolved correctly too. Now I can access my OpenShift
cluster running on my Fedora PC from anywhere!