 Evan Shortiss
Deploying TypeScript Applications on OpenShift Online
Recently I wrote a Node.js application using TypeScript and ended up deploying it in Red Hat’s OpenShift Online environment. In this blogpost I’ll walk through how I deployed it so you can learn to do the same!
If you’re not familiar with OpenShift then a quick TLDR; summary is that it can be thought of as a PaaS based on Kubernetes and Linux Container technologies that enables application developers and enterprises to easily deploy and scale modern application architectures. You should check out the OpenShift website if you’d like to know more.
This post is aimed at application developers and covers the concepts of using OpenShift from that perspective. If you’re looking for a deeper dive into OpenShift’s architecture and containers and Kubernetes technologies this isn’t the blogpost you’re looking for.

Here you’ll find a guide and high-level explanation that will get you kickstarted on your journey to using these technologies to deploy awesome applications using containers. Basic knowledge of containers, specifically Docker, will be helpful in following along, but isn’t essential.
Sample Code
For the purpose of this blogpost we’re going to use this code on GitHub, so go ahead and fork it to your own GitHub account before going any further. We’ll come back to it in subsequent sections of this post.
OpenShift Online Account Setup
To get an OpenShift Online instance you need to sign up at manage.openshift.com and choose to provision a free tier instance. This provides plenty of resources for running simple Node.js applications like the example we’re using for this post.
Deploying on OpenShift Online
Assuming you’ve registered and your OpenShift Online instance has been provisioned, you can now login and view the OpenShift Catalog. From here you can see the various base images available that you can use to get started. Since our sample TypeScript application will be run in a Node.js environment we’ll be using the Node.js entry in the Catalog, so click it.
This loads up a form where you’ll need to enter some details to uniquely
identify your project and application. You’ll want to select Node.js v6 since
the sample code we’re using is tested with that version. In the repository
field paste in the URL to your fork of the sample code - it should look
something like this
https://github.com/YOUR_GITHUB_USERNAME/openshift-typescript-example.git
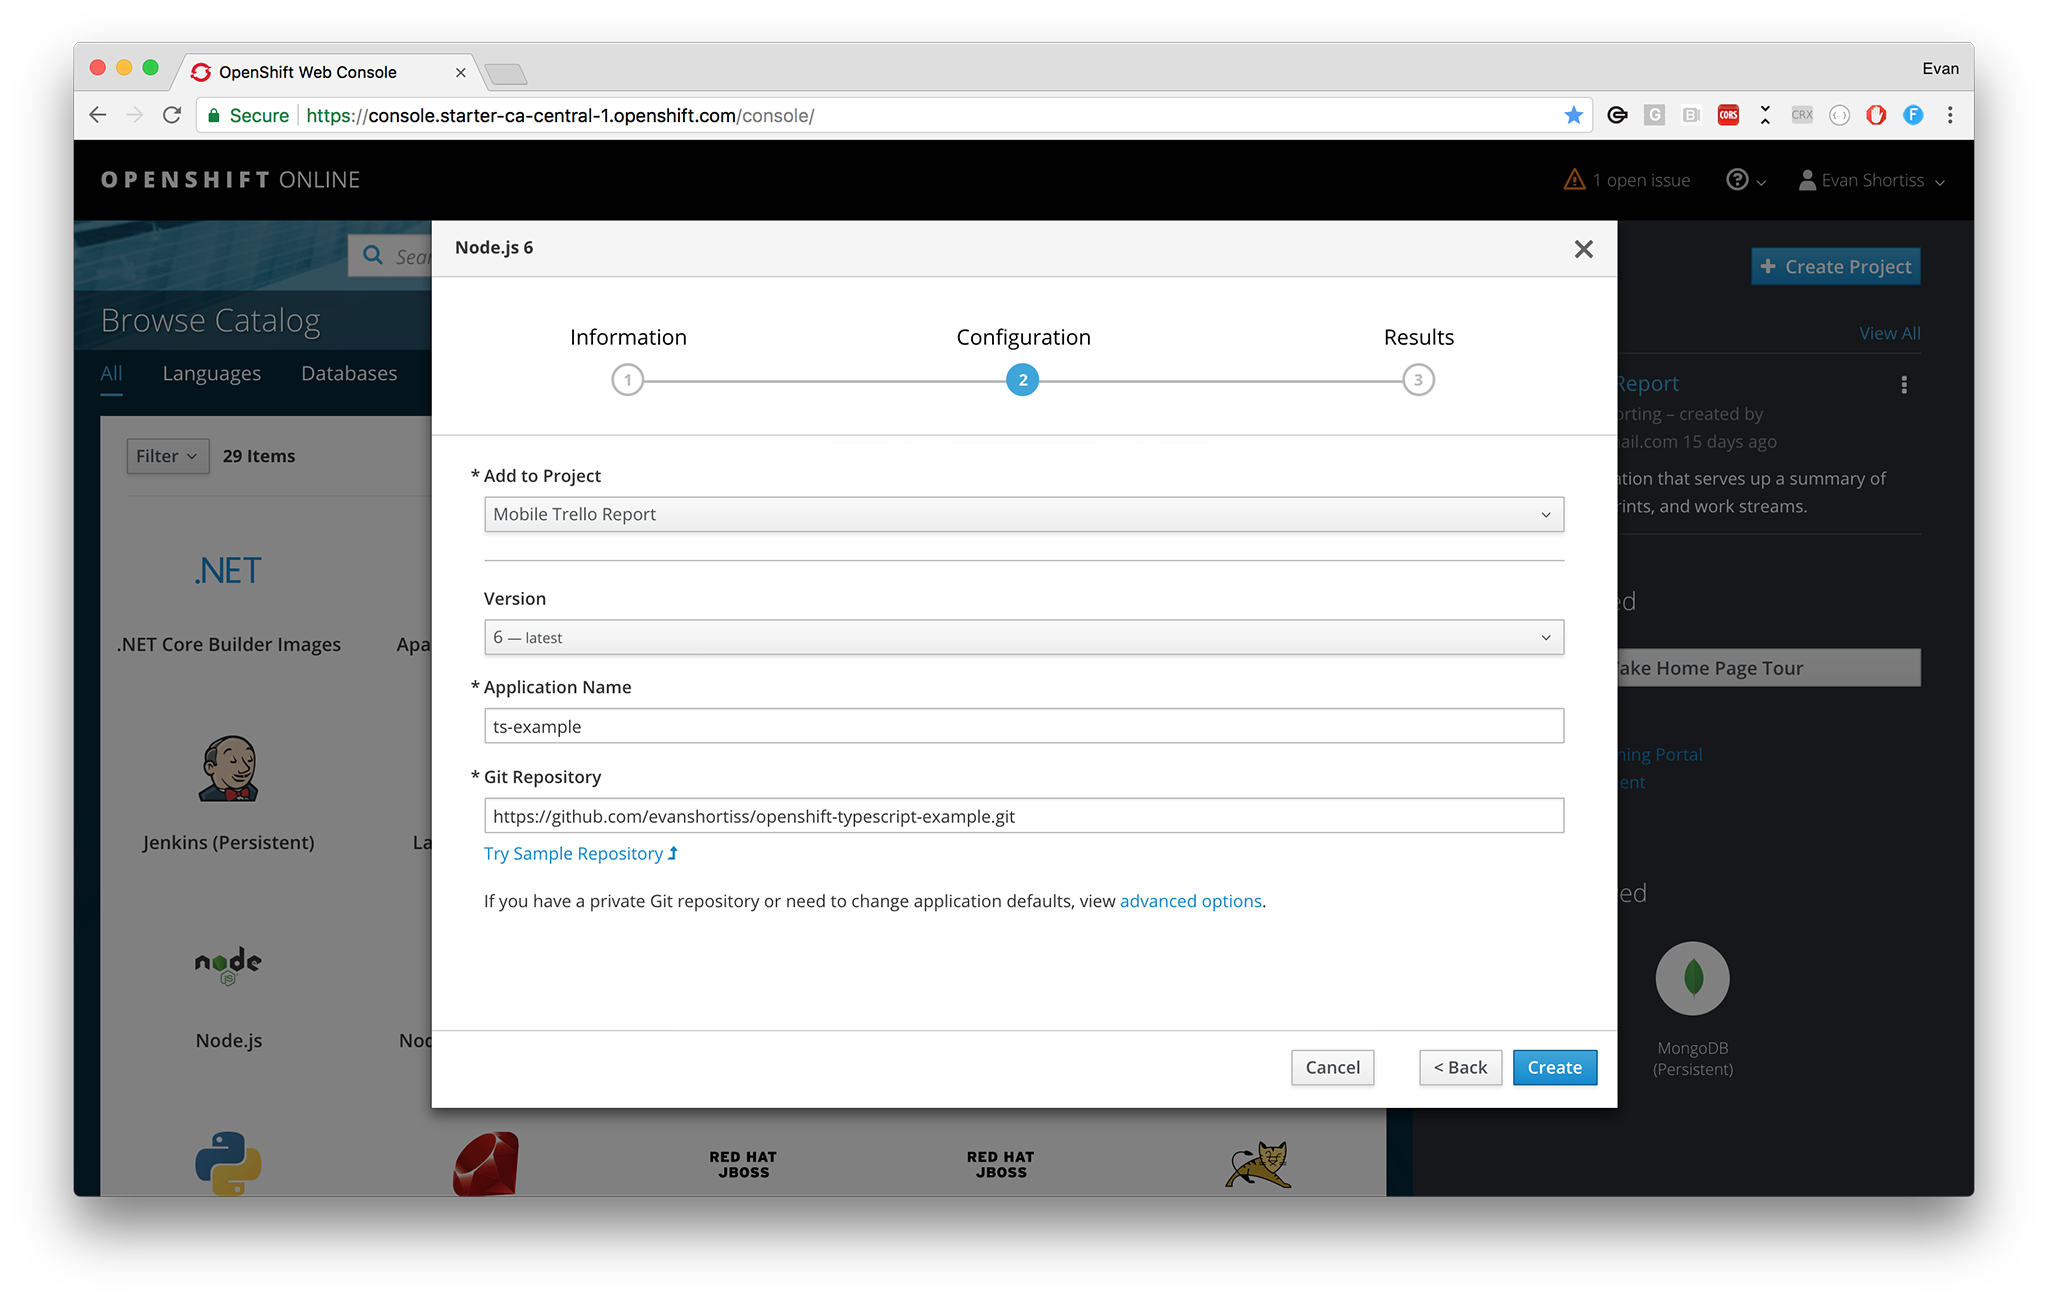
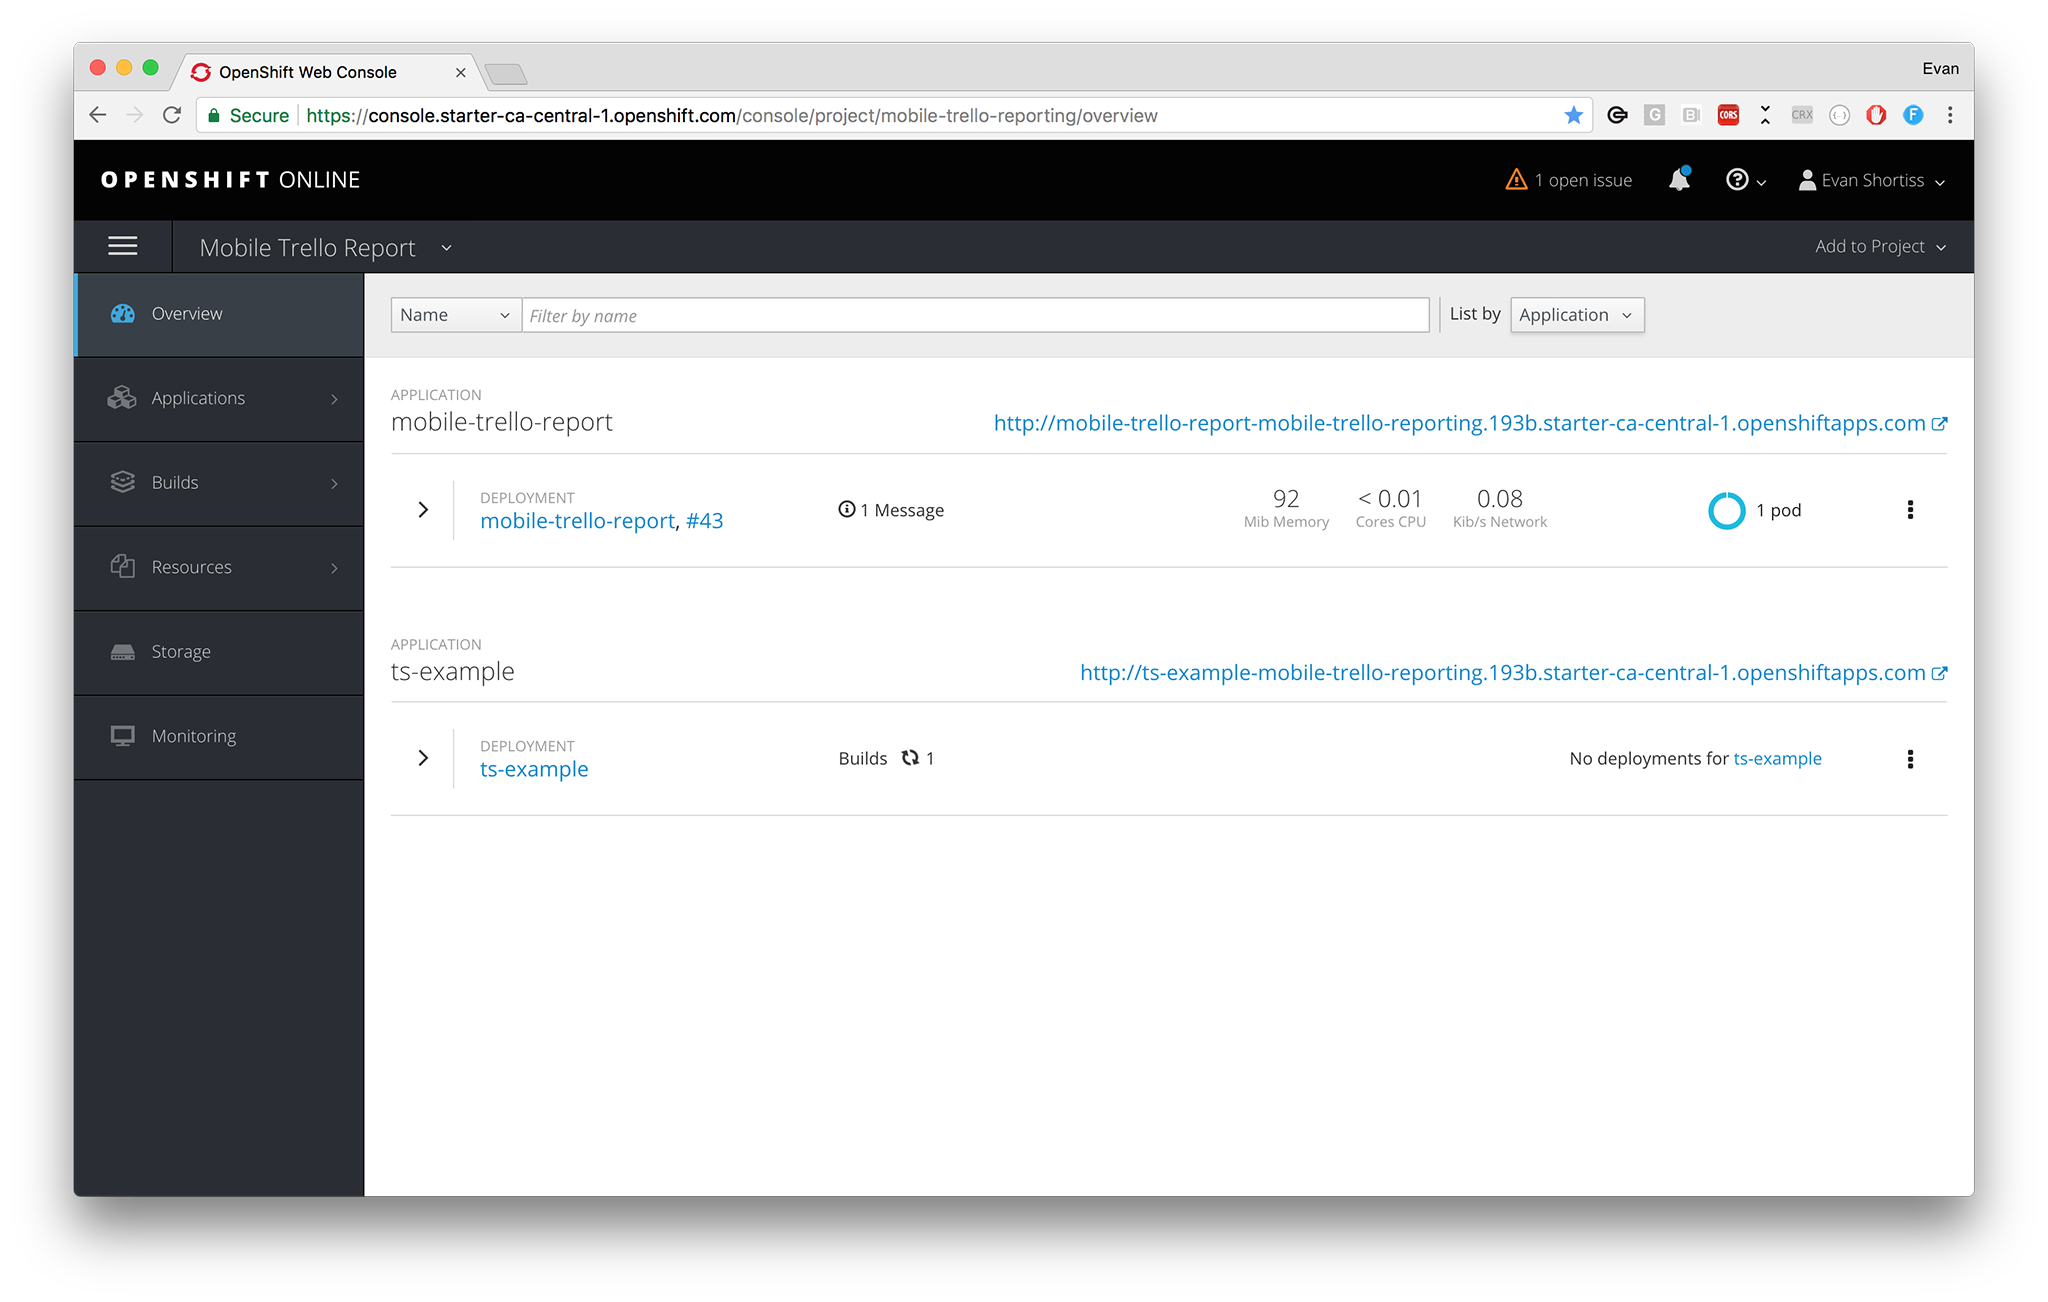
Once you entered everything click “Create”. If everything goes well you’ll be told your application was created and given a link to the Project Overview. You can see my Project Overview below showing my newly created “ts-example” project is being built.
Navigate to the builds screen using the side navigation menu Builds => Builds.
From here you can select the build that’s in progress and view the logs of the
source-to-image (s2i) process. This process packages our code for deployment,
and we’ll discuss it in more detail below. It should reflect that node modules
are being installed using npm, then it will push the generated image to the
internal OpenShift registry with logs like so at the end of the build:
Pushing image 172.30.17.124:5000/your-project-name/ts-example:latest ...
Pushed 0/6 layers, 1% complete
Pushed 1/6 layers, 23% complete
Pushed 2/6 layers, 45% complete
Pushed 3/6 layers, 61% complete
Pushed 4/6 layers, 72% complete
Pushed 5/6 layers, 100% complete
Pushed 6/6 layers, 100% complete
Push successful
Once the build is complete you can navigate to Applications => Deployments
using the side navigation. From here you will see you application is being
deployed, or it might already be deployed by the time the screen loads! Choose
the View Logs option and you should see a log entry stating that the server
has started listening on port 8080.
That’s it, we’ve successfully deployed our TypeScript application on OpenShift.
Interacting with Our Application
This is all great. Our source code was plucked from GitHub, built into an image and then deployed, but how do we actually hit a public endpoint? OpenShift is kind enough to create an entry in it’s Router for us so our application has a public URL.
To find the URL you can navigate via the side menu to Applications => Routes.
From this screen you can open the public route of your application and have it
return a “Hello, World” JSON response. You can also add a querystring to the end
of the URL to have it echo back a name like so
http://project-name.cluster.openshiftapps.com/?name=Evan
Plz. Explain.
It’s great that it was so easy to get our TypeScript application up and running on OpenShift, but what did we actually do? How did all of this work?

Let’s go over the concepts without getting into excessive detail:
- We created a Project in OpenShift.
- We created an Application based on OpenShift’s Node.js v6 source-to-image process within our Project. Strictly speaking we created an Image Stream, Deployment Config, Route, and the other resources that comprise an Application.
- OpenShift initiated a Build that cloned our code from GitHub and used the s2i process to create a Docker image.
- After the Build finished, OpenShift pushed the resulting image to it’s internal image registry.
- Upon pushing the new image to its registry OpenShift triggered a new Deployment.
- Each Application has a Deployment Config, or “dc” for short, can be configured to use different deployment strategies and different images.
- Our Deployment is configured to watch our
ts-exampleImage Stream. Whenever a new image is pushed to this stream a deployment occurs automatically. - By default the Deployment is a “Rolling” type. This means OpenShift created a new Pod with a running instance of our application container before shutting down any previously running instances. Since this was our first deployment we had no previous versions of our application deployed, but if we had then the rolling deployment would have ensured there was no downtime as a result of the deployment - pretty neat, right? You can read about Pods and Services here.
- An entry in the Router was created for our project.
- Router entries provide an ingress point for HTTP requests.
- When a request is received Router will determine which application, if any, that the request should be routed to.
- For our application the Router mapped port 8080 to the exposed hostname.
Source-to-Image (s2i) Overview
One of the main goals of containerisation is to create standardised environments
in which our code is deployed. For example, running our sample codebase locally
is as easy as cloning it locally and running npm install && npm start, right?
You certainly could do this, but you might be developing on macOS while the code
will be deployed in a RHEL environment meaning new issues could surface in the
deployed code that can’t easily be replicated locally.
Using the source-to-image process enables us to easily create standardised container images to run our application code. OpenShift uses this technique to build and deploy an image containing the source code from our GitHub repository. What’s awesome is that this same technique can be utilised when testing your application locally too.
An overview of the OpenShift Node.js builder image (the one you clicked in the OpenShift catalog earlier) is available here, but all that we need to know for the purposes of this blogpost is that it will:
- Declare that the built image exposes our API on port 8080
- Run
npm installto fetch application dependencies - Start our Node.js program using the
npm startconvention - Output a built Docker container image containing our application
npm start is shorthand for npm run start, a command that invokes the
scripts.start entry in your package.json. You can read the documentation for
the command here. Our sample application has
the start entry set to "node server.js | pino". This will start our
program and pipe output to pino so our logs are printed in a prettier format.
You’ll also notice we have a postinstall script; this is super important since
it will compile our TypeScript files to JavaScript by executing tsc after the
s2i process has run npm install for us and ultimately package our compiled
JavaScript into the created image.
The README.md in the sample code describes how you can use the s2i tool
locally to create an image and run it, so you should do that now to get an idea
of how this process operates. Here are the logs from my version running locally.
$ docker logs openshift-ts
Environment:
	DEV_MODE=false
	NODE_ENV=production
	DEBUG_PORT=5858
Launching via npm...
npm info it worked if it ends with ok
npm info using npm@3.10.9
npm info using node@v6.11.3
npm info lifecycle openshift-ts@0.1.0~prestart: openshift-ts@0.1.0
npm info lifecycle openshift-ts@0.1.0~start: openshift-ts@0.1.0

> openshift-ts@0.1.0 start /opt/app-root/src
> node src/server.js | pino

[2018-02-09T19:52:33.701Z] INFO (25 on 53cc2b5df877): server listening on port 8080
[2018-02-09T19:52:35.721Z] DEBUG (25 on 53cc2b5df877): returing message "Dia dhuit, World!"
Updating our Application
Now that we have a high-level understanding of how OpenShift source-to-image
deployments work and have our initial codebase deployed we’d like to update
our application, right? Thankfully OpenShift makes this easy since it supports
webhooks. Navigate to Builds => Builds and click your application’s name. You
should be shown a screen that has a configuration tab as shown below.
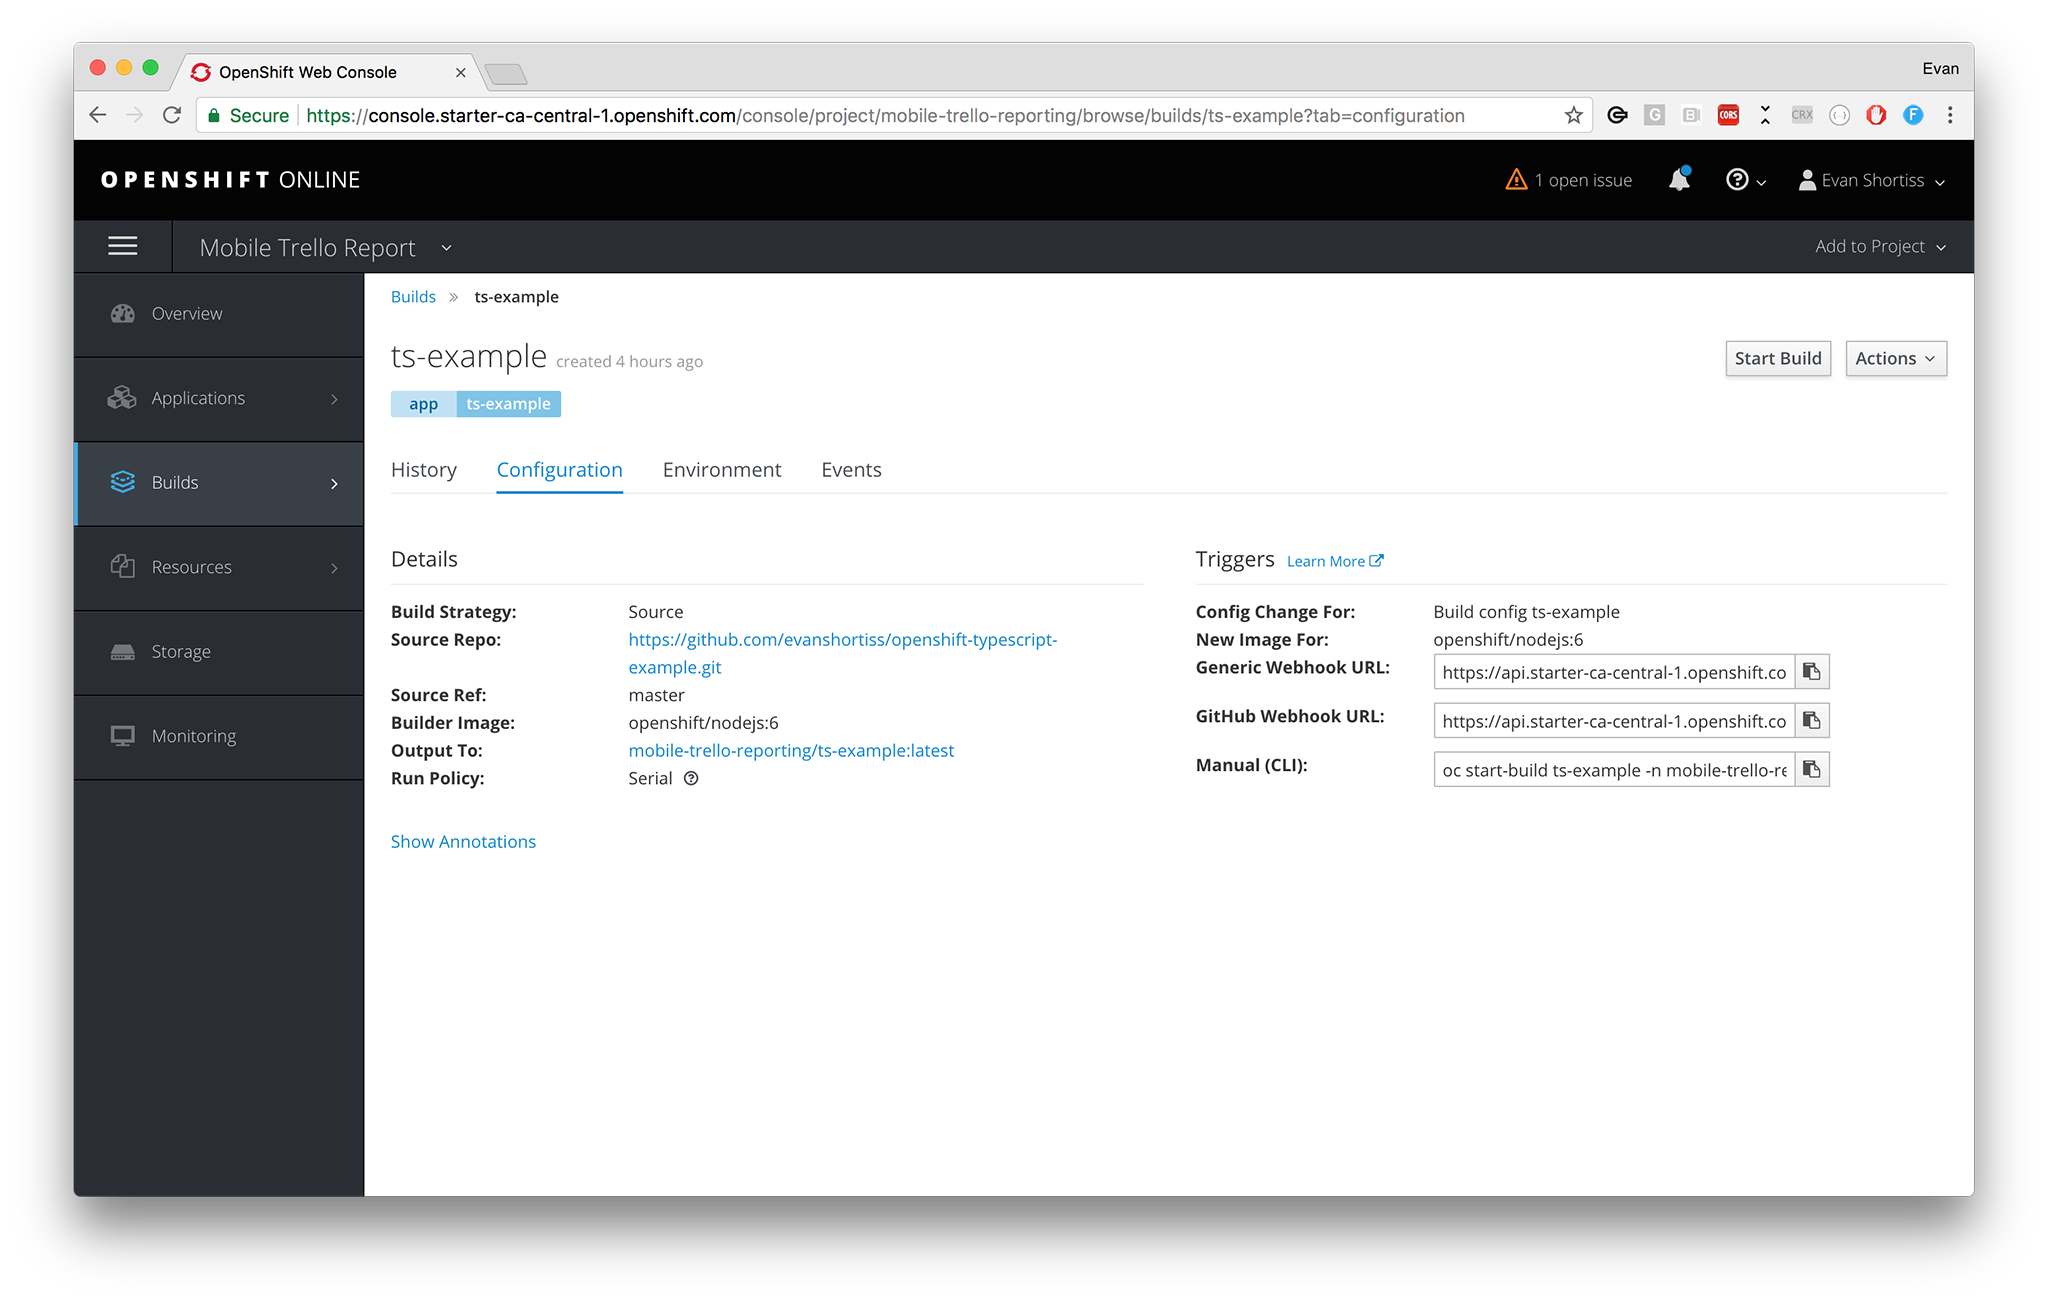
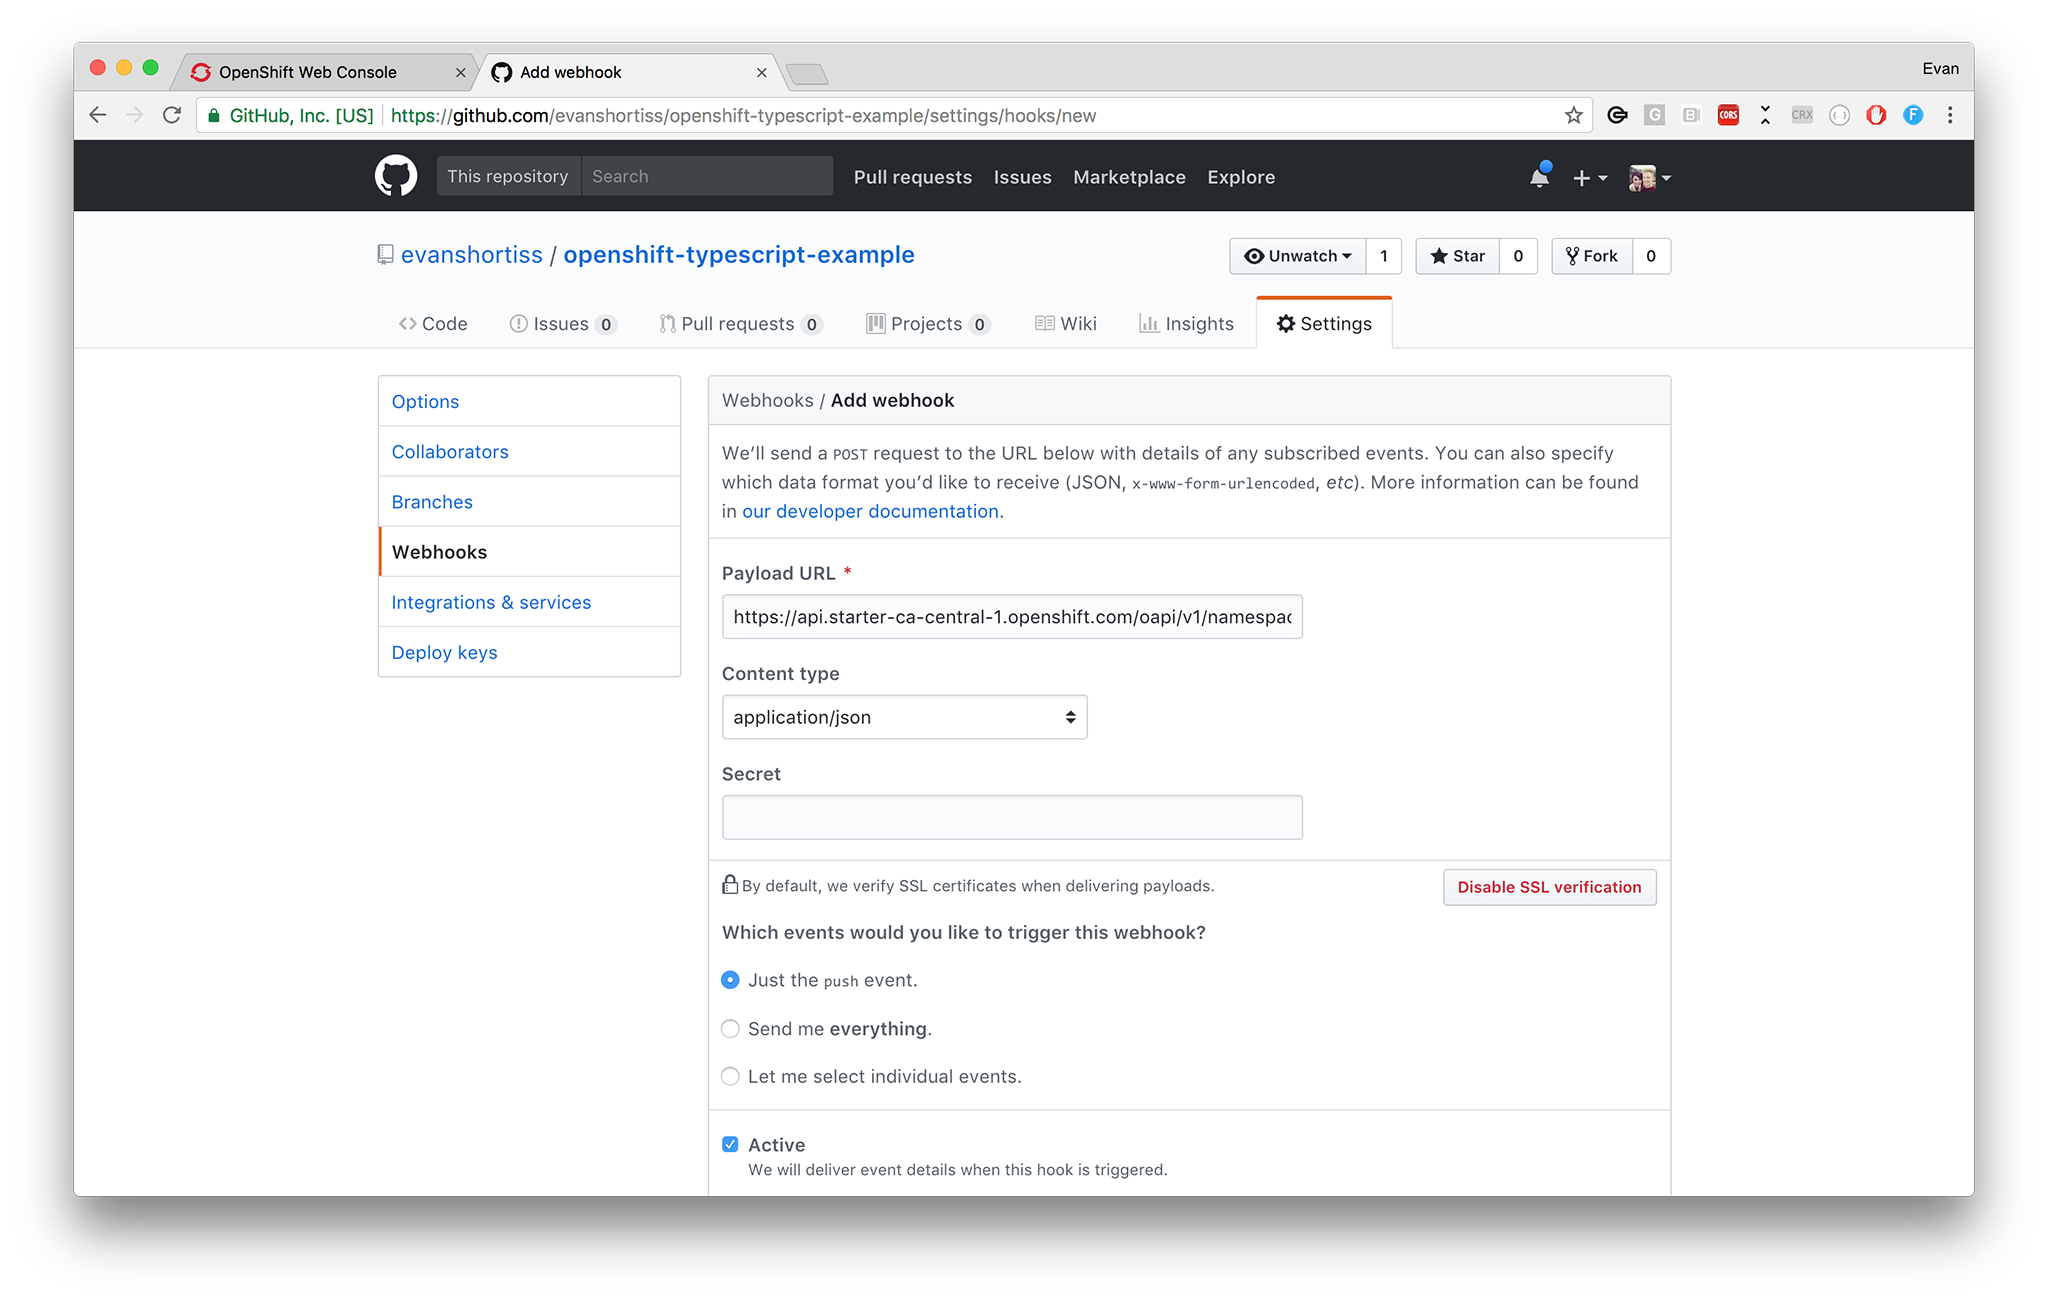
On this screen there’s a GitHub Webhook URL that we can add to our repository in GitHub. Copy the URL to the clipboard and head to your fork of the sample code. Go to the repository Settings screen and choose the Webhooks section on the left, then click “Add Webhook” in the top right corner of the screen. A dialog should appear. Paste the URL you copied into the “Payload URL” input and set the “Content-Type” to “application/json” as shown.
Now that the webhook is configured our application will redeploy whenever we
push new code. Open an editor and change the src/server.ts file to respond
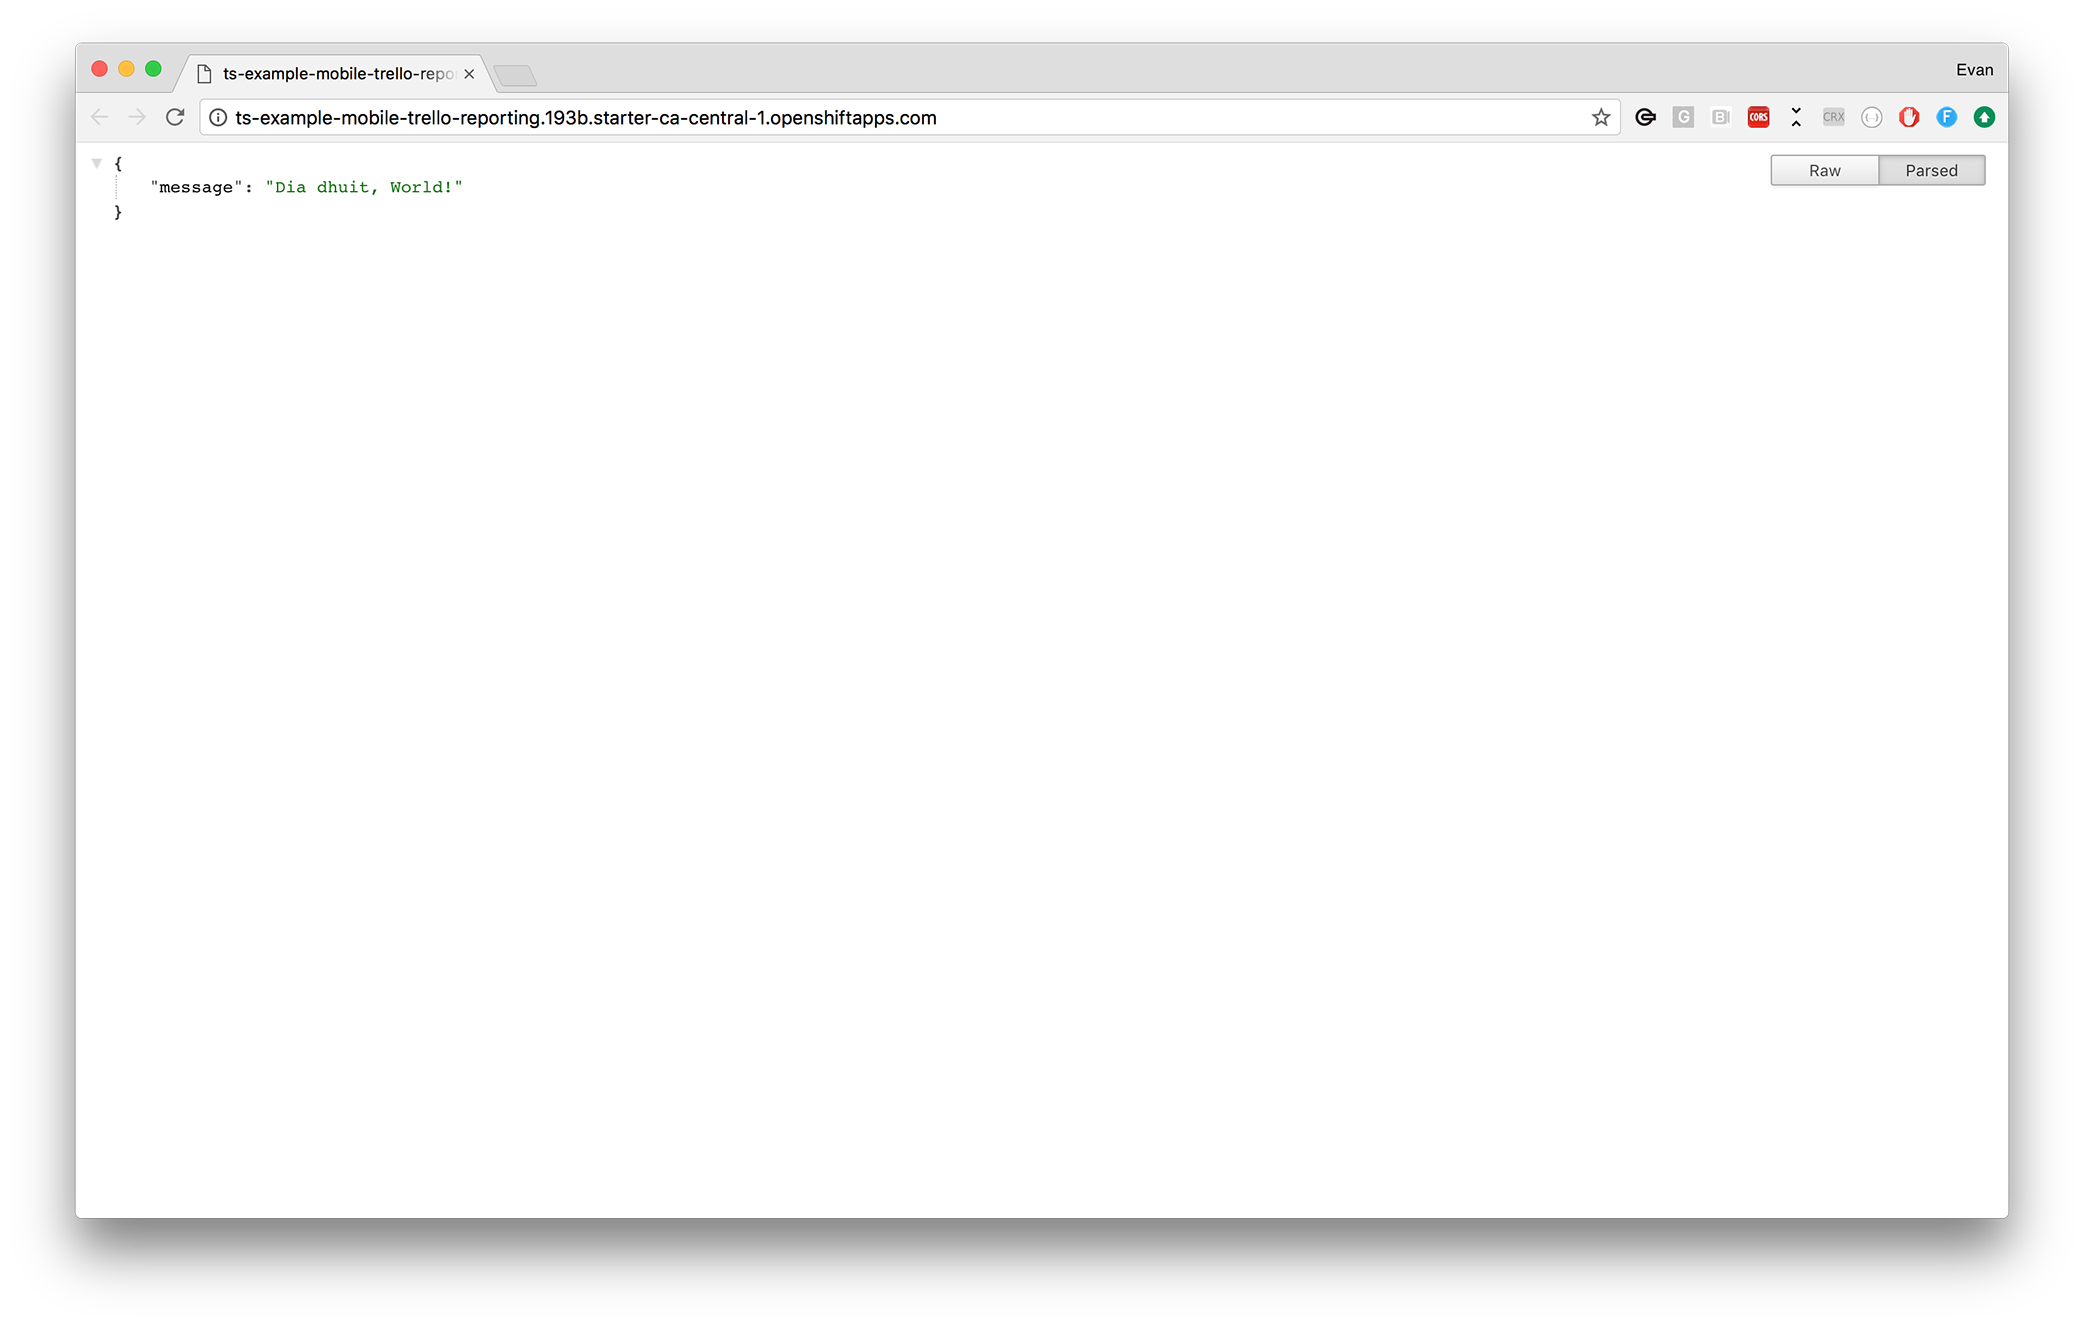
with the word for “Hello” in another language. I’ll use the Irish (Gaelic)
phrase “Dia dhuit”.
The route in server.ts should look something like this now:
app.get('/', (req, res) => {
  const name = req.query.name || 'World'

  // Change "dia dhuit" to whatever you like!
  const message = `Dia dhuit, ${name}!`

  log.debug(`returing message "${message}"`)

  res.json({
    message
  })
})
Once you’ve done this commit and push the new code:
$ git add .
$ git commit -m "change greeting to use irish phrase"
$ git push origin master
Within a few moments of the push the Builds screen in OpenShift will be showing that a new build started a “few seconds ago” like so.
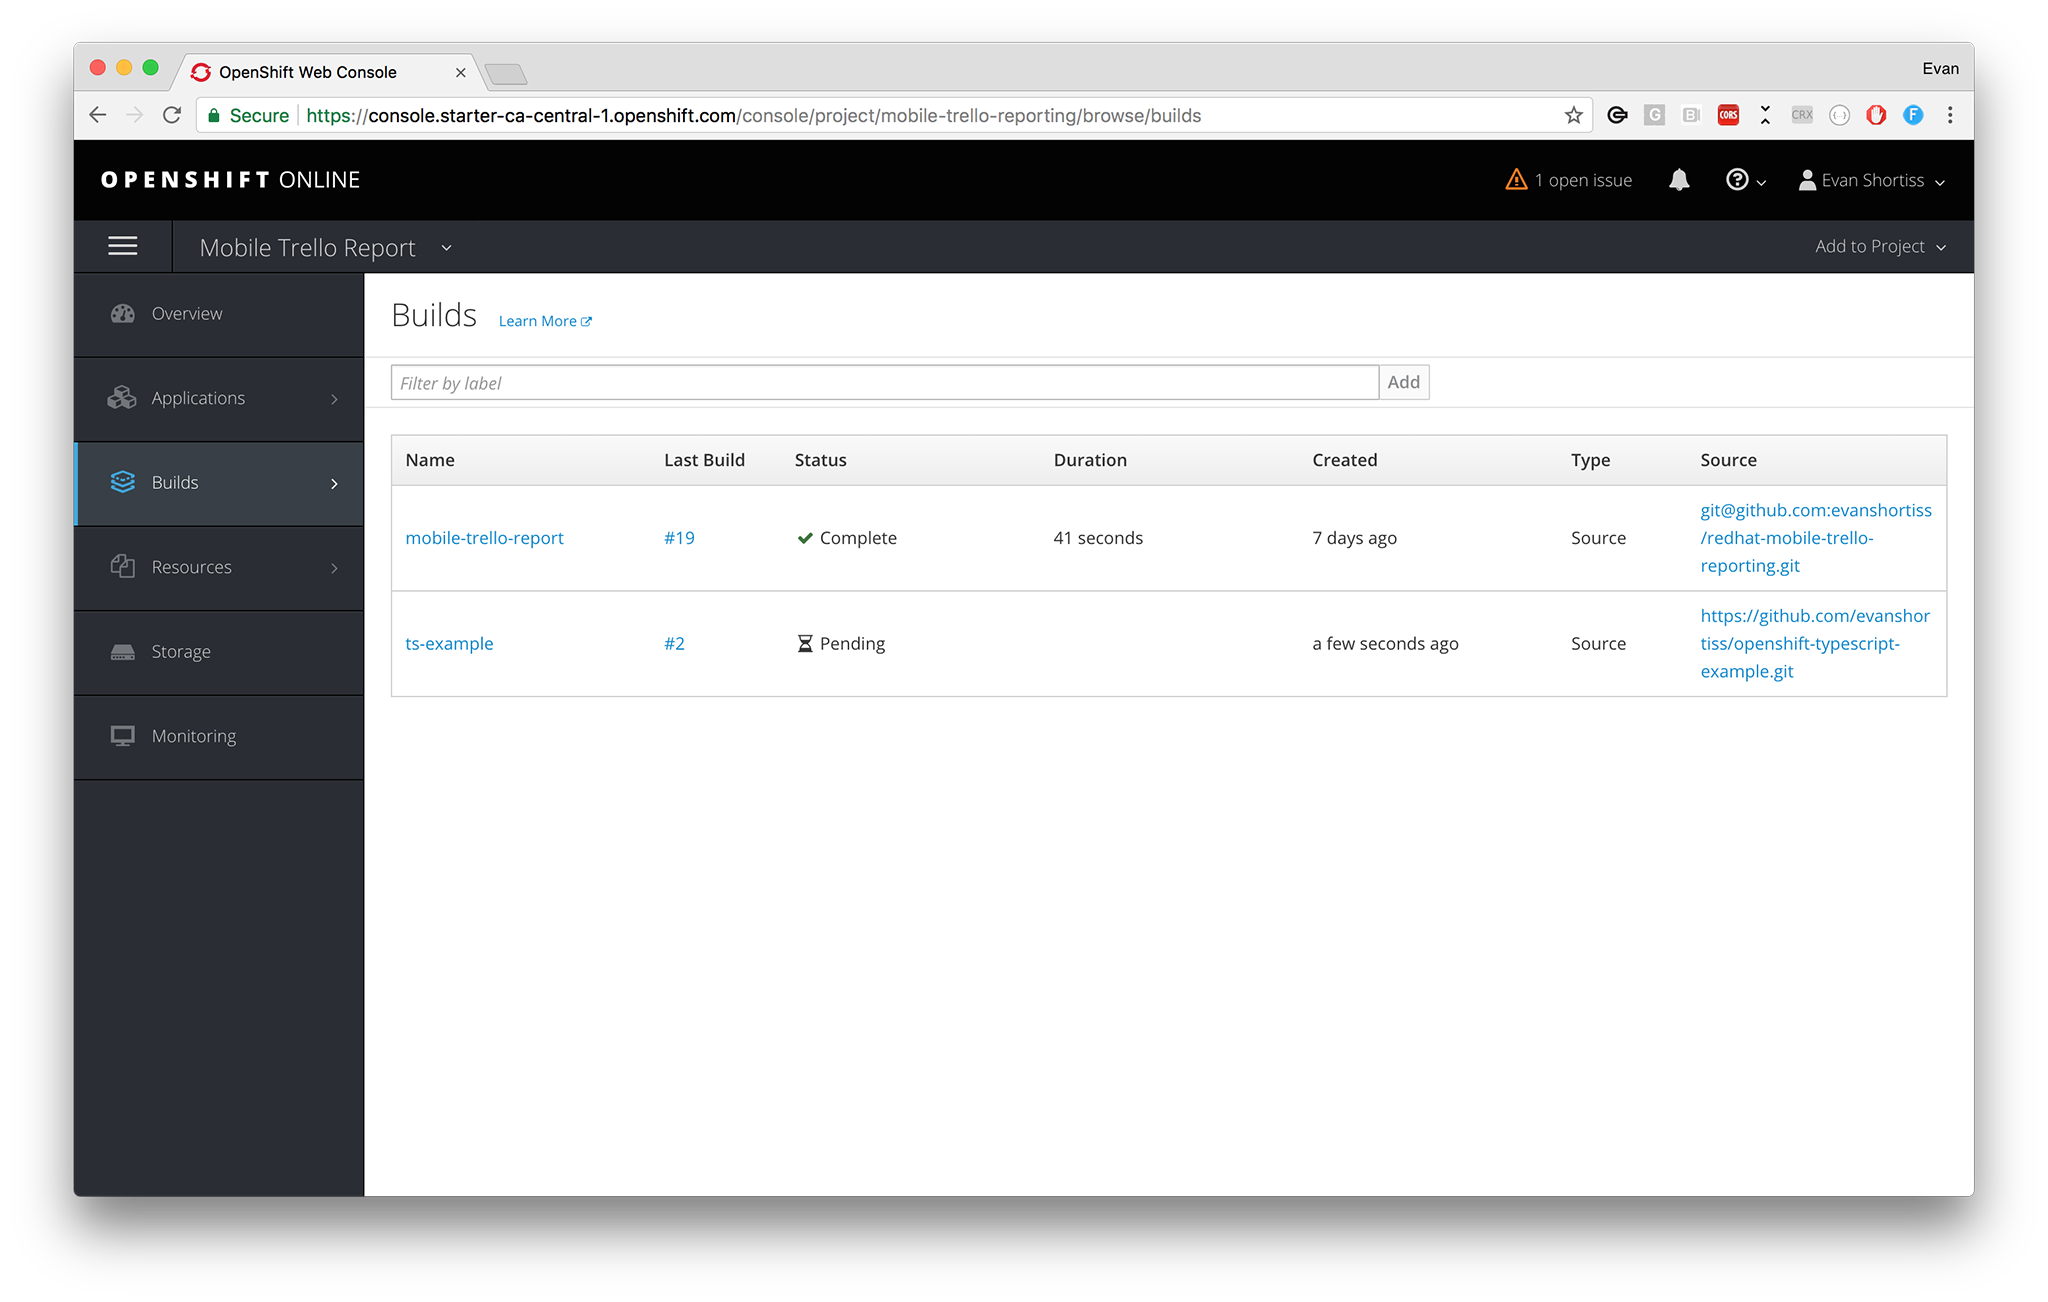
When you click the build number you can view the build information. You can see that the screen shot below states that my build was triggered by a webhook. It also shows the commit message and hash.
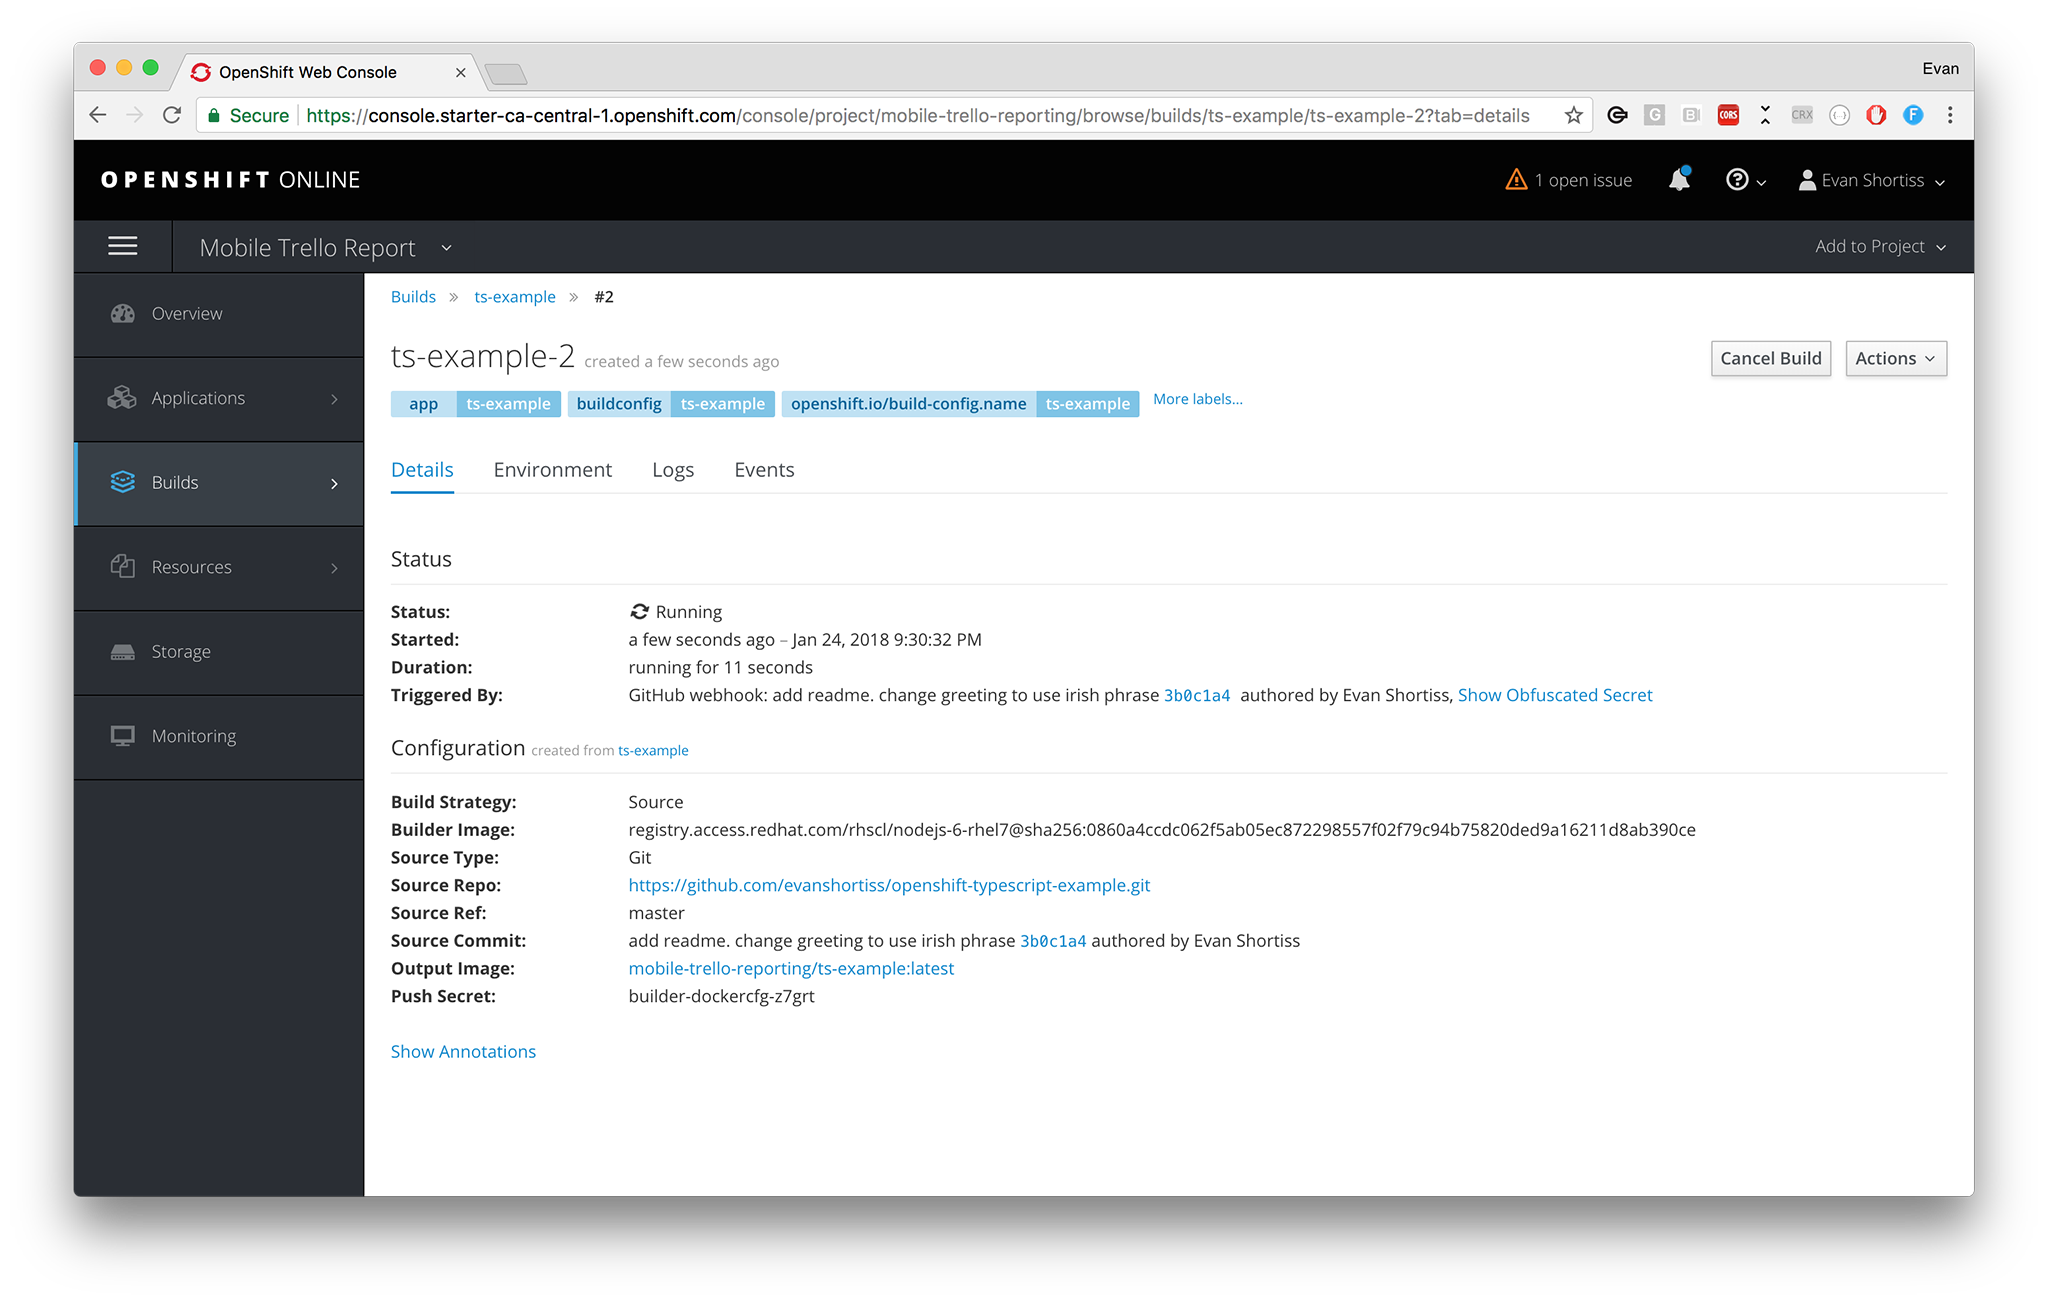
After the build completes the resulting image is pushed to our Image Stream and a rolling deployment takes place. Once it completes our application will respond using the updated greeting.
Fin
That’s it. Now you’re ready to become an OpenShift ninja. Here are some ideas for next steps:
- Determine how you might enable HTTPS for your application. Hint, check the Routes entry.
- Install the OpenShift CLI
- Spin up your own local cluster via
oc cluster up - Use
oc rshto open a remote shell to the Pod your application is running on.
- Spin up your own local cluster via